
Craft Caches: More Creativity and Longevity in Geocaching
TL;DR:
- DIY caches offer customizability, surprise, and extended durability.
- Weather-resistant materials like PETG or ASA increase lifespan in outdoor use.
- Start simply, test thoroughly, and perform regular maintenance to create long-lasting caches.
Over 35% of geocachers already use homemade or 3D-printed components for their caches. No wonder: once you've found a truly clever, handcrafted cache, the next PETling tends to be rather boring. Standard containers serve their purpose, but they offer little surprise, little character, and often little durability. DIY caches are different. They bring a breath of fresh air to the game, demand creative thinking, and make hiding just as exciting as finding. In this article, we'll show why more and more geocachers are opting for DIY and how you can successfully implement your first DIY cache.
Table of Contents
- More Creativity and Individuality in Geocaching Through DIY Caches
- Durability and Camouflage: The Advantages of Homemade Cache Containers
- Practice: Construction, Mechanics, and Maintenance of DIY Caches
- Community Tips and Common Pitfalls with DIY Caches
- Why Most DIY Caches Fail – And How to Develop Truly Durable Solutions
- Discover More DIY Fun and Custom Solutions at CacheWerk
- Frequently Asked Questions About DIY Caches
Key Takeaways
| Point | Details |
|---|---|
| Creative Geocaching Fun | DIY caches introduce individual puzzles and exciting hiding spots. |
| Use Durable Materials | With PETG, ASA, or wood and clever construction, caches remain functional long-term. |
| Build Efficiently and Affordably | DIY saves money and allows for tailored solutions for any terrain. |
| Avoid Mistakes | Keeping an eye on overcomplexity and maintenance ensures long-term success. |
More Creativity and Individuality in Geocaching Through DIY Caches
Anyone who regularly places caches knows the feeling: you grab the tried-and-true film canister hide, stick a logbook in, and hide it somewhere. Done. It works, of course. But exciting? Not really. This is exactly where DIY caches come into play.
Creative cache designs stand out significantly from standard containers and offer finders a real experience. Instead of a simple can, they might discover a deceptively real-looking stone, a disguised screw, or a magnet behind a street sign. These are moments that geocachers share on platforms, recommend, and reward with favorite points.
The advantages of DIY caches at a glance:
- Individual Design: Each cache is unique, reflecting your style.
- Higher Fun Factor: Finders are surprised, leading to more favorite points.
- Exciting Puzzles: Mechanical elements or hidden openings make finding an experience.
- Learning Effect: You develop crafting skills and an eye for good hiding spots.
- Community Value: Unique caches strengthen the local geocaching community.
Inspiration is everywhere. Look at the caches with the most favorite points in your area. Browse YouTube for crafting tutorials. Or visit specialized shops that offer ready-made ideas and materials. Geocaching creativity makes the hobby more exciting and brings fresh energy to the community.
Currently very popular are nano-caches from 3D printers, magnetic hides for urban environments, and thematically designed containers that match the location. A pirate treasure cache on the riverbank simply looks more authentic than a green film canister.
Those who want to experiment with urban cache ideas will find many practical suggestions for getting started there.
Pro Tip: Start with a simple model, for example, a magnetic hide or a small 3D-printed container. Too much ambition on the first project quickly leads to frustration. Start small, gain experience, then escalate.
Durability and Camouflage: The Advantages of Homemade Cache Containers
A DIY cache must not only be creative. It must also function. For months, sometimes years. Rain, frost, heat, and curious muggles (non-geocachers who know nothing about caches) are the biggest enemies of any hide.
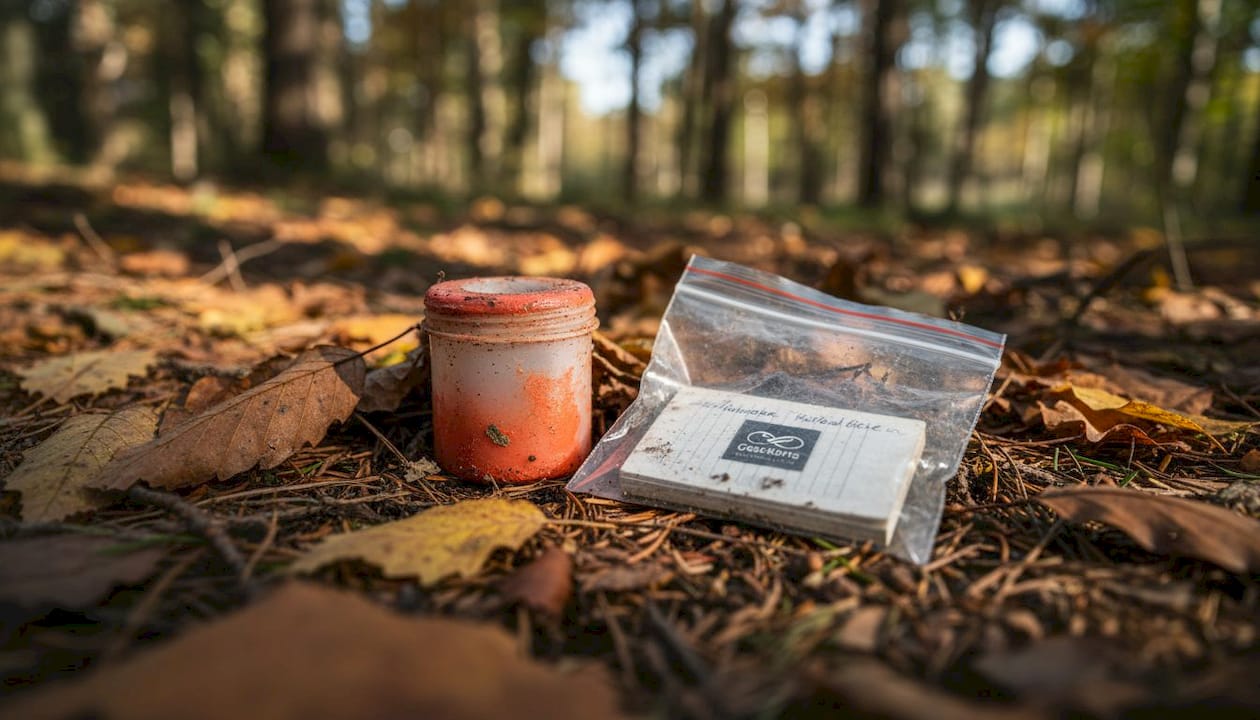
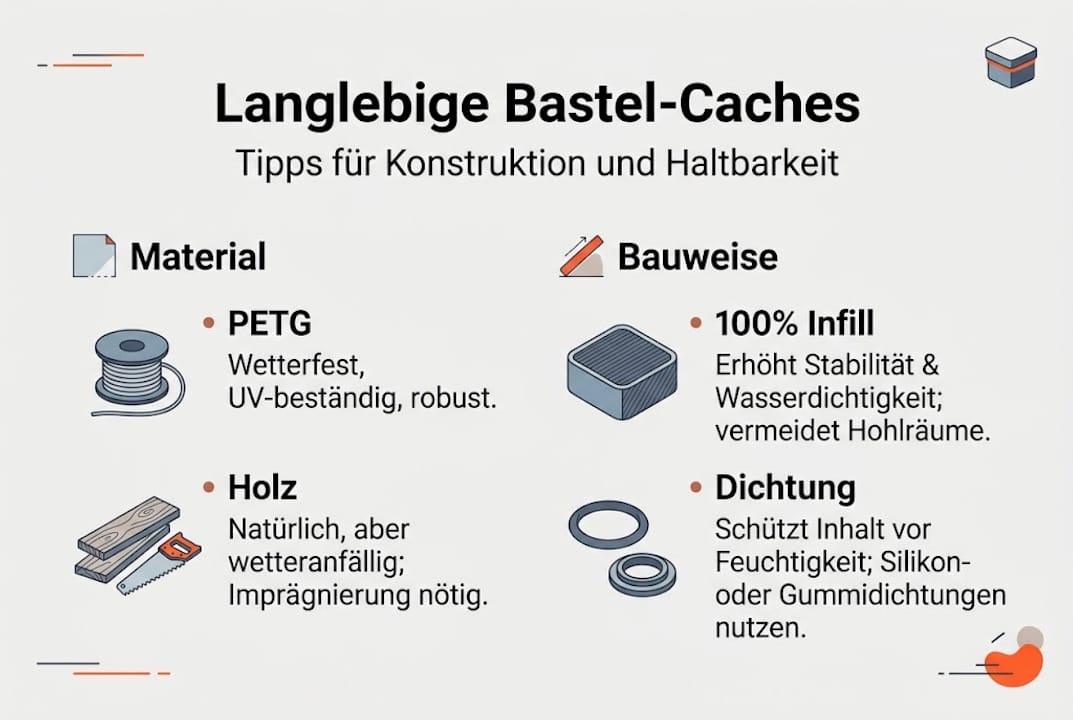
The difference is immediately noticeable in the choice of material. Perfect camouflage is achieved by adapting the shape and color to the environment. A cache made of gray PETG that looks like a concrete block won't be noticed. A film canister in signal yellow is more likely to be.
| Material | Durability | Camouflage | Cost | Processing |
|---|---|---|---|---|
| PETG (3D printing) | Very high | Very good | Low | Medium |
| ASA (3D printing) | Very high | Very good | Medium | Medium |
| Wood | High | Good | Low | Easy |
| Film canister | Medium | Poor | Very low | None |
| PETling | Medium | Poor | Very low | None |
Building a micro-cache yourself costs, according to experience, only 0.15 to 0.50 Euros per piece. That's a fraction of what you pay for ready-made brand containers. For larger quantities, this quickly pays off.
The most important material advantages at a glance:
- PETG: UV-resistant, food-safe, flexible enough for threads, ideal for outdoor use.
- ASA: Even more weather-resistant than PETG, especially for sunny locations.
- Wood: Natural look, easy to work with, good for rural environments.
- Magnets: Perfect for urban hides on metal surfaces, easy to attach.
Another advantage: homemade containers can be precisely adapted to the location. You can freely choose color, shape, and size. A round cache that looks like a branch knob disappears in the forest. A flat magnetic cache on a lamppost goes unnoticed even by attentive passers-by.
Weather resistance largely depends on the construction. For 3D printing: more infill (fill density inside the printed object) means more stability and less water absorption. For outdoor caches, at least 40% is recommended, for particularly exposed locations even 100% infill.
Practice: Construction, Mechanics, and Maintenance of DIY Caches
Now it gets concrete. How do you build a DIY cache that really works and lasts?
- Select materials: Choose PETG or wood as the base. Get suitable magnets, screws, and a waterproof logbook.
- Plan design: Roughly sketch the cache. Where should the logbook go? How does the container open? What camouflage suits the location?
- Build or print: Simple models can be assembled in about 15 minutes. With 3D printing, the printing takes longer, but preparation is minimal.
- Assemble: Carefully apply glue, magnets, and threads. Always recut threads to ensure they close cleanly.
- Water test: Place the finished cache in water for 24 hours. If the inside remains dry, it's ready for use.
- Place and maintain: Hide the cache, check coordinates, regularly inspect.
“A cache that fails after the first rain harms the entire community. It's better to test once more than once too little.”
Typical errors and their solutions:
| Problem | Cause | Solution |
|---|---|---|
| Water in container | Too little infill | 100% infill, check seal |
| Thread jams | Inaccurate print | Recut or sand thread |
| Cache falls off | Weak magnet | Use stronger magnet |
| Container yellows | Wrong material | Use ASA instead of PLA |
For 3D printing: non-waterproof caches almost always result from too little infill or missing top layers. The solution is simple: set infill to 100% and print at least 4 top layers.
Pro Tip: Use simple construction methods for your first projects. A magnetic nano-cache can be finished in an hour and works reliably. Complex mechanisms sound tempting but often fail in practice.
Maintenance is just as important as construction. Check your cache every few months. Inspect the logbook for moisture, test the mechanics, and replace worn parts in time.
Community Tips and Common Pitfalls with DIY Caches
The Geocaching community is one of the most helpful sources for ideas and experience. Listening to others saves many detours.
Proven practical tips:
- Inspiration from favorite points: Caches with many favorite points show what really excites finders. Analyze these hides and adopt the best ideas.
- Location before container: The cache's location is more important than the container itself. A great spot with a simple hide beats an elaborate cache in a boring location.
- Carefully design the listing: Describe the cache honestly. Provide hints about the size and type of container so finders know what to expect.
- Use reviewer notes: For unusual containers or mechanisms, a brief explanation for the reviewer helps. This significantly speeds up approval.
- Geocaching stickers: Stickers for containers make the cache officially recognizable and increase acceptance among finders.
Listing hints and correct size indications significantly increase the chance of smooth approval. If you use an unusual container, you should set the size to "Other" and briefly explain why to the reviewer.
A common mistake: too much ambition on the first project. Many failures result from overly complex constructions that don't work in practice. The community clearly advises: simplicity wins.
Those looking for community tips for cache construction will find many practical advice directly from the geocaching scene.
Pro Tip: In the reviewer note, write what material you used and how the container is opened. This saves follow-up questions and speeds up the publication of your cache.
Why Most DIY Caches Fail – And How to Develop Truly Durable Solutions
We see it again and again: someone has a great idea, invests hours in construction, and is thrilled with the finished cache. Three months later, the logbook is wet, the mechanism is stuck, and the cache is archived. What went wrong?
The problem is rarely creativity. It's the lack of planning for everyday use. A cache must withstand rain, frost, and careless finders. Anyone who doesn't consider this during construction is building for nothing.
Many failures arise from overambition, and the community agrees: simple solutions work more reliably. Our recommendation is clear: start with a proven material, test thoroughly, and only increase complexity once you've gained experience. Individuality comes with time. Durability comes from the start if you choose the right materials and maintain your cache regularly.
Discover More DIY Fun and Custom Solutions at CacheWerk
Are you ready to build your first DIY cache or upgrade your existing hide? Then CacheWerk is the right place for you.
At CacheWerk, you'll find everything you need for creative and durable caches: from high-quality materials to ready-made hiding solutions and useful accessories for DIY enthusiasts. Browse our Geocaching equipment and accessories and get inspired by our selection. Whether you're planning a simple nano-cache or a sophisticated mechanical hide: we have the products and ideas to make your project a success. Also, check out our blog for more instructions and tips.
Frequently Asked Questions About DIY Caches
How can I make a DIY cache weather-resistant?
Use PETG or ASA as material and print with 100% infill and at least 4 top layers. A 24-hour water test before hiding will show you if the container is truly waterproof.
What materials are suitable for a particularly durable DIY cache?
PETG, ASA, wood, and magnets are the most proven materials for reliable outdoor caches. PETG and ASA offer the best combination of weather resistance and ease of processing.
How much does it cost to build a micro-cache yourself?
DIY is surprisingly affordable: 0.15 to 0.50 Euros per micro-cache is realistic if you use filament or inexpensive basic materials. This is significantly less than what finished products cost.
What are common mistakes when building DIY caches?
Overly complex constructions, imprecise threads, and lack of maintenance are the most common problems. The community clearly recommends starting with simple models and gradually increasing complexity.