
Finding a Geocache: A Step-by-Step Workflow for Everyone
TL;DR:
- A systematic workflow significantly optimizes the search for geocaches.
- Preparation includes an account, equipment, and correctly assessing cache difficulty.
- Creative hiding spots and accurate ratings promote lasting enjoyment in the community.
You're standing in the middle of the park, GPS showing zero meters, but the cache remains invisible. Frustrating. The problem is rarely with the cache itself, but with the lack of a system behind it. Geocaching statistics show that a search takes an average of 45 minutes, but many geocachers search significantly longer because they proceed without a clear process. A well-thought-out workflow changes this fundamentally. From proper preparation to systematic search techniques and assessing difficulty levels, this article shows you how to find every cache more efficiently, whether in the city or the forest.
Table of Contents
- Preparation: Account, Equipment, and Cache Selection
- The Systematic On-Site Search Process
- Rating and Challenges: D/T Scale and Edge Cases
- Innovative Hiding Techniques: Urban vs. Rural
- My Own Perspective: Quality, Creativity, and Community as Success Factors
- Next Step: Equipment and Special Hides for Your Adventure
- Frequently Asked Questions about the Geocache Finding Workflow
Key Insights
| Point | Details |
|---|---|
| Workflow improves success | With systematic preparation and a targeted approach, the success rate of geocaching increases significantly. |
| Understand D/T rating | Correctly using the difficulty and terrain scale prevents frustration and saves time. |
| Creative hiding spots ensure adventure | Creative containers and camouflage techniques provide more enjoyment and reduce the risk from muggles. |
| Quality over quantity | The community spirit and innovative solutions bring lasting success and motivation. |
Preparation: Account, Equipment, and Cache Selection
Without preparation, there's no success. This applies to geocaching just as much as to any other outdoor activity. The workflow starts with registering on a geocaching platform, installing the app, and selecting caches. Skipping this step will cost valuable time later.
First, you need an account on a platform like Geocaching.com or opencaching.de. Download the corresponding app and set up your profile. Then, it's straight to cache selection. Here, understanding the D/T rating helps, as the scale immediately shows you how challenging a cache really is.
Recommended basic equipment for various terrains:
- Smartphone with geocaching app and charged battery
- Gloves for rural and urban environments
- Pen for signing the logbook
- Small trade items for traditional caches
- Flashlight for hiding spots in cracks or dark corners
- Weatherproof clothing depending on the terrain rating
After equipping yourself, it's time for the GPS signal. Wait at least 60 seconds until the device or smartphone has found a stable position. An inaccurate signal leads directly in the wrong direction. Patience pays off immediately here.
| Difficulty | Meaning | Recommended for |
|---|---|---|
| D1 / T1 | Very easy, no climbing | Beginners, families |
| D2 / T2 | Easy, small obstacles | Casual geocachers |
| D3 / T3 | Medium, thinking required | Experienced geocachers |
| D4 / T4 | Hard, specialized equipment | Advanced |
| D5 / T5 | Extreme, climbing or diving | Professionals |
The complete geocaching guide recommends beginners start with traditional caches of category D1 to D2 and T1 to T2. This way, you learn the basic mechanics without immediately overwhelming yourself.
Pro Tip: Always start with caches rated D1 to D2 and T1 to T2. This way, you quickly gain a sense of accomplishment and simultaneously learn how hides are typically constructed. This makes later, more difficult caches significantly easier.
The Systematic On-Site Search Process
Once the equipment is set, the actual on-site search begins. Many geocachers make the mistake of searching wildly as soon as the GPS is close enough. A clear process that guides you step-by-step to your goal is better.
Systematic searching means first observing the surroundings, identifying typical hiding spots, and then proceeding in a targeted manner. This saves time and nerves.
Step-by-step search on site:
- Secure the area: Are there muggles (non-geocachers) nearby? Wait until the coast is clear.
- Check GPS radius: Stand in the center of the indicated area and calmly look around.
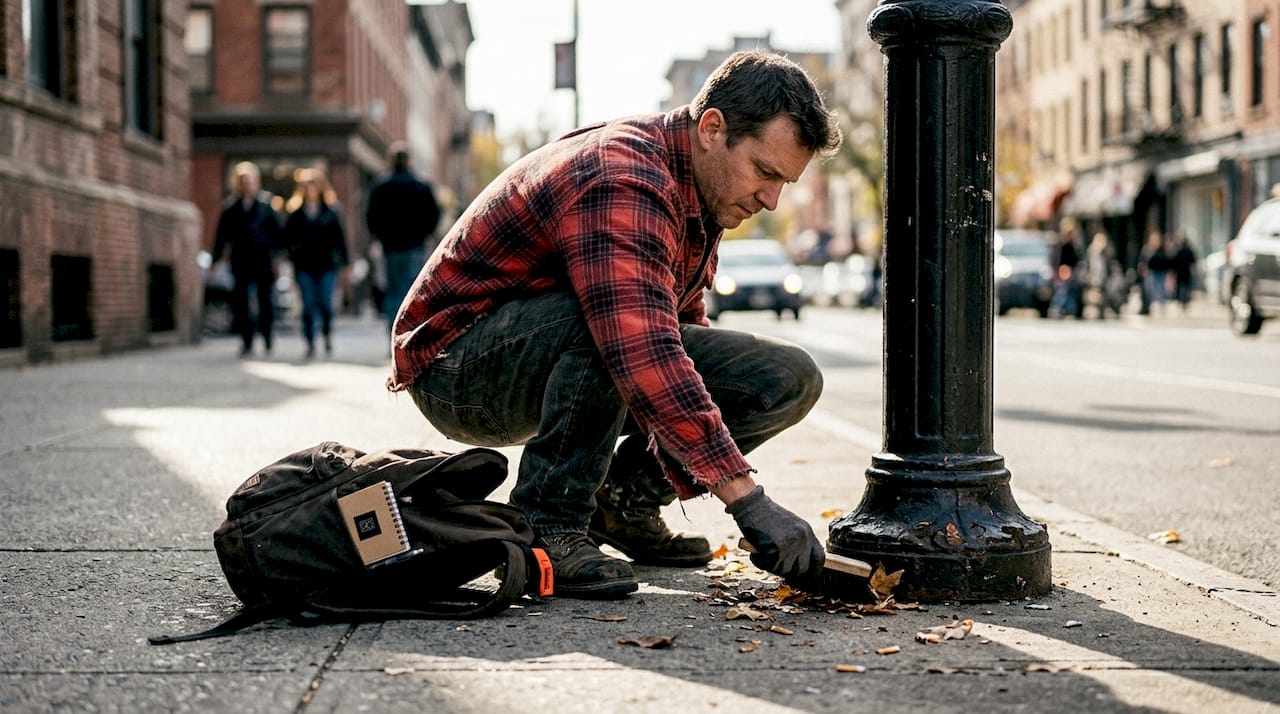
- Check typical spots: Tree stumps, lamppost bases, wall crevices, loose stones, and signs.
- Use clues: Reread the cache description and look at community photos.
- Work systematically: Search from the outside in, not randomly back and forth.
- Be patient: Don't give up after five minutes. Many finds happen only after a second look.
"Germany has the highest cache density worldwide with around 1.2 caches per square kilometer. This means: Almost everywhere in Germany, a cache is hidden within easy reach." Source: Geocache Statistics
The community is a huge resource. Many geocachers upload photos of the surroundings without showing the cache itself. These pictures often provide crucial clues to the exact location. Also, use other geocachers' logs. Comments like "look more closely" or "not too high" are valuable tips.
The detailed cache rating also helps you assess how elaborate the search will really be. A D3 cache requires real thought, not blind searching.
Pro Tip: In urban areas, many caches are magnetically attached to metal structures. Slowly run your hand along lampposts, railings, and signs. You'll be surprised how often you find a nano-cache this way.
Rating and Challenges: D/T Scale and Edge Cases
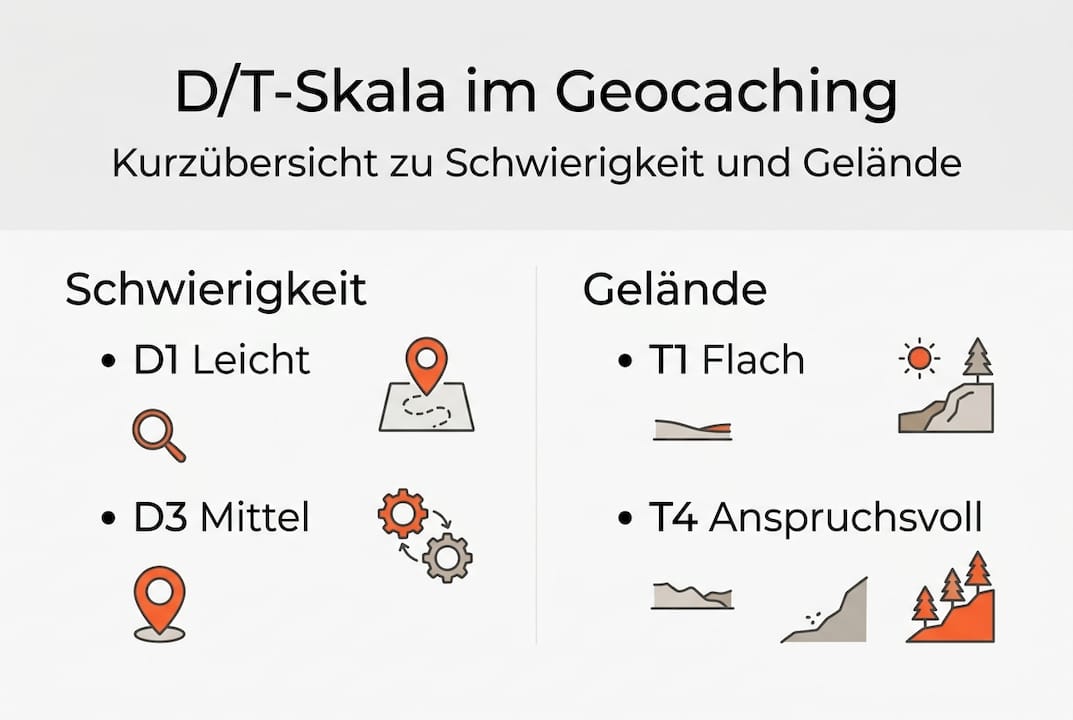
Assessing the difficulty significantly influences the search strategy. Those who correctly read the D/T scale save themselves a lot of frustration and prepare more effectively.
D stands for Difficulty, meaning the mental challenge of finding the cache. T stands for Terrain, meaning the physical demands of the path to it. The scale ranges from 1 to 5, where T1 means wheelchair accessible and urban caches are often underestimated.
| Terrain | Description | Typical Edge Case |
|---|---|---|
| T1 | Flat, paved path | Wheelchair accessible |
| T1.5 | Slight incline, grass | Often incorrectly rated as T1 |
| T2 | Unpaved path, steps | City park with stairs |
| T3 | Steep terrain, climbing | Rocks without securing |
Common mistakes in D/T rating:
- Underestimating terrain because the path seems short
- Underestimating difficulty for multi-caches with many stages
- Ignoring edge cases: A T1 cache on a slope is not a T1
- Not considering seasonal changes (snow, floods)
- Estimating urban caches as easy, even though muggle risk is high
A common problem are T1 caches that are not actually T1. The cache owner misjudged the terrain, and you suddenly find yourself facing a slope instead of a sidewalk. Therefore, always read the current logs before you set off.
Properly using the D/T scale also means rating your own caches fairly. Too low ratings frustrate other geocachers, too high ones deter beginners.
Pro Tip: When creating your own caches, rate them half a point higher rather than too low. This protects inexperienced geocachers from nasty surprises and ensures better ratings in the logs.
Innovative Hiding Techniques: Urban vs. Rural
Depending on the environment, different tricks and materials are required. What works in the city immediately stands out in the forest. And vice versa.
Techniques for urban hiding spots:
- Magnetic nanos on lampposts, railings, and metal signs
- 3D-printed containers made of PETG for individual shapes and colors
- Camouflage film and tape for inconspicuous surfaces
- Fake screws, fake sockets, or fake road signs as creative containers
- Small magnetic hides under benches or on bridge railings
Techniques for rural hiding spots:
- Natural camouflage with leaves, moss, and stones
- Weatherproof containers made of plastic or metal with a sealing ring
- Wood-look boxes that blend perfectly into tree stumps
- Ground hides with waterproof bags as additional security
- Camouflage nets for larger containers in bushes
Statistic: Worldwide, there are currently around 4.5 million active caches and over 3.5 million registered geocachers. The demand for creative hiding spots is continuously growing.
For urban caches, also keep safety distances from schools and playgrounds. This is not just a recommendation, but a requirement according to geocaching guidelines. After placing, wait a few weeks and check the cache for damage or moisture.
Pro Tip: For urban hiding spots, use only robust containers that can withstand rain, heat, and cold. Cheap cans rust or deform quickly, making the cache unusable for other geocachers. PETG plastic is the first choice here.
The rating of urban and rural caches also differs greatly. A magnetic nano in the city center can have a high difficulty despite T1, because muggles are constantly nearby.
My Own Perspective: Quality, Creativity, and Community as Success Factors
After years in the geocaching community, one thing is clear to us: the number of caches found says little about the fun. Someone who completes 500 caches in a week often has less enjoyment than someone who searches for and finds 10 truly creative hides.
"The community fosters innovative solutions and fair ratings. Those who actively give and receive feedback improve the experience for everyone."
Active geocachers are decreasing, while the number of caches continues to rise. This shows: quality over quantity is becoming increasingly important. A poorly placed, wet cache with an incorrect rating frustrates more than it excites.
What really motivates:
- Creative hiding spots that surprise and make you think
- Exchanging techniques and ideas with other geocachers
- Teamwork on difficult multi-caches
- Honest feedback in logs that helps cache owners
Realistic rating as a community factor is not a minor detail. Incorrect D/T information can be dangerous in the worst case, for example, if someone with limited mobility heads for a supposed T1 cache that is actually a T3. Fairness and accuracy protect the entire community.
Next Step: Equipment and Special Hides for Your Adventure
If you want to further optimize your workflow, CacheWerk offers practical solutions for every situation.
From camouflage mushrooms to fake road signs and weatherproof PETG containers, CacheWerk offers everything you need for creative and durable hides. Check out the equipment and accessories and gear up for your next adventure. If you're looking for special challenges, you'll find what you need in the special hides. Premium equipment makes the difference between a cache that breaks after a week and one that lasts for years and delights geocachers.
Frequently Asked Questions about the Geocache Finding Workflow
How do I choose a suitable geocache for beginners?
Easy caches with D1 to D2 and T1 to T2 are ideal for starting. Also, pay attention to the description and available clues that facilitate access.
What does the D/T rating mean in geocaching?
D stands for mental difficulty, T for physical demands of the terrain. Both values range from 1 to 5, with T1 meaning wheelchair accessible and T5 requiring extreme physical fitness.
How do I recognize typical hiding spots in an urban environment?
In the city, caches are often hidden as magnetic nanos, 3D containers, or camouflage packaging on metal structures. Robust materials protect the contents from weather influences.
What should be considered when logging and replacing the cache?
Log the cache, trade if desired, and replace the container exactly as found. Then, carefully camouflage it so the next geocacher has the same joy.