
Building a PETG Cache: The Guide to Weatherproof Hides
PETG is the best choice for most outdoor geocaches. The material easily withstands rain, frost, and mechanical stress, can be processed on any standard FDM printer without an enclosure, and costs significantly less than finished special containers. For this PETG Cache Building Guide, the following applies: nozzle temperature 235–245 °C, bed temperature 70–80 °C, wall thickness at least 2 mm. Anyone who knows these three values and keeps the filament dry will print a cache that will last for years outdoors.
Three things determine success or failure:
- Dry filament before printing (moist PETG shows stringing and bubbles)
- Dense wall structure with at least 5 top/bottom layers and ≥ 30% infill
- 24-hour water test before deployment, no compromise
Pro Tip: ASA is only useful if the cache is permanently exposed to direct sunlight, for example, on a south-facing post without shade. For everything else, PETG is perfectly sufficient, and you save yourself the enclosure.
Table of Contents
- What do you need for your PETG cache?
- Why is PETG so well suited for geocaches?
- Which print settings do you need for a weatherproof PETG cache?
- Which dimensions and designs fit which cache type?
- How do you properly assemble and seal your cache?
- How do you recognize moist PETG and dry it correctly?
- What to do if the print doesn't work?
- What do you need to consider before deploying in Germany?
- How does the 24-hour water test work?
- Important Findings
- What I learned after printing many caches
- Finished products from the Cachewerk shop
- Useful sources and further links
What do you need for your PETG cache?
Before the printer starts, a quick material check is worthwhile. Nothing is more annoying than a half-finished print because the O-ring is missing.
Materials:
- PETG filament, 1.75 mm, preferably in a dark or UV-absorbing color (black, dark green)
- O-rings suitable for the groove (common sizes for micro and nano lids)
- Neodymium magnets in standard sizes for magnetic closures
- Two-component epoxy resin or clear acrylic lacquer
- Silicone adhesive or silicone sealant (transparent)
- Weatherproof logbook or paper strips in a foil cover
- Label with contact details and "Geocache" notice
Tools:
- Thread cutter (matching the selected thread diameter, e.g., M30 or M40)
- Dremel or key file for finishing grooves and threads
- Hex key set
- Kitchen thermometer or oven thermometer for the filament dryer
Pro Tip: Always buy O-rings in small assortment boxes. You will try different sizes before the fit is right.
| Cache Type | PETG Consumption | Estimated Print Time |
|---|---|---|
| Nano | 3–5 g | 20–40 min |
| Micro | 8–12 g | 1–2 h |
| Small | 40–60 g | 4–8 h |
| Puzzle container (complex) | 60–100 g | 6–12 h |
Why is PETG so well suited for geocaches?
PETG outperforms PLA in almost every outdoor scenario. PETG is significantly more robust against moisture and mechanical stress than PLA; PLA softens with heat and moisture and is only suitable for indoor caches or short-term test setups. A PLA cache lying on a dark stone in summer can deform within a few weeks.
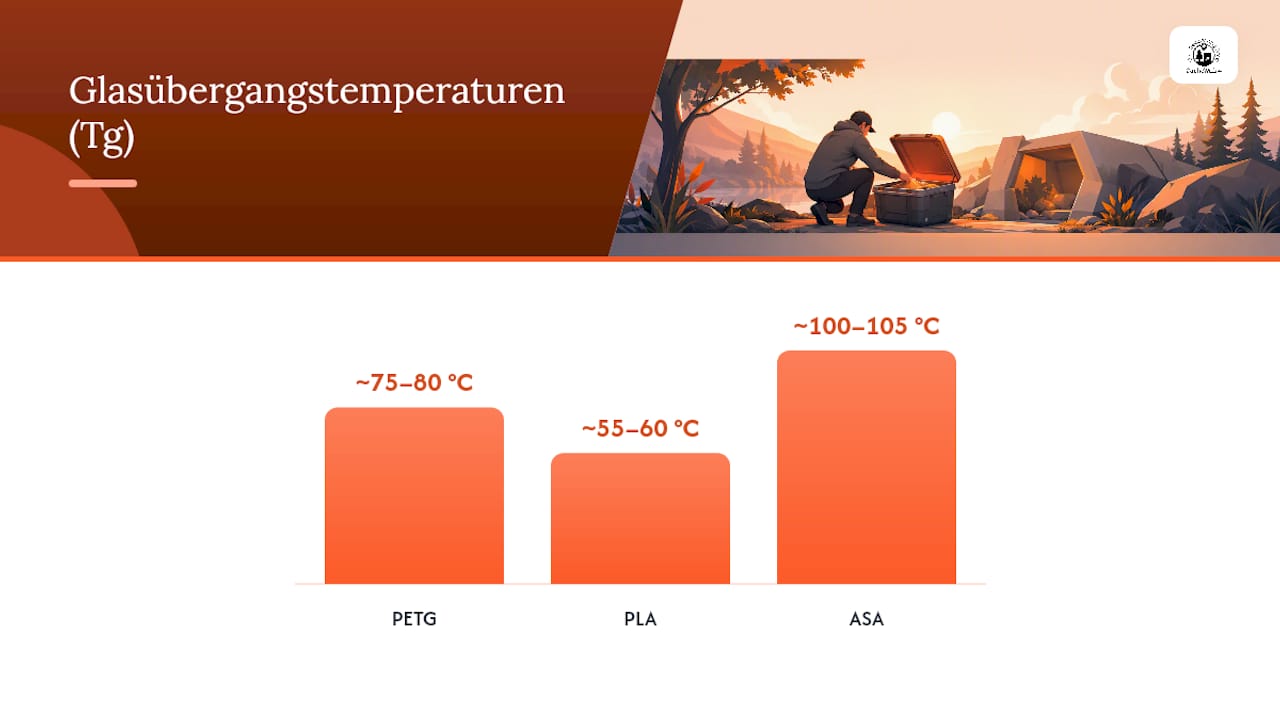
PETG has a glass transition temperature of about 75–80 °C, which is more than sufficient for shady to semi-shady locations. Direct, continuous sunlight exposure on dark surfaces can theoretically approach this limit in midsummer. For such extreme locations, ASA is the more long-term stable choice with a glass transition temperature of around 100–105 °C and better UV stability. The catch: ASA requires a closed printer enclosure and extraction due to styrene emissions.
For beginners and most standard hiding places, PETG is the pragmatic choice. No enclosure needed, no special tools, good availability in Germany.
| Feature | PETG | PLA | ASA |
|---|---|---|---|
| UV Resistance | Medium | Low | High |
| Moisture Resistance | High | Low | High |
| Glass Transition Temperature | ~75–80 °C | ~55–60 °C | ~100–105 °C |
| Printability (open printer) | Very good | Very good | Limited |
| Enclosure Required | No | No | Yes |
| Recommended Use | Outdoor, shade to semi-shade | Indoor, short-term | Continuous sun, heat |
If you want to learn more about PETG parts in geocaching, Cachewerk offers a detailed practical guide with specific application cases.
Which print settings do you need for a weatherproof PETG cache?
Concrete starting values instead of vague recommendations: This table gives you an immediately usable starting point for your slicer. Fine-tuning is necessary afterwards, but with these values, you'll print a solid first cache.
| Parameter | Starting Value | Note |
|---|---|---|
| Nozzle Temperature | approx. 235 to 245 °C | Varies by filament brand |
| Bed Temperature | between 70 and 80 °C | Suitable for glass plate or PEI sheet |
| Layer Height | approx. 0.2 mm | A smaller layer height may be useful for threads |
| Wall Thickness | at least 2 mm | Possibly thicker for Nano and Micro |
| Infill | at least 30% (100% for Nano/Micro) | Recommended patterns like Gyroid or Grid |
| Top/Bottom Layers | at least 5 layers | Important for watertightness |
| Fan | 30 to 50% | Do not turn off completely |
| Print Speed | 40 to 60 mm/s | Print slower for threads |
| Retraction | between 4 and 6 mm for Bowden, 1 to 2 mm for direct drive | Fine-tuning to avoid stringing |
These starting values and the recommended troubleshooting sequence follow a clear scheme: first check filament condition, then adjust temperature, fine-tune retraction, finally speed and flow.
Improve adhesion to the print bed:
- Textured PEI plate is the most reliable surface for PETG
- Alternatively: thin glue stick (UHU-Stick) as a release agent, so the print can be removed more easily later
- Clean the bed with isopropanol before printing.
- Increase first layer to 0.3 mm and reduce print speed to 20 mm/s
- Brim of 5–8 mm width prevents warping on large components
Pro Tip: Print a flow calibration cube (20 × 20 × 20 mm) with 100% infill and measure the wall thickness with calipers. If it deviates more than 0.1 mm from the target value, adjust the flow factor in the slicer before printing the actual cache.
For a deeper dive into print settings and outdoor suitability, Cachewerk has published its own 3D printing guide for PETG caches.
Which dimensions and designs fit which cache type?
The size of the cache not only determines material consumption but also wall thickness, sealing geometry, and the minimum size of the logbook. Here are tried-and-tested guidelines that can be directly transferred to CAD or slicer.
Nano-Cache (up to approx. 3 cm length):
- Outer diameter: 15–20 mm, length: 20–30 mm
- Wall thickness: 1.5–2 mm, infill: 100%
- Logbook: rolled paper strip, minimum width 5 mm
- O-ring groove: 15 × 1.5 mm (inner Ø × cord thickness), depth 1.2 mm
- Material consumption: 3–5 g, print time: 20–40 min
Micro-Cache (up to approx. 10 cm length):
- Outer diameter: 30–40 mm, length: 60–100 mm
- Wall thickness: 2 mm, infill: 30–50%
- Logbook: paper roll or folded A7 sheet
- O-ring groove: 40 × 3 mm (standard size), depth 2.4 mm, width 3.5 mm
- Material consumption: 8–12 g, print time: 1–2 h
Small-Cache (up to approx. 20 cm length):
- Outer dimensions: variable, typically 100 × 60 × 40 mm
- Wall thickness: 2.5–3 mm, infill: 20–30%
- Logbook: folded A6 or small notebook
- Flat seal or O-ring on the lid edge
- Material consumption: 40–60 g, print time: 4–8 h
| Cache Type | Wall Thickness | Infill | Sealing Type | Minimum Logbook Size |
|---|---|---|---|---|
| Nano | approx. 1.5 to 2 mm | 100% | O-ring or suitable seal | Paper strip not very wide |
| Micro | approx. 2 mm | 30 to 50% | Standard O-ring | A7 or similar |
| Small | 2.5 to 3 mm | 20 to 30% | Flat seal or O-ring | approx. A6 |
| Puzzle container | 2 to 3 mm | approx. 30% | depending on mechanism | at least approx. A7 |
Popular Camouflage Designs:
- Screw/nut camouflage: external thread on the container, matching nut as lid. Tolerance for thread fit: plan for 0.2–0.3 mm clearance.
- PETling variant: cylindrical container with internal thread, compatible with commercially available PETling lids.
- Magnetic holder case: flat container with embedded neodymium magnets (Ø 10 × 3 mm), for metal surfaces.
Pro Tip: Plan thread tolerances generously. PETG shrinks slightly when cooling. A thread that looks perfect in the slicer may be too tight after printing. Start with 0.3 mm clearance and work your way up.
How do you properly assemble and seal your cache?
A well-printed cache is only half finished. The seal determines whether the logbook is still readable after the first rain.
Designing and finishing the O-ring groove
- Design the groove depth to 80% of the O-ring cord thickness (Example: cord thickness 3 mm → groove depth 2.4 mm).
- Groove width: cord thickness + 0.5 mm tolerance (Example: 3 mm cord → 3.5 mm groove width).
- After printing, smooth the groove with a key file or Dremel, remove print residue.
- Insert O-ring dry, screw on lid and check for even compression. The O-ring must not squeeze out.
- For additional security: apply a thin film of silicone to the O-ring before screwing on the lid.
Thread Strategies
- Plan for 0.2–0.3 mm thread clearance in the slicer.
- After printing, recut threads with a suitable tap, especially for fine threads.
- Threadlocker (e.g., Loctite 243, medium strength) only if the lid should remain permanently fixed.
- For removable connections: silicone spray as lubricant instead of threadlocker.
How do you recognize moist PETG and dry it correctly?
PETG is highly hygroscopic. Even a few hours of open storage are enough to noticeably degrade print quality.
Symptoms of moist spools:
- Cracking noises during printing (water evaporates in the nozzle)
- Excessive stringing between structures
- Bubbles or rough surfaces on the print
- Poor layer adhesion, brittle layers
Simple preliminary test: Briefly hold the filament end in the hot nozzle (245 °C). If it hisses or bubbles, the spool is moist.
Drying Step-by-Step
- Place the spool in a filament dryer (e.g., Sunlu S2, Creality Filament Dryer).
- Set temperature to 60 °C, drying time 4–6 hours. For very moist material, 6–8 hours.
- After drying, immediately store in an airtight container with silica gel.
- Only use an oven with an oven thermometer: household ovens often fluctuate ±20 °C, which can damage PETG.
The exact temperature/time matrix for different moisture levels is: slightly moist 55–60 °C for 4–5 h, noticeably moist 60–65 °C for 5–6 h, very moist 60–65 °C for 6–8 h.
Storage:
- Airtight vacuum bags or plastic boxes with sealing rings
- Silica gel packets (200–500 g per box), regenerate regularly at 120 °C in the oven
- Drybox directly on the printer: spool remains dry during printing and is fed directly
What to do if the print doesn't work?
PETG print errors usually follow one of four patterns. The correct order for troubleshooting saves time.
Step 1: Check filament condition (always first). Stringing, bubbles, and rough surfaces often disappear immediately after drying.
Step 2: Adjust temperature. Too low nozzle temperature leads to poor layer adhesion. Too high temperature increases stringing. Adjust in 5-°C increments.
Step 3: Fine-tune retraction. Too much retraction with PETG leads to clogging. Start with 4 mm (Bowden) or 1 mm (direct drive) and increase only if necessary.
Step 4: Speed and flow. Only adjust flow factor and print speed once the first three points are correct.
Common problems and solutions:
- Stringing: Dry filament, increase retraction, lower print temperature by 5 °C, increase print speed
- Poor bed adhesion: Clean bed, apply glue stick, slow down first layer, increase bed temperature to 80 °C
- Thread fit too tight: Increase tolerance in slicer to 0.3–0.4 mm, re-tap thread with tap
- Warping on large parts: Add brim, protect print area from drafts, reduce fan to 20%
- Bubbling: Dry filament (main cause), check print temperature
Print Checklist:
- First layer: even, no gaps or waves
- Layer adhesion: no visible separation lines between layers
- Infill quality: fully filled, no voids
- Thread fit: lid screws on easily but doesn't jam
- O-ring seat: groove clean, O-ring sits evenly
After printing: sand edges (220 grit), deburr threads, press in O-ring, and apply final seal.
What to consider before placing a cache in Germany?
A self-printed cache is only a true geocache if it complies with the rules of the geocaching platform and legal requirements.
Mandatory information and labeling:
- Every cache must have a label with "Geocache" and the owner's contact details
- Logbook must be present and writable (minimum size depends on cache type, but always sufficient for date and nickname)
- No imitations of dangerous objects (weapons, explosive optics, official IDs)
- No anchoring in trees, buildings, or nature reserves without explicit permission
Owner's obligations:
- Keep contact details in the listing up-to-date
- Maintain cache regularly (check at least once per season)
- Camouflage must not damage the environment (no screwing into living trees, no gluing onto monuments)
- Location documentation for the reviewer: photos and precise description of the hiding place
Practical tips before listing:
- Test cache at the planned location for at least 24 hours before submitting the listing
- Verify coordinates with a second GPS device or smartphone
- Include a reviewer note with hints on camouflage and accessibility
How does the 24-hour water test work?
The water test is not an optional step. It is the only reliable method to ensure the cache is waterproof before placement.
Step-by-step test protocol
- Preparation: Insert logbook, close lid tightly, O-ring correctly seated.
- Water bath setup: Submerge container completely in water, at least 10 cm water depth. Place a weight (e.g., a stone) on the cache so it doesn't float.
- Waiting time: 24 hours. Not 2 hours, not overnight. 24 hours.
- Evaluation: Remove cache, dry exterior, open lid. Check logbook and interior for moisture.
Acceptance criteria:
- No water ingress into the interior
- Logbook completely dry
- O-ring seat and threads show no deformation or leakage
If the cache fails the test, locate the cause (usually O-ring seat or thread fit), rework, and retest.
For electronic components, additionally: protect electronics and logbook in an inner PET enclosure, because even successful water tests do not guarantee against condensation due to temperature fluctuations.
Key takeaways
A weatherproof PETG cache can be reliably achieved with three core values: 235–245 °C nozzle temperature, at least 2 mm wall thickness, and a successful 24-hour water test before deployment.
| Topic | Details |
|---|---|
| Material choice | PETG for most locations; ASA only necessary for continuous sun exposure |
| Print settings | 235–245 °C nozzle, 70–80 °C bed, ≥ 2 mm wall thickness, ≥ 5 top/bottom layers |
| Sealing | O-ring groove 40 × 3 mm (Micro), silicone or epoxy as additional sealant |
| Filament care | Dry PETG at about 60 °C for several hours, then store airtight with silica gel |
| Mandatory test | 24-hour water bath with weight, logbook must remain completely dry |
| Cachewerk | Offers pre-made PETlings, post caps, and starter bundles as ready-to-use alternatives |
What I've learned after printing many caches
The biggest surprise when building PETG caches isn't the printing technique. It's the underestimation of moisture and rodent damage. A cache that passes the water test can still fail after a winter if mice discover the logbook as nesting material or if condensation enters due to temperature fluctuations. The solution is simple: an inner protective casing, always.
What has proven successful: Micro caches with screw camouflage and embedded neodymium magnets last the longest. The combination of magnetic closure and O-ring seal is more robust than any thread alone. Threads wear out, magnets don't.
First-time printers should start with a simple cylindrical micro-cache, not a complex puzzle mechanism. The basics of sealing and thread play are best learned on a simple object. Complexity comes later.
And one more thing: Black or dark green PETG resists UV radiation better than light colors. This is not a myth. Dark pigments absorb UV radiation before it damages the polymer. For caches without UV protective varnish, color choice is therefore not a purely aesthetic decision.
Finished products from the Cachewerk shop
For those who don't have a printer or simply want to get started right away, Cachewerk offers ready-made solutions that meet the same quality standards as a well-printed DIY cache.
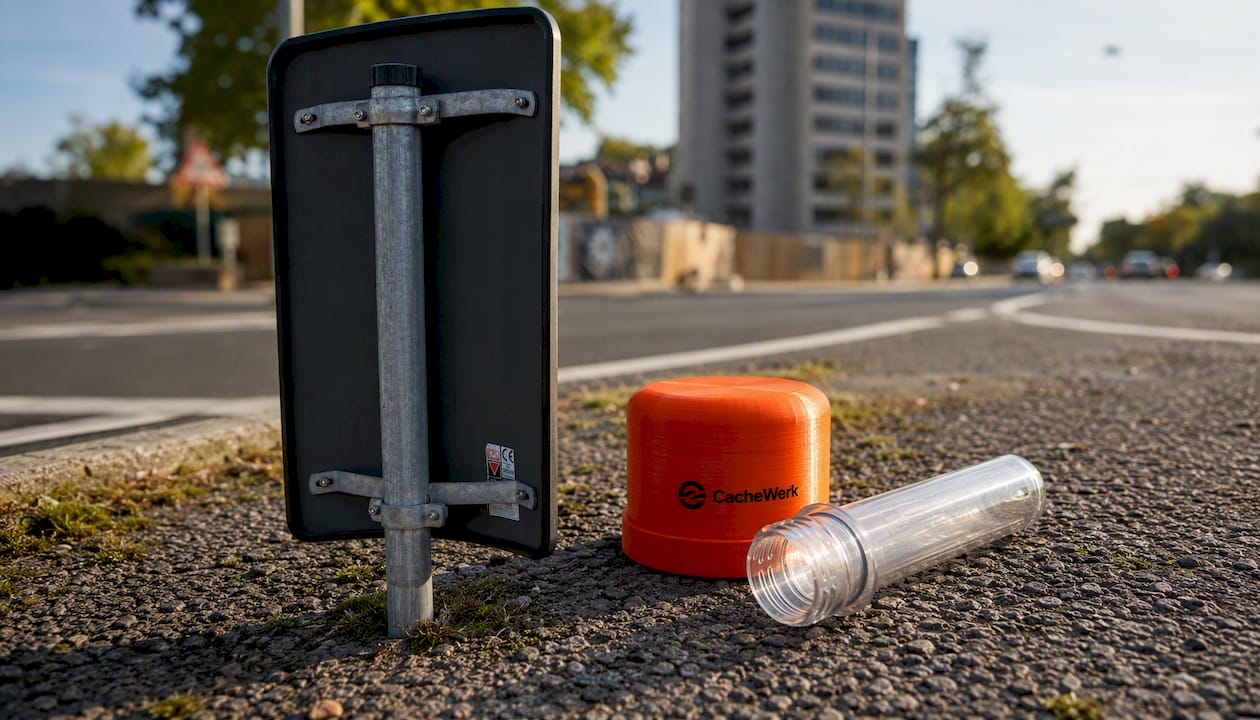
The PETling 12 cm is the classic among geocaching containers: robust, weatherproof, and with enough space for a proper logbook. Ideal for anyone who wants to place a reliable micro-cache without printing effort.
For those who prefer something more inconspicuous: The Geocaching Post Cap 60 mm perfectly camouflages a PETling as an ordinary fence post cap. Weatherproof, inconspicuous, and installed in seconds.
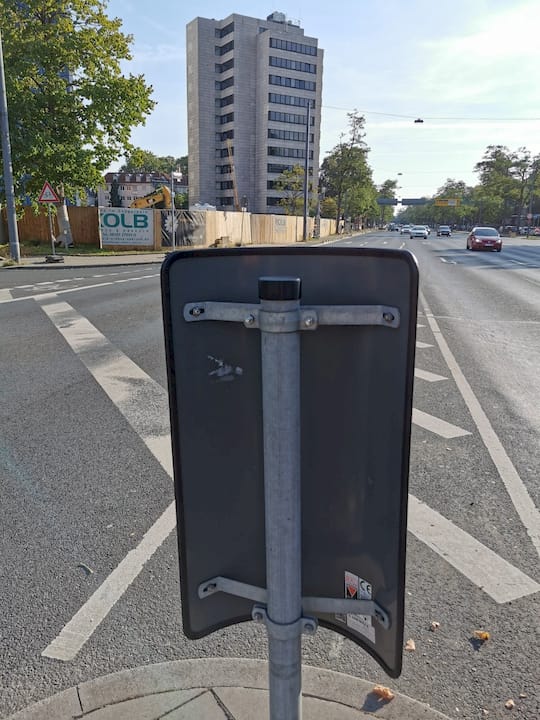
For a complete start, there's the Geocaching Starter-Bundle 2 with PETling, logbook, and hanger. Everything you need for your first cache, in one package. Check out the Cachewerk shop directly and place your next cache this week.
Useful sources and further links
All sources this guide is based on are freely accessible and directly verifiable:
- Geocaching 3D Print Templates (3D Print Archive) — Specific print parameters and material consumption examples for Nano, Micro, and Small caches; good starting point for templates.
- Setting PETG correctly (3D Print Workshop) — Detailed slicer starting values and recommended troubleshooting order; indispensable for debugging.
- Drying PETG (3D Print Workshop) — Temperature/time matrix for different moisture conditions; clarifies common misconceptions about the oven method.
- Drying filament (Filamentcore) — Practical guide to symptoms of damp spools and drying parameters for PETG.
- ASA vs PETG (Qidi3D Print Lab) — Comparison of UV stability and heat deflection temperature; helps with material selection for extreme locations.
- PETG vs ASA (Spoolhound) — Community practical tips on printability, build plate choice, and emissions for ASA.
- PETG vs PLA (All3DP) — Clear comparison of material properties; explains why PLA is unsuitable for outdoor caches.
- DIY Electronic Geocaches with long-lasting battery (heise Ratgeber) — Protection measures against moisture and rodents; relevant for anyone installing electronics or sensitive logbooks.
For an introduction to the Cachewerk world, the internal PETG guide from Cachewerk is also worthwhile as a first in-depth look with product-specific recommendations.