
Using PETG parts in geocaching: Step by step
PETG is the best material for 3D-printed geocache containers because it can withstand temperatures from -20°C to +70°C while also being UV-resistant. By correctly using PETG parts for geocaching, step by step, you'll get containers that survive outdoors for years. In this article, Cachewerk guides you through all phases: from material selection and print settings to waterproof assembly. You'll learn which parameters truly matter, how to avoid common mistakes, and how to seal your cache so that the logbook remains dry even after the third winter.
Using PETG parts for geocaching: Preparation and print settings
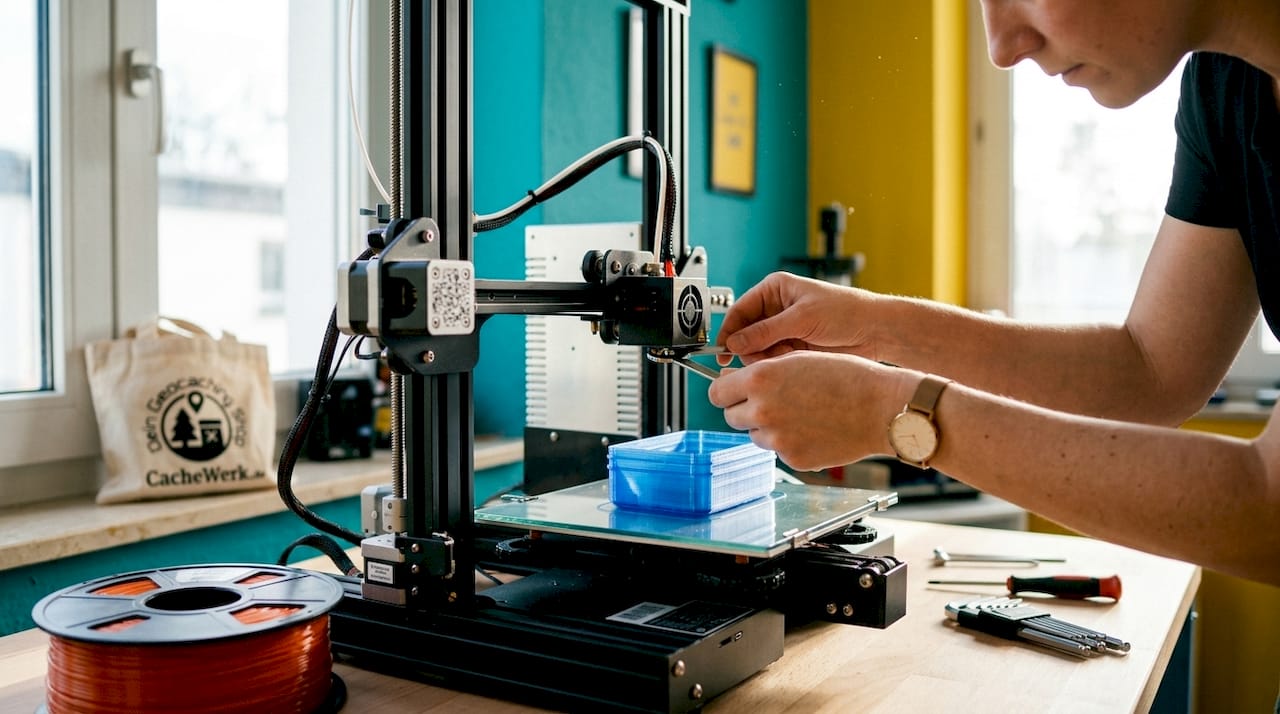
Before the first layer hits the print bed, you need the right equipment. PETG filament, a reliable FDM printer like the Prusa MK4 or the Bambu Lab A1, as well as silicone sealant and O-rings, are essential for any cache builder.
What materials do you need?
The shopping list for a weatherproof cache enclosure is manageable. You'll need PETG filament (1.75 mm, preferably from brands like Prusament, Polymaker, or Sunlu), suitable O-rings in the size of your groove, silicone sealant or UV-resistant epoxy resin, neodymium magnets, and high-quality adhesive like Pattex Repair Extreme. For post-processing, you'll also need sandpaper in grits 120 and 240, and isopropanol for cleaning.
Pro Tip: PETG filament is hygroscopic and absorbs moisture from the air. Dry the filament for 4–6 hours at 60–65°C in a filament dryer like the Sunlu S2 or a regular convection oven before printing. Moist filament causes bubbles, stringing, and weak layer adhesion, which will make your cache leak after a few weeks.
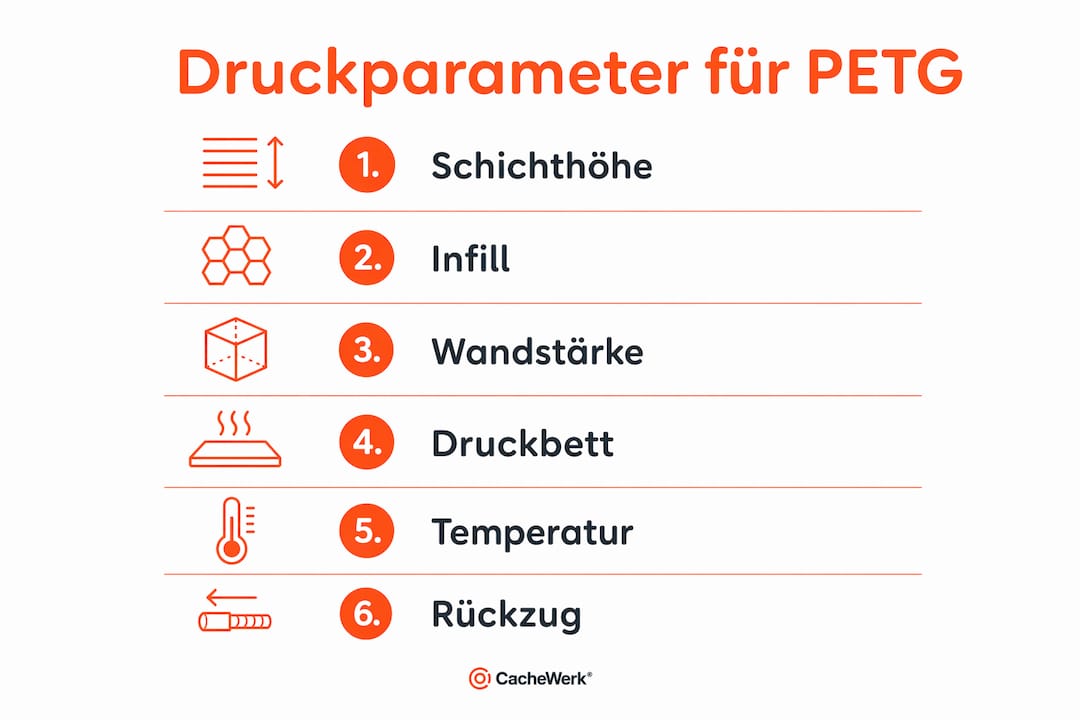
Recommended print parameters for PETG cache parts
Optimal print settings for PETG are a layer height of 0.2 mm, 30–50% infill, a wall thickness of at least 2 mm, and a nozzle temperature of 235–245°C. This combination provides stable, weather-resistant enclosures without unnecessarily long print times.
| Parameter | Recommended Value | Reason |
|---|---|---|
| Layer Height | 0.2 mm | Good detail, stable layer adhesion |
| Infill | 30–50% | Sufficient stability at a reasonable weight |
| Wall Thickness | min. 2 mm | Prevents moisture penetration |
| Nozzle Temperature | 235–245°C | Optimal melt viscosity for PETG |
| Bed Temperature | 70–85°C | Prevents detachment during printing |
| Print Speed | 40–60 mm/s | Reduces stringing and layer defects |
The print bed should be equipped with a PEI sheet or glass plate. Both surfaces offer good adhesion for PETG without aids like hairspray or glue stick. After cooling, the parts will detach on their own.
How to 3D print PETG geocache parts step by step
Printing a cache enclosure from PETG follows a clear sequence. If you adhere to this sequence, you'll avoid the most common mistakes and get a usable result on the first try.
-
Select or create a model. Platforms like Thingiverse, Printables, or Cults3D offer ready-made geocache models with integrated O-ring grooves. Make sure the model is specifically designed for geocaching and has space for a logbook. If you create your own designs, use CAD software like Fusion 360 or FreeCAD.
-
Prepare the model in the slicer. Load the STL file into PrusaSlicer, Bambu Studio, or Cura. Set the layer height, infill, and wall thickness according to the table above. Activate support material only where absolutely necessary, as supports on sealing surfaces can damage the surface.
-
Clean and level the print bed. Wipe the print surface with isopropanol. A clean bed is the most important prerequisite for good adhesion. Then perform automatic bed leveling if your printer has this function.
-
Observe the first layer. The first layer determines the entire print. It should adhere slightly squished to the surface without breaking or warping. Adjust the Z-offset setting if necessary.
-
Adjust fan control. PETG requires less cooling than PLA. Set the fan to 30–50%. Too much cooling leads to layer separation; too little leads to stringing and blurry details.
-
Monitor the print. Pay special attention to the first 10 layers and the areas around O-ring grooves. Precise measurements are crucial there for later watertightness.
-
Remove support material. Carefully remove supports with pliers or a spatula. Then finish the separation surfaces with sandpaper grit 120, then 240, until they are smooth.
-
Perform dimensional control. Measure the O-ring groove with a caliper. The groove must exactly match the thickness of the O-ring. A groove that is too narrow will pinch the O-ring, while a groove that is too wide will not seal.
Pro Tip: PETG tends to string, especially with travel moves over open areas. Increase retraction to 3–5 mm for direct drive or 6–8 mm for Bowden systems. Also activate the "Wipe before retract" option in the slicer. This significantly reduces stringing and saves you a lot of post-processing time.
How to assemble and seal PETG geocache parts
Assembly determines whether your cache remains sealed after the first rain. O-ring grooves combined with silicone sealant are the most reliable method for permanently waterproof cache enclosures.
Inserting and sealing O-rings
Place the O-ring dry into the groove and check the fit. It should protrude slightly above the edge of the groove so that it gets compressed when the lid is closed. Then apply a thin layer of silicone sealant to the contact surface. Let the sealant cure for 24 hours before closing the cache.
UV-resistant epoxy resin can also be used as a surface sealant for the outer walls. It increases water resistance and protects the PETG surface from UV radiation. Apply it thinly and let it cure completely.
Securely attaching magnets
Neodymium magnets are glued in with Pattex Repair Extreme and additionally secured mechanically with fabric tape. This double hold is important because temperature changes and vibrations in outdoor use can overwhelm the adhesive alone. Glue in the magnet, let the adhesive cure for 12 hours, then wrap fabric tape tightly around the joint.
Dos and don'ts for sealing
You should:
- Lightly grease the O-ring with silicone grease before inserting
- Clean sealing surfaces with isopropanol before applying silicone
- Allow all adhesive joints to cure for at least 12 hours
- Integrate labeling and geocaching instructions directly into the model or print them waterproof
- Camouflage the cache before deployment, for example with spray paint in earthy tones
You should avoid:
- Using superglue on PETG (brittle connection, no flexibility)
- Sealing the cache immediately after printing without drying time
- Only gluing magnets without mechanical reinforcement
- Using thin wall thicknesses below 1.5 mm for the lid area
Performing the 24-hour water test
Place the fully sealed cache completely in water and leave it there for 24 hours. After that, open it and check the inside for moisture. If the inside is dry, the cache is ready for use. If you find moisture, locate the leak, thoroughly dry everything, and re-seal.
What problems occur with PETG geocache parts?
Even experienced makers encounter recurring problems when printing PETG cache parts. The good news: almost all of them can be prevented or solved with the right measures.
Typical errors and their causes
Adhesion problems usually arise from a dirty print bed or an incorrectly set Z-offset height. Warping occurs less frequently with PETG than with ABS, but can happen with large flat parts if the print bed temperature is too low. Stringing is the most common PETG problem and occurs due to too high a print temperature or incorrectly set retraction parameters.
Moist PETG filament produces audible crackling noises and visible bubbles in the layers during printing. The result is porous walls that allow moisture to pass through. The solution is always the same: dry the filament and reprint.
| Error | Cause | Prevention |
|---|---|---|
| Adhesion problems | Dirty bed, incorrect Z-offset | Clean bed, calibrate Z-offset |
| Stringing | Too high temperature, insufficient retraction | Lower temperature, increase retraction |
| Warping | Too low bed temperature | Increase bed temperature to 80°C |
| Porous walls | Moist filament | Dry filament for 4–6 hours at 65°C |
| Layer separation | Too much fan cooling | Reduce fan to max. 50% |
| Leaky seams | Insufficient wall thickness | Increase wall thickness to min. 2 mm |
Improving long-term durability
PETG withstands UV radiation and temperature fluctuations significantly better than PLA, but an additional epoxy resin coating extends its lifespan considerably. After printing, apply a thin layer of UV-resistant epoxy resin to the outer surfaces. This protects against fading and increases surface hardness.
Always store unused PETG parts and filament dry, ideally in a sealed container with silica gel packets. Experienced users recommend consistently dry storage as the most important single measure for consistent print quality. Those who follow this advice will avoid most printing errors from the outset.
For planning and hiding 3D-printed geocaching objects, it's also worth looking at guides for collectible figures in 3D printing, which show how outdoor use and design requirements can be combined.
Key Takeaways
By combining PETG geocache parts with the right print parameters, O-ring seals, and an epoxy resin coating, you'll get containers that reliably function outdoors for years.
| Point | Details |
|---|---|
| Dry filament | Dry PETG for 4–6 hours at 65°C before printing to avoid bubbles and layer defects. |
| Adhere to print parameters | 0.2 mm layer height, 30–50% infill, and 235–245°C nozzle temperature yield stable results. |
| Combine O-ring and silicone | Only the combination of O-ring groove and silicone sealant guarantees permanently waterproof enclosures. |
| Secure magnets doubly | Always glue neodymium magnets and additionally secure them mechanically with fabric tape. |
| Water test before deployment | A 24-hour water test is mandatory before the cache goes out into nature. |
What I've learned after printing dozens of caches
It took me a while to realize that the biggest risk in PETG printing isn't the printer, but the filament itself. My first caches had fine pores in the walls, even though the settings looked correct on paper. The reason was moist filament that I had used directly from the original packaging. Since then, I dry every spool before its first use, without exception.
What also surprised me: the design matters more than print quality. A well-constructed model with an integrated O-ring groove and sufficient wall thickness forgives minor print errors. A poorly constructed model won't seal even with perfect layers. Therefore, I recommend starting with Cachewerk's 3D printing guide for PETG caches, because the models and settings there are coordinated.
For magnet attachment, I relied on superglue for a long time. That was a mistake. Superglue becomes brittle in the cold and reliably fails after one winter. Pattex Repair Extreme plus fabric tape, on the other hand, holds bombproof even after two years. This combination is my clear recommendation for anyone who wants to embed magnets in PETG parts.
One last point that is often underestimated: camouflage and labeling should be part of the design from the start. If you label the cache only after printing, you risk unreadable stickers or peeling paint. If you integrate the labeling directly into the model or print it waterproof, you will have consistently clean results.
— Benedikt
Ready-made PETG solutions from Cachewerk for a quick start
You want to get started, but your first self-print still feels too complex? Cachewerk has just the thing for you.
The Geocaching Starter Bundle 1 contains a ready-made PETling, a waterproof logbook, and a suitable holder. Everything is coordinated and ready for immediate use. You save yourself the drying time, the search for print parameters, and the first failed test print. The bundle is perfect as an entry point or as an addition to your self-printed parts. Also check out Cachewerk's entire geocaching equipment and accessories range if you're looking for more ideas for your next hide.
FAQ
What makes PETG better than PLA for geocaches?
PETG withstands temperatures from -20°C to +70°C and is UV-resistant. PLA softens in heat and deforms in direct sunlight during summer.
How long does it take to print a PETG cache enclosure?
A simple cache enclosure with a lid takes between 3 and 8 hours, depending on its size and the printer. Complex designs with threads and O-ring grooves can take longer.
Do I really need to dry PETG filament?
Yes. PETG absorbs moisture from the air, causing bubbles and pores during printing. Dry the filament for 4–6 hours at 60–65°C before printing.
Which adhesive permanently holds magnets in PETG parts?
Patex Repair Extrem in combination with fabric tape as mechanical reinforcement is the most reliable method. Superglue fails in cold temperatures and should be avoided.
How do I check if my cache is really waterproof?
Place the fully sealed cache completely in water for 24 hours. If the inside is dry afterward, the cache is ready for outdoor use.