
Securing Your Cache: Innovative DIY Instructions for Geocachers
Do you know that feeling of finding a carefully placed cache after just a few weeks, only to discover a soggy logbook and a leaky container? Many geocachers struggle with this exact problem. Standard solutions from the supermarket quickly fail in rain, frost, or curious glances. In this article, we'll show you step-by-step how to build a cache that really lasts, using innovative DIY techniques, thoughtful materials, and creative hiding ideas. You'll learn everything from material selection to long-term maintenance.
Table of Contents
- Materials and Tools for Securing Caches
- Step-by-Step: Building Your Secure Cache Yourself
- Creative Hiding Ideas for Maximum Security
- Maintenance and Error Prevention: Securing a Cache Long-Term
- Why Innovative DIY Techniques Turn Real Caches into Legends
- The Next Level: Special Equipment and Creative Cache Hides
- Frequently Asked Questions about Securing Caches
Key Takeaways
| Point | Details |
|---|---|
| Waterproof containers | Homemade containers from couplings and PETlings reliably protect the logbook from moisture. |
| Creative camouflage | Original hides like insect hotels or 3D mimics make caches difficult to find. |
| Regular maintenance | Keep your cache functional for a long time through checks and replacement of parts. |
| Magnetic solutions | Neodymium magnets provide secure attachment to metal surfaces and offer new hiding possibilities. |
Materials and Tools for Securing Caches
So that you don't start unprepared, here is an overview of all materials and tools, including costs:
The choice of the right materials determines whether your cache survives for six months or six years. Many geocachers initially opt for cheap plastic boxes from the hardware store and then wonder why the logbook is already damp after the first winter. The fault usually lies not with the hiding spot, but with the container itself.
Waterproof Basic Materials
The following materials have proven effective for durable outdoor caches:
- Sewer couplings made of PVC: Robust, completely waterproof, available in various diameters and very inexpensive at hardware stores or plumbing supply stores.
- PETlings (small PET containers with screw caps): Ideal for nano and micro caches, especially when equipped with magnets.
- Epoxy adhesive (2-component): Bonds almost all materials permanently and waterproof. Note curing time.
- Patex adhesive: More flexible than epoxy, particularly suitable for connections that need to withstand slight movements.
- Neodymium magnets: Small powerhouses for magnetic attachments. Homemade containers from sewer couplings with epoxy adhesive and plugs are considered waterproof and reliable by the community.
- Heat shrink tubing: Protects cable connections and glued joints from moisture.
- Sealing tape (PTFE): For screw caps that need to be absolutely watertight.
Tools for Implementation
You don't need a professional workshop. A few basic tools are sufficient:
- Cordless drill with step drill bit
- Saw or Dremel for PVC processing
- Sandpaper (80 and 120 grit)
- Clamps for fixing when gluing
- Lighter or heat gun for heat shrink tubing
Pro Tip: Always buy neodymium magnets in small quantities for testing. A single magnet holds up to 2.4 kg per piece, which is more than sufficient for most PETlings. Test the adhesive strength before final assembly on the planned metal surface.
Cost-Benefit Comparison: Homemade versus Ready-made Solution
| Container Type | Cost (approx.) | Waterproofness | Customizability | Durability |
|---|---|---|---|---|
| Homemade coupling container | €6 | Very high | High | Very high |
| Clip'n'Lock box | €3 | Medium | Low | Medium |
| Commercial PETling | €2 | High | Low | High |
| Magnetic DIY PETling | €5 | High | Very high | High |

As you can see: A homemade coupling container costs approx. €6, making it only slightly more expensive than a Clip'n'Lock box, but it offers significantly better long-term properties. Those who regularly place caches should specifically invest in robust cache containers.
Step-by-Step: Building Your Secure Cache Yourself
Once you have all the materials ready, you can start building right away:
Building your own cache is not witchcraft. With the right preparation and a little patience with gluing, you can create a container that can withstand rain, cold, and curious glances. Here's the proven method that has been tested in the community.
Building the Coupling Container
-
Select and cut the coupling: Choose a PVC sewer coupling with a suitable diameter (50 mm or 75 mm are popular). Cut it to the desired length. Smooth the cut edges so that no sharp burrs interfere.
-
Prepare the plugs: Use suitable PVC plugs for both ends. One plug is permanently glued, the other remains removable for logbook access. Lightly sand the contact surfaces so that the adhesive adheres better.
-
Insert the logbook: Fold the logbook so that it fits comfortably into the coupling. Wrap it in a small zip bag to achieve double protection against moisture.
-
Glue in the plug: Mix the epoxy adhesive according to the instructions and apply it evenly to the contact area of the fixed plug. Place the plug, press firmly, and secure it with a clamp. Note curing time (usually 24 hours).
-
Attach sealing tape: Wrap PTFE sealing tape several times around the thread of the removable plug. This reliably prevents water from entering.
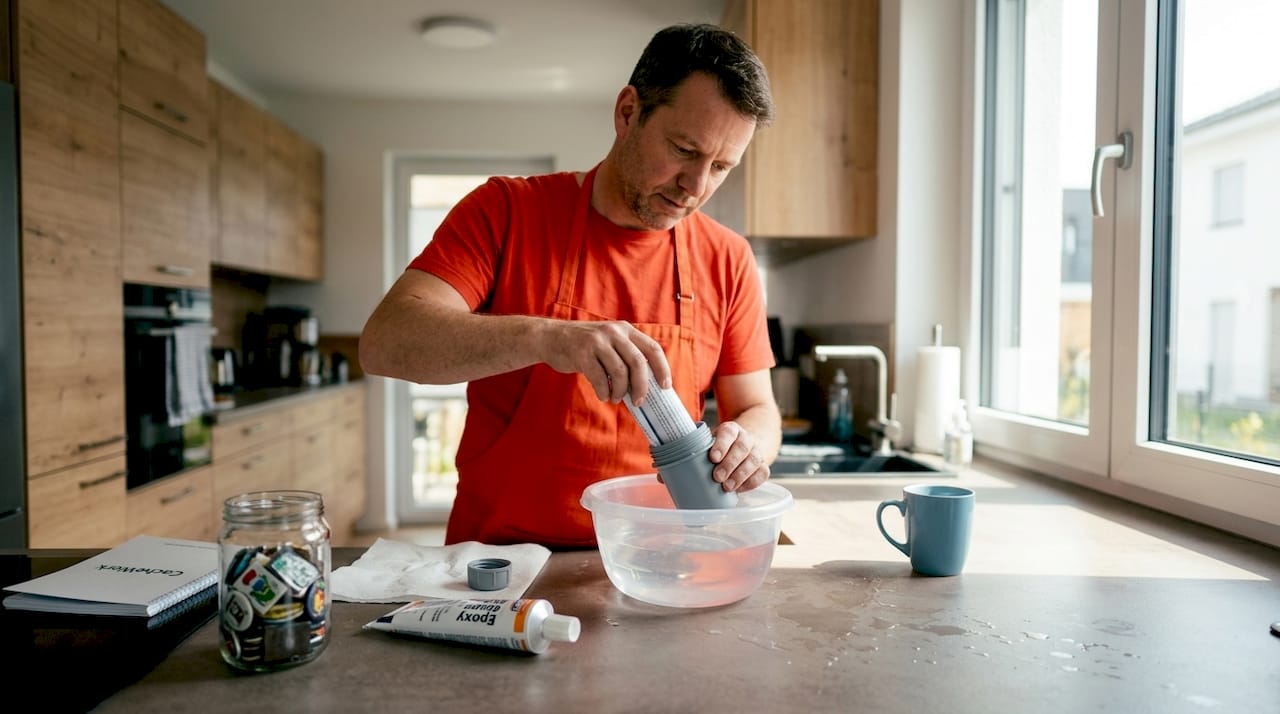
-
Water tightness test: Fill the finished container with a piece of paper towel. Immerse it in water for at least 30 minutes. Does the paper stay dry? Perfect. Then the container made of sewer couplings is really tested for watertightness.
-
Apply camouflage: Spray the container with textured paint in earthy colors (brown, green, grey). Before drying, sprinkle some sand or small pieces of bark on the surface to make the texture appear more natural.
Experience from the community: Covering the coupling container with a jute fabric stocking also creates a surprisingly good ground look. Geocachers report that containers camouflaged in this way are hardly noticeable even when looking directly at them.
Pro Tip: Always place a white sheet of paper instead of paper towel in the container during the watertightness test. White paper immediately shows even the smallest moisture stains. Paper towel can be misleading because it first distributes moisture before it becomes visible.
Building the Magnetic PETling
The magnetic PETling is a classic for urban hides on metal surfaces such as bridge railings, signposts, or electrical boxes.
- Clean and dry the PETling: Thoroughly clean the PETling inside and out. Grease and dirt prevent a good adhesive bond.
- Position the magnet: Glue the neodymium magnet to the screw cap of the PETling with Pattex adhesive. Centered is best for maximum adhesion.
- Fix and allow to cure: Press the magnet firmly for at least 60 seconds and then leave it to cure for 24 hours.
- Check carrying capacity: Before use, hang an object weighing approx. 200g on the magnet and check if the adhesive bond holds.
If you want to learn more about customized DIY caches, you'll find more creative building instructions and ideas there.
Creative Hiding Ideas for Maximum Security
Even a secure cache needs the right hide. Here are the most ingenious solutions:
A perfectly built container is of little use if the hide looks suspicious at first glance. The goal is for the cache to blend in with its surroundings and for Muggles (non-geocachers) simply not to notice it. Really good hides imitate everyday objects or cleverly utilize the natural environment.
Proven Hiding Concepts at a Glance
- Pseudo-insect hotel: A small wooden frame made of plywood and battens that looks like a real insect nesting box. A PETling is hidden inside. If you want it to look even more authentic, insert some bamboo tubes or wooden logs as filling material. Pseudo-insect hotels made of plywood with a PETling inside are considered one of the most effective camouflages for natural locations.
- Rolled log in a plastic tube: A rolled-up logbook that is stuck in a piece of plastic tube with a wooden stick. Looks like a branch or a broken stick. Easy to build, difficult to discover.
- Mini birdhouse with pull mechanism: A small wooden birdhouse with a hidden chamber. The geocacher triggers a simple pull mechanism to access the logbook. Visitors only see a harmless birdhouse.
- 3D-printed mimics: With a 3D printer and PETG filament, deceptively real objects can be printed, such as screw heads, stones, tree bark segments, or bolts. These mimics can be attached directly to the intended location and go unnoticed in any environment.
- Magnetic nano cache under a bench: A tiny PETling with a neodymium magnet that sticks under the metal crossbeam of a park bench. Muggles sit on it daily and notice nothing.
Comparison of Hiding Concepts
| Hide Type | Effort | Cost (approx.) | Risk of Discovery | Suitable Location |
|---|---|---|---|---|
| Pseudo-insect hotel | High | €10 to €20 | Very low | Forest, garden, park |
| Rolled log in tube | Low | €2 to €5 | Low | Forest, bush |
| Mini birdhouse | High | €15 to €30 | Low | Park, garden area |
| 3D Mimic | Medium | €5 to €15 | Very low | Urban, forest |
| Magnetic Nano | Low | €3 to €6 | Medium | Urban, metal infrastructure |
Pro Tip: When designing cache camouflage yourself, the more inconspicuous the hide looks in its direct surroundings, the longer the cache will last. Never place the pseudo-insect hotel alone. Place it near other natural elements such as tree stumps or bushes.
Those looking for urban hiding ideas for the city will find even more unusual approaches specifically for urban environments there.
Maintenance and Error Prevention: Securing a Cache Long-Term
To ensure your cache remains well-maintained and functional a year from now, keep the following in mind:
Many geocachers put a lot of energy into building and placing, but neglect regular maintenance. This quickly backfires. An unmaintained cache becomes an annoyance for finders and eventually ends up on the platform's archival list. With a clear maintenance plan, you can avoid these problems.
Regular Maintenance Steps
-
Check once per season: Inspect the container for cracks, mold, moisture, and damaged camouflage. A thorough inspection is especially important after winter.
-
Check and replace logbook: If the logbook is full or damp, replace it immediately. Use waterproof paper or laminated logbooks for extra protection.
-
Renew sealing tape: The PTFE sealing tape on screw caps wears out over time. A new tape costs a few cents and reliably prevents water from entering.
-
Lubricate mechanical parts: For caches with pull mechanisms, hinges, or moving parts, lubrication with silicone spray is recommended. Classic oils attract dirt and can gum up.
-
Refresh camouflage: Paint fades, jute fabric comes loose, and wood cladding can swell. Clean the surface and renew the camouflage before it becomes noticeable.
-
Check magnetic adhesion: For magnetic caches, regularly check if the magnet is still firmly attached and if the adhesive surface is clean. Rust or paint on the adhesive surface significantly reduces adhesion.
Typical Sources of Error and How to Avoid Them
Error 1: Too little glue used. The plug holds initially but comes loose after the first frost. Solution: Always cover the entire contact surface evenly with epoxy glue.
Error 2: No watertightness test before deployment. Solution: The basic rule is to test every container in a water bath for at least 30 minutes before it goes into nature.
Error 3: Cache placed too close to a well-used path. Even the best container will be discovered if it's in the way. Choose locations a little further away from the direct path.
Statistics: Mechanical caches last 1.5 years and longer if regularly maintained. Without maintenance, the lifespan is often shortened to just a few months.
Pro Tip: Keep a digital note for each cache, recording the placement date, last maintenance, and any problems encountered. This way, you'll never lose track, even if you manage many caches simultaneously. Good cache care and durability are the most important factors for long-term success.
Why Innovative DIY Techniques Turn Real Caches into Legends
Often it's not the material, but your courage to break new ground that makes the difference. This may sound like a motivational phrase, but there's a real principle behind it.
We regularly observe in the geocaching community that the most discussed, most "Favorited" caches are not expensive high-tech constructions. They are the creative, handmade hides that truly excite finders. A lovingly built pseudo-insect hotel, a funny rolled log, or a hand-masoned mini stone made of concrete that looks exactly like the other stones in the vicinity: these things stick in people's minds.
Why is that? Because creative hides tell stories. The finder immediately understands that someone with real dedication was at work here. That inspires respect. It motivates one to become more creative oneself. And it strengthens precisely that community spirit that makes geocaching more than just a treasure hunt game.
We believe that many geocachers underestimate DIY projects because they think you need crafting skills for them. That's not true. The best DIY caches come from curiosity and a willingness to experiment, not perfection. A slightly crooked glue line, a slightly uneven paint coating: that often makes a handmade container even more authentic and inconspicuous than a machine-made product.
Every DIY solution is also a learning opportunity. With your first sleeve container, you learn how epoxy glue really hardens. With your first magnetic PETling, you understand how much adhesive force a neodymium magnet truly needs. This practical knowledge is invaluable and makes you a better, more independent geocacher in the long run.
The courage to develop your own camouflage solutions always pays off. Not just for your cache, but for your development as a geocacher. Dare to try unusual materials, implement crazy ideas, and make mistakes. It's often the failed experiments that teach the most.
The Next Level: Special Equipment and Creative Cache Hides
Now take the next step from DIY crafting to master class:
You've built your first cache, learned about all the materials, and know what's important for maintenance and camouflage. Now is the right time to take your setup to the next level. Because sometimes DIY reaches its limits, for example, when very precise fits are required, or when you're looking for a hide that truly fools every muggle.
At cachewerk.de, you'll find equipment and accessories specifically developed for geocachers that perfectly complement your DIY projects. Whether high-quality PETG-printed containers, camouflage materials for urban environments, or original accessories: the range is tailored to the real needs of geocachers. Take a look at the geocaching hide as a fake traffic sign, for example. It's one of the most original solutions for urban locations and fools even experienced geocachers at first glance.
Frequently Asked Questions about Securing Caches
What materials are particularly durable for outdoor caches?
Drainage sleeves and PETlings with epoxy glue and stoppers are considered particularly durable because they are waterproof, frost-resistant, and robust against mechanical stress.
How do I prevent my cache from being discovered too quickly?
Original camouflages such as pseudo-insect hotels and 3D mimics make caches perfectly disappear into their surroundings, as they imitate everyday objects with deceptive authenticity.
How often should a geocache be checked and maintained?
A thorough check once per season is recommended. Regular maintenance extends the lifespan to over 1.5 years and keeps the gaming experience high-quality for all finders.
How can I securely attach my cache magnetically?
Neodymium magnets hold up to 2.4 kg per piece and are ideal for magnetic PETlings on smooth metal surfaces such as signposts or bridge railings.