
Geocaching mit Arduino basteln: Dein DIY-Leitfaden
Geocaching mit Arduino basteln bedeutet, mithilfe eines Mikrocontrollers interaktive Verstecke zu bauen, die Finder mit Rätseln, Displays oder mechanischen Schlössern überraschen. Der Arduino Pro Mini und ein GPS-Modul bilden dabei das Herzstück fast aller Projekte. Solche Eigenbauten, in der Szene oft als „Gadget Caches" oder „Mystery Caches mit Elektronik" bezeichnet, verbinden Outdoor-Abenteuer mit echtem Bastelspaß. Du programmierst selbst, was passiert, wenn jemand den Cache findet. Das Ergebnis ist ein Versteck, das kein anderer so hat. Cachewerk zeigt dir, wie du kreative DIY-Geocaches von Grund auf baust.
Welche Hardware-Komponenten sind ideal für Arduino-basierte Geocaching-Projekte?
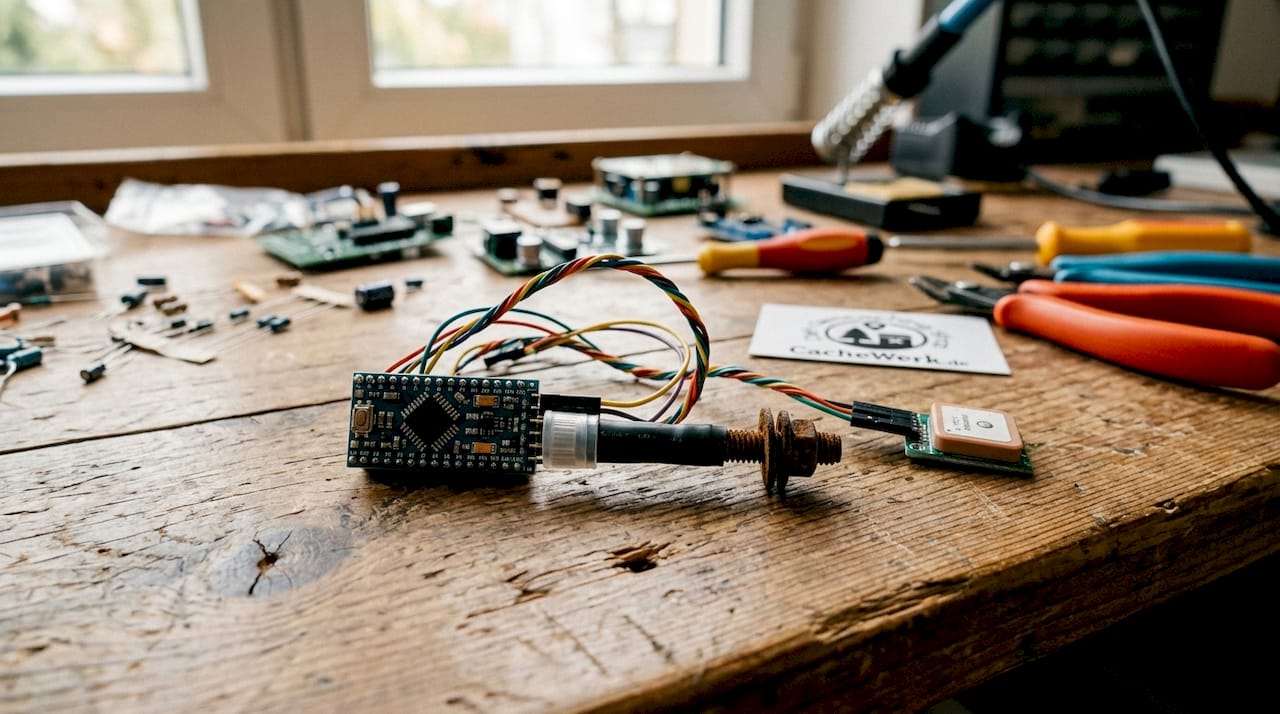
Der Arduino Pro Mini ist die erste Wahl für stromsparende Geocaches. Er spart konstant etwa 25 mA gegenüber Varianten mit USB-Brücke. Das klingt wenig, macht über Monate aber den Unterschied zwischen einem funktionierenden Cache und einer leeren Batterie.
Mikrocontroller und GPS
Für einfache Projekte reicht ein Arduino Pro Mini mit 3,3 V vollkommen aus. Wer noch mehr Strom sparen will, greift zum ATtiny1634. GPS-Module wie der u-blox NEO-6M liefern zuverlässige Positionsdaten und lassen sich per serieller Schnittstelle direkt ansprechen. Wichtig: Das GPS-Modul zieht selbst im Betrieb deutlich mehr Strom als der Mikrocontroller. Es lohnt sich, es per Transistor schaltbar zu machen und nur bei Bedarf einzuschalten.
Anzeige und Bedienung
Ein kleines OLED-Display mit 128 × 64 Pixeln reicht für Textnachrichten und einfache Grafiken. LCD-Displays mit I²C-Adapter sind günstiger, aber größer und stromhungriger. Für den Finder ist ein lesbares Display entscheidend, damit das Rätsel Spaß macht.
| Komponente | Vorteil | Nachteil |
|---|---|---|
| Arduino Pro Mini | Sehr geringer Stromverbrauch | Kein USB, Programmer nötig |
| ATtiny1634 | Noch sparsamer | Weniger Bibliotheken verfügbar |
| u-blox NEO-6M GPS | Günstig, weit verbreitet | Hoher Stromverbrauch im Betrieb |
| OLED 128×64 | Scharf, stromsparend | Teurer als LCD |
| LCD mit I²C | Günstig | Größer, mehr Strom |
- Servomotoren (z. B. SG90) eignen sich gut als Verriegelungsmechanismus.
- Lithium-Batterien vom Typ Energizer Ultimate Lithium arbeiten auch unter 0 °C zuverlässig.
- Ein Buck-Converter (Abwärtswandler) passt die Spannung mehrerer Zellen an den Mikrocontroller an.
- Ein Soft-Power-Schalter trennt die gesamte Schaltung vom Strom, ohne dass eine mechanische Unterbrechung nötig ist.
Profi-Tipp: Kaufe den Arduino Pro Mini ohne vorgelötete USB-Brücke. Du sparst sofort die 25 mA, die der Chip der Brücke dauerhaft zieht, und verlängerst die Batterielaufzeit erheblich.
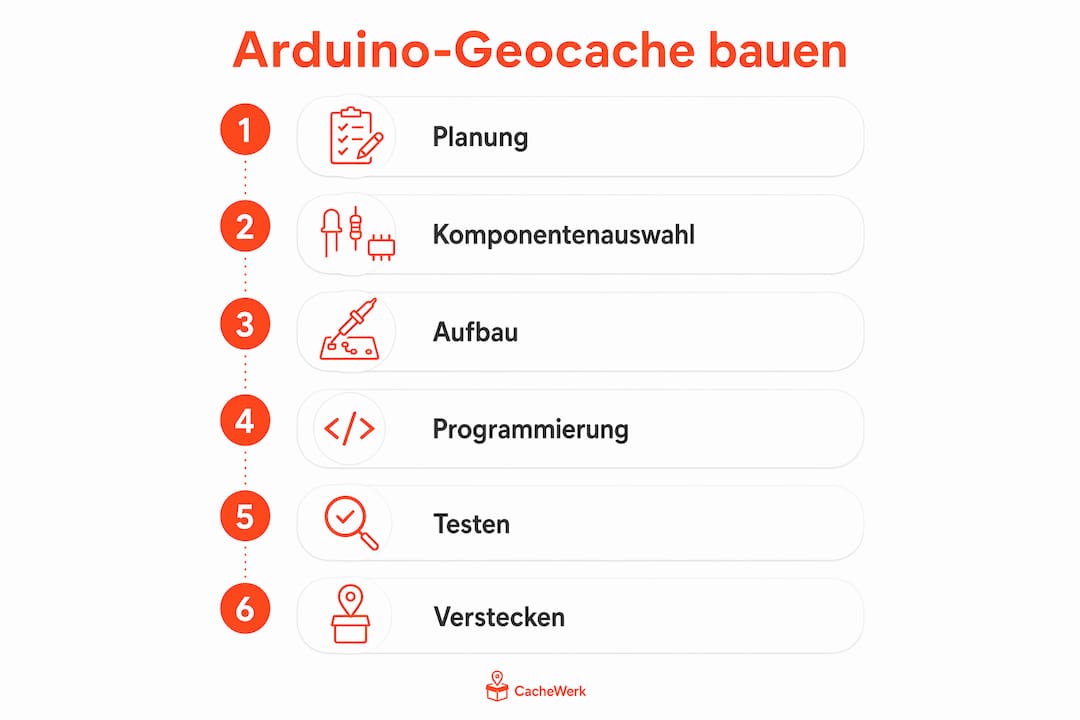
Wie baut und programmierst du einen Arduino-Geocache Schritt für Schritt?
Ein vollständiger Gadget Cache entsteht in klar trennbaren Phasen. Einsteiger rechnen mit 4–6 Wochen für Zusammenbau und Programmierung. Das ist realistisch, wenn du noch keine Erfahrung mit der Arduino IDE hast.
Schritt-für-Schritt-Anleitung
- Schaltplan zeichnen. Lege fest, welche Komponenten du verbindest: Mikrocontroller, GPS, Display, Servo und Stromversorgung. Ein einfacher Schaltplan auf Papier verhindert Verdrahtungsfehler.
- Breadboard-Aufbau. Stecke alle Bauteile auf einem Steckbrett zusammen, bevor du lötest. So kannst du Fehler leicht korrigieren.
- Grundprogramm schreiben. Starte mit der Arduino IDE und einem einfachen Sketch, der nur das Display ansteuert. Füge GPS und Servo erst hinzu, wenn das Display funktioniert.
- GPS-Logik integrieren. Lies die aktuelle Position aus und vergleiche sie mit den Zielkoordinaten. Zeige die verbleibende Distanz in Metern an. Öffne den Servo, sobald der Finder nah genug ist.
- Rätsel programmieren. Ein einfaches Beispiel: Das Display zeigt „Du bist 47 m entfernt. Komm näher!" Unter 10 m dreht der Servo und gibt das Logbuch frei.
- Gehäuse bauen. Verwende eine wasserdichte Box, z. B. eine Kunststoffdose mit Gummidichtung. Befestige die Platine mit Abstandshaltern, damit sie nicht vibriert.
- Feldtest durchführen. Teste den Cache an einem echten Standort, bevor du ihn versteckst. GPS-Signale verhalten sich draußen anders als auf dem Schreibtisch.
Profi-Tipp: Baue von Anfang an eine Reset-Funktion ein. Ein versteckter Taster, der den Cache in den Ausgangszustand versetzt, spart dir später viel Aufwand, wenn du das Versteck warten musst.
Die Grundlagen für dein erstes Geocaching-Projekt findest du auch in der Cachewerk-Anleitung, die speziell für Einsteiger aufgebaut ist.
Leistungsstarke Komponenten wie Solenoid-Verschlüsse brauchen eine eigene Schaltung. Hohe Stromstärken von etwa 800 mA dürfen nicht direkt über Mikrocontroller-Pins fließen. Ein einfacher NPN-Transistor als Schalter löst das Problem zuverlässig.
Wie lässt sich die Batterielaufzeit optimieren?
Energiemanagement ist der wichtigste Designfaktor bei smarten Gadget Caches. Soft-Power-Schalter etablieren sich als Standard, weil sie den Stromverbrauch im ausgeschalteten Zustand auf praktisch null reduzieren. Ein normaler Kippschalter lässt oft noch Mikroampere fließen. Über Monate summiert sich das.
- Arduino Pro Mini ohne USB-Brücke senkt den Grundverbrauch auf ein Minimum.
-
Schlafmodus (Sleep Mode) lässt den Mikrocontroller zwischen GPS-Abfragen pausieren. Die Bibliothek
LowPower.hmacht das mit wenigen Codezeilen möglich. - Energizer Ultimate Lithium hält auch bei Temperaturen unter 0 °C stabile Spannung. Das ist für Outdoor-Einsätze im Winter entscheidend.
- Buck-Converter passen die Spannung von vier AA-Zellen auf 3,3 V an, ohne Energie als Wärme zu vergeuden.
- GPS nur bei Bedarf einschalten spart den größten Anteil. Schalte das Modul per Transistor ab, wenn kein Finder in der Nähe ist.
Mit konsequentem Energiemanagement und der richtigen Hardware sind Batterielaufzeiten von bis zu 10 Jahren erreichbar. Das ist kein theoretischer Wert, sondern ein praktisch erreichtes Ergebnis bei energiesparender Hardware und durchdachter Programmierung.
Profi-Tipp: Miss den tatsächlichen Stromverbrauch deiner Schaltung mit einem Multimeter, bevor du den Cache versteckst. Viele Bastler unterschätzen den Ruhestrom einzelner Module um den Faktor 10.
Wer sich tiefer mit der Auswahl geeigneter Zellen für Outdoor-Elektronik beschäftigen will, findet bei Batterien für Outdoor-Systeme nützliche Hintergrundinformationen zur Leistung verschiedener Batterietypen unter realen Bedingungen.
Welche technischen Herausforderungen gibt es beim Outdoor-Einsatz?
Die häufigste Ursache für Cache-Ausfälle ist Kondensation im Gehäuse. Temperaturschwankungen führen zu Feuchtigkeit auf der Leiterplatte, selbst wenn das Gehäuse scheinbar dicht ist. Viele Anfänger unterschätzen diesen Effekt. Ein Cache, der im Sommer tadellos funktioniert, kann im Herbst durch Kondenswasser ausfallen.
- Conformal Coating schützt die Leiterplatte mit einer dünnen Lackschicht gegen Feuchtigkeit. Sprühdosen mit Acryllack sind günstig und einfach aufzutragen.
- Silicagel-Päckchen im Gehäuse binden Restfeuchte. Wechsle sie bei jeder Wartung aus.
- Kabeldurchführungen abdichten: Silikon oder Epoxidharz verhindert, dass Feuchtigkeit entlang der Kabel ins Gehäuse zieht.
- Servomotoren als Verriegelung sind mechanisch robust, aber die Achse sollte nach außen hin abgedichtet sein.
- Reset-Taster von außen zugänglich machen, ohne die Dichtigkeit zu gefährden. Ein magnetischer Reed-Schalter löst das elegant.
Profi-Tipp: Lege vor dem Verschließen ein frisches Silicagel-Päckchen in das Gehäuse und wärme die Box kurz auf, damit die Luft innen trocken ist. Das reduziert Kondensation beim ersten Temperaturwechsel deutlich.
Mechanische Verriegelungen mit Servomotoren sind langlebig, wenn du sie mit ausreichend Spiel konstruierst. Ein Servo, der gegen einen Anschlag drückt, zieht dauerhaft Strom und überhitzt. Baue einen Endlagenstopp ein, der den Servo entlastet, sobald er die Zielposition erreicht hat.
Welche Arduino-Geocaching-Projekte sind besonders beliebt?
Die Reverse Geocaching Box ist das bekannteste Projekt in der Szene. Sie öffnet sich nur, wenn der Finder den richtigen Ort erreicht. Mechanisch wiederverwendbare Konstruktionen mit Servo-gesteuerten Verriegelungen erlauben es, denselben Cache für verschiedene Versteckorte zu nutzen. Das spart Bauzeit und Kosten.
- Reverse Geocaching Box: GPS-Modul misst die Distanz zum Ziel. Unter einem definierten Schwellenwert öffnet ein Servo das Schloss. Das Display zeigt Hinweise und Distanz an.
- Licht- und Soundrätsel: Ein Lichtsensor oder Mikrofon reagiert auf ein bestimmtes Signal. Erst wenn der Finder das richtige Muster erzeugt, öffnet sich der Cache.
- Zahlencode am Display: Der Cache zeigt eine Rechenaufgabe. Die Lösung gibt der Finder per Taster ein. Richtig gelöst, dreht der Servo.
- Mehrstufige Mystery Caches: Jede Stufe liefert eine neue Koordinate oder einen Hinweis. Arduino und GPS führen den Finder von Station zu Station.
- Beleuchtete Nachtverstecke: LEDs, gesteuert per Arduino, machen einen Cache erst nach Einbruch der Dunkelheit sichtbar. Mehr dazu findest du bei beleuchteten Cacheverstecken.
Für alle diese Projekte gilt: Je klarer das Rätsel, desto mehr Spaß hat der Finder. Komplizierte Technik, die niemand versteht, frustriert. Ein einfaches Konzept mit zuverlässiger Umsetzung schlägt jede Spielerei.
Wichtige Erkenntnisse
Geocaching mit Arduino basteln gelingt am besten mit dem Arduino Pro Mini, konsequentem Energiemanagement per Soft-Power-Schalter und wetterfestem Gehäuse mit Conformal Coating.
| Thema | Details |
|---|---|
| Hardwareauswahl | Arduino Pro Mini ohne USB-Brücke spart konstant 25 mA und verlängert die Batterielaufzeit erheblich. |
| Energiemanagement | Soft-Power-Schalter und GPS-Abschaltung per Transistor sind die wirksamsten Maßnahmen gegen leere Batterien. |
| Wetterfestigkeit | Conformal Coating und Silicagel schützen die Elektronik vor Kondensation als häufigster Ausfallursache. |
| Projektaufwand | Einsteiger sollten 4–6 Wochen für Bau und Programmierung einer Reverse Geocaching Box einplanen. |
| Projektideen | Reverse Geocaching Boxen mit wiederverwendbaren Servo-Verriegelungen bieten den besten Kosten-Nutzen-Wert. |
Meine Erfahrung mit Arduino-Geocaches: Was wirklich zählt
Ich habe meinen ersten Arduino-Geocache mit einem einfachen GPS-Modul und einem LCD-Display gebaut. Das Ergebnis war technisch in Ordnung, aber nach drei Monaten draußen hat Kondensation die Platine zerstört. Kein Conformal Coating, kein Silicagel. Klassischer Anfängerfehler.
Was mich seitdem am meisten überrascht hat: Das Programmieren ist nicht das Schwierigste. Die meisten Probleme entstehen beim Gehäuse und beim Strommanagement. Wer dort sorgfältig arbeitet, hat einen Cache, der Jahre läuft. Wer es eilig hat, baut zweimal.
Der Soft-Power-Schalter war für mich ein echter Wendepunkt. Vorher haben meine Caches im Standby noch messbar Strom gezogen. Danach war der Verbrauch im ausgeschalteten Zustand praktisch null. Das klingt nach einem Detail, ist aber der Unterschied zwischen einer Batterie, die ein Jahr hält, und einer, die drei Jahre hält.
Mein Rat für Einsteiger: Fang mit der Reverse Geocaching Box an. Das Konzept ist klar, die Community hat viele fertige Codebeispiele geteilt, und du lernst alle wichtigen Grundlagen in einem Projekt. Lass dich nicht entmutigen, wenn der erste Prototyp nicht funktioniert. Jeder Fehler zeigt dir, was du beim nächsten Mal besser machst. Und die Freude, wenn ein Finder deinen Cache zum ersten Mal öffnet und strahlt, ist es wert.
— Benedikt
Starte dein erstes Geocaching-Projekt mit dem richtigen Zubehör
Wer mit dem Basteln loslegen will, braucht neben Elektronik auch einen soliden Cache-Behälter. Das Geocaching-Starter-Bundle 2 von Cachewerk enthält einen PETling, ein Logbuch und eine Aufhängung. Alles, was du für den physischen Teil deines Verstecks brauchst, ist damit abgedeckt.
Wer lieber kleiner anfängt, findet im Geocaching-Starter-Bundle 1 das Grundpaket mit PETling, Logbuch und Halterung. Für urbane Projekte lohnt sich außerdem ein Blick auf den Rusty Bolt Cache, einen täuschend echten Schraubenbolzen mit Nano-Behälter. Kombiniere diese Verstecke mit deiner Arduino-Elektronik und du hast einen Cache, den so schnell niemand findet.
FAQ
Welcher Arduino eignet sich am besten für Geocaching?
Der Arduino Pro Mini ohne USB-Brücke ist die beste Wahl, weil er konstant etwa 25 mA weniger verbraucht als Varianten mit Brücke. Für noch längere Laufzeiten kommt der ATtiny1634 infrage.
Wie lange hält die Batterie in einem Arduino-Geocache?
Mit energiesparender Hardware und Schlafmodus-Programmierung sind Batterielaufzeiten von bis zu 10 Jahren erreichbar. Lithium-Batterien wie die Energizer Ultimate Lithium arbeiten dabei auch bei Kälte zuverlässig.
Wie schütze ich die Elektronik vor Feuchtigkeit?
Conformal Coating auf der Leiterplatte und Silicagel-Päckchen im Gehäuse schützen am wirksamsten gegen Kondensation. Kabeldurchführungen zusätzlich mit Silikon abdichten.
Wie lange dauert der Bau einer Reverse Geocaching Box?
Einsteiger rechnen realistisch mit 4–6 Wochen für Zusammenbau und Programmierung, wenn sie noch keine Erfahrung mit der Arduino IDE haben.
Brauche ich Programmierkenntnisse für einen Arduino-Geocache?
Grundkenntnisse in C++ und der Arduino IDE sind nötig, aber es gibt viele fertige Codebeispiele in der Community. Wer mit einfachen Sketches beginnt und sich vorarbeitet, kommt ohne Vorkenntnisse ans Ziel.