Checking magnet polarity: the most reliable methods tested

The quickest way to check a magnet's polarity is to hold it against a reference magnet with known polarity or a compass. If two sides repel each other, they have the same poles. If the needle points toward one side, it indicates the south pole of the tested magnet. For strong neodymium magnets: approach cautiously first, then take a closer look. App sensors, the thread method, or a gaussmeter provide additional confirmation if you want to be more precise.
In short:
- Caution is advised with strong neodymium magnets, as approaching too quickly can cause permanent demagnetization or skewed measurement results.
- For most DIY projects, a reference magnet or a compass is sufficient to reliably determine magnet polarity.
- Testing with a reference magnet is the simplest method, as it requires no interpretation and is very reliable when used correctly.
- For smaller magnets that are difficult to hold, a simple pole tester is a practical solution to avoid inconsistencies during measurement.
- Using a gaussmeter or Hall sensor is only worthwhile for very small, strong, or multi-pole magnets to check the polarity exactly.
Table of Contents
- Overview: Which method fits your magnet?
- How to check magnet polarity step-by-step
- When are gaussmeters, teslameters, and Hall sensors worth it?
- Working safely: Practical tips for magnet testing
- Why this guide is based on real practical experience
- What really counts when checking polarity
- The right magnet holder for your next hiding spot
- Sources
- FAQ
Overview: Which method fits your magnet?
Before you get started, it is worth taking a quick look at which tool matches your type of magnet. A flat disc magnet behaves differently than a ring or pot magnet, and a tiny neodymium magnet from a geocache container requires more caution than a large industrial magnet.
The common methods for determining magnet polarity differ primarily in effort and accuracy:
- Reference magnet: fast, free, works for almost any shape, provided you own a magnet with known polarity.
- Compass: almost as fast as the reference magnet, ideal for small to medium-sized magnets, but risky for very strong ones.
- Thread or suspension method: slightly more cumbersome, but independent of a second magnet.
- Float test: good for flat, lightweight magnets, impractical for heavy ring magnets.
- App with magnetic field sensor: practical for on the go, but less precise than a real measuring device.
- Gaussmeter or pole tester: the most accurate solution if you test regularly or work with very small magnets.
In axially magnetized disc magnets, the poles are usually located on the two flat circular faces, not on the edge. Diametrically magnetized magnets, on the other hand, have their poles distributed across their diameter. Those who don't know this often hold the magnet to the compass in the wrong place and are surprised when the needle doesn't deflect.
How to check magnet polarity step-by-step
The four classic methods can all be performed without a specialized lab. The important thing is to proceed calmly and in a fixed order for each method.
1. The reference magnet method
Hold the unknown magnet against a second magnet whose north and south poles you already know. If both sides attract each other, opposite poles are facing each other; if they repel each other, two like poles meet. This is the most reliable method on the list because it requires no interpretation. Typical error: The magnet is placed at an angle and immediately turns away. Always approach straight on, not from the side.
2. The compass method
Place the magnet at a safe distance next to a compass and observe where the needle swings. The end of the compass needle marked with an N is attracted by the south pole of the tested magnet, not the north pole, as many instinctively assume. Slowly bring the magnet in from the side and pull it back to check if the needle swings back. With strong neodymium magnets, a small distance is enough to completely confuse the needle or permanently demagnetize it.
3. Thread and suspension method
Tie a thin thread around the center of the magnet and let it rotate freely, away from metal parts and other magnets. The magnet will align itself with the Earth's magnetic field like a compass needle. The end that points North is the south pole of the magnet, following the exact same principle as a compass needle.
4. The float test
Place the magnet on a small piece of Styrofoam or cork and set it in a shallow bowl of water. The magnet will slowly rotate and eventually show the same north-south alignment as in the thread method. For heavy ring or pot magnets, this becomes impractical because the ratio between the magnet and the float is no longer suitable.
5. The repulsion method for marked magnets
If you have two magnets with a known marking, simply hold them briefly against each other. If they repel, both have the same marking on the side that touched.
Pro tip: With disc magnets, test the thin edge first, not the flat side. Because the poles are usually located on the circular faces, the magnet will rotate almost automatically into the correct alignment when stood on its edge.
When are gaussmeters, teslameters, and Hall sensors worth it?
Everyday methods are perfectly sufficient for most DIY projects. However, anyone working with very small, very strong, or multi-pole magnets often cannot avoid using a measuring device.
A gaussmeter or teslameter measures magnetic flux density and provides a sign. The polarity can be derived from the sign of the measured value, whereby axial and transverse probes must be positioned differently. For hobby applications, a simple Hall sensor circuit is usually sufficient; for technical precision, a calibrated gaussmeter with the appropriate probe provides the most accurate data.
Practical points that matter during measurement:
- Choose probe type: Axial probes measure along the symmetry axis, transverse probes perpendicular to it, depending on the magnet shape.
- Maintain distance: contact that is too close distorts the reading, while too much distance no longer provides a usable signal.
- Avoid sources of interference: steel furniture, other magnets, and electric motors nearby will falsify the display.
- Check calibration: many affordable devices drift over time; performing a zero adjustment before measuring is worthwhile.
Commercial pole testers with LED indicators simplify the process further: green usually stands for South, red for North, so you get an immediate answer without having to read a numerical value. For DIY electronics enthusiasts, a simple Hall sensor detector is also a solid option, as long as the environment remains free of larger steel parts.
Working safely: Practical tips for magnet testing
A few simple rules prevent the most common mistakes while simultaneously protecting your tools.
- Always approach magnets slowly, never with a sudden jerk.
- When comparing, always maintain the same orientation, otherwise you will unknowingly falsify the result.
- Keep strong magnets away from credit cards, hard drives, and medical devices.
- If possible, verify a result with a second method before classifying it as certain.
With powerful neodymium magnets, two specific risks exist: pinched fingers during sudden attraction and permanent demagnetization of compass needles if there is contact that is too close. Both can be avoided if you move the magnet in bit by bit instead of applying it directly.
Pro tip: Always double-verify an important result, for example using a reference magnet and a compass together. If both methods deviate from each other, it is almost always a setup error, not a material defect.
Why this guide is based on real practical experience
Magnetic hiding spots are a core part of Cachewerk's business, and that is exactly where this knowledge comes from. Experience with the secure attachment of magnetic PETlings shows daily how important correctly tested polarity is for adhesion in outdoor use. The entire workflow for the magnet construction of a geocache is also built on the same basic principles described above.
Anyone who wants to make their hiding spots weather-resistant will find additional information on coating and installation for outdoor areas. And for those still looking for the right magnet type for their cache, the overview of geocaching magnetic containers provides good classification before a polarity check is even necessary.
What really counts when checking polarity
Most guides on this topic overload the subject. They list six or seven methods of equal rank, as if every hobbyist had to buy a gaussmeter just to install a neodymium magnet into a geocache container correctly. That is unnecessary. For ninety percent of DIY projects, the reference magnet or a simple compass is perfectly sufficient, and both methods provide a clear result in seconds.
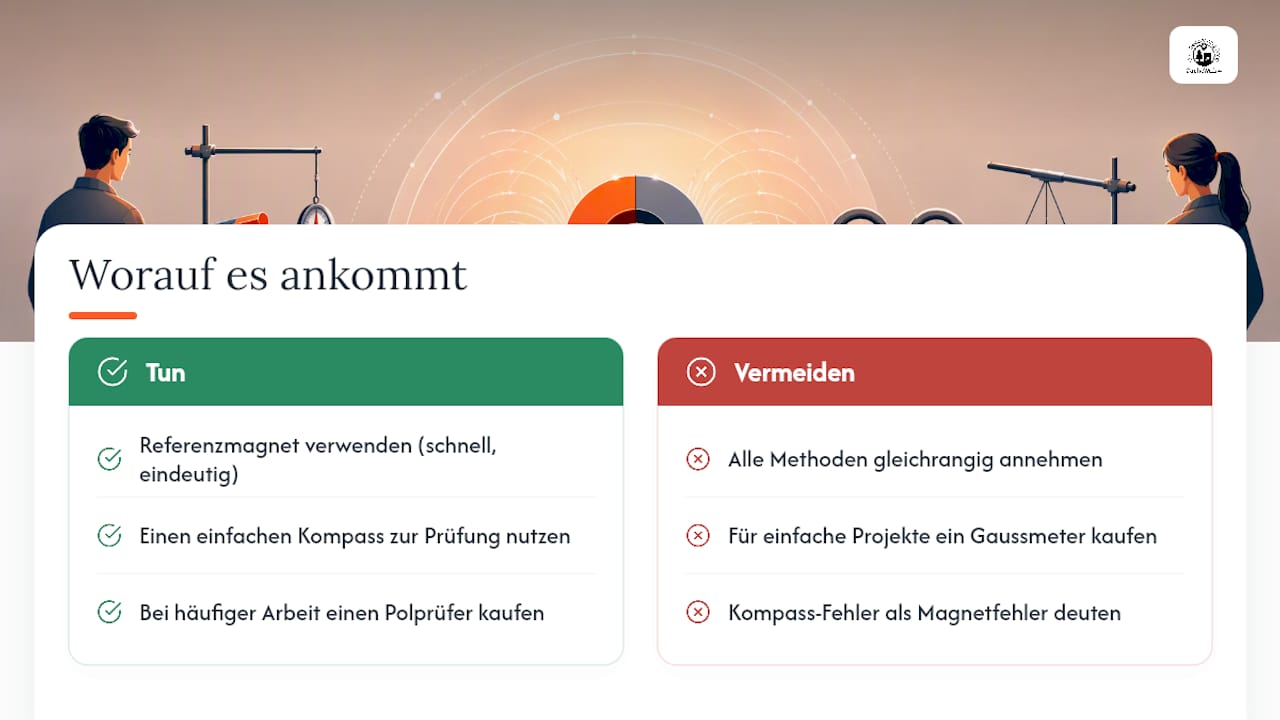
Where classic advice often falls short: the warning about the demagnetization of compasses is usually a footnote, yet it is the reason why many hobby users suddenly receive conflicting results with strong magnets. Their compass is simply damaged, not the magnet wrongly polarized.
Anyone working regularly with small, hard-to-handle magnets, for example, when building magnetic cache hiding spots, should still invest in a simple pole tester. It costs little, but removes the question of whether the needle just happened to waver or not from every single test process.
— Benedikt
The right magnet holder for your next hiding spot
As soon as the polarity is determined, the real challenge begins: installing the magnet so that it holds reliably outdoors, even in wind and rain. That is exactly why there is the Geocaching PETling with magnet holder from Cachewerk, available in camouflage and signal colors.
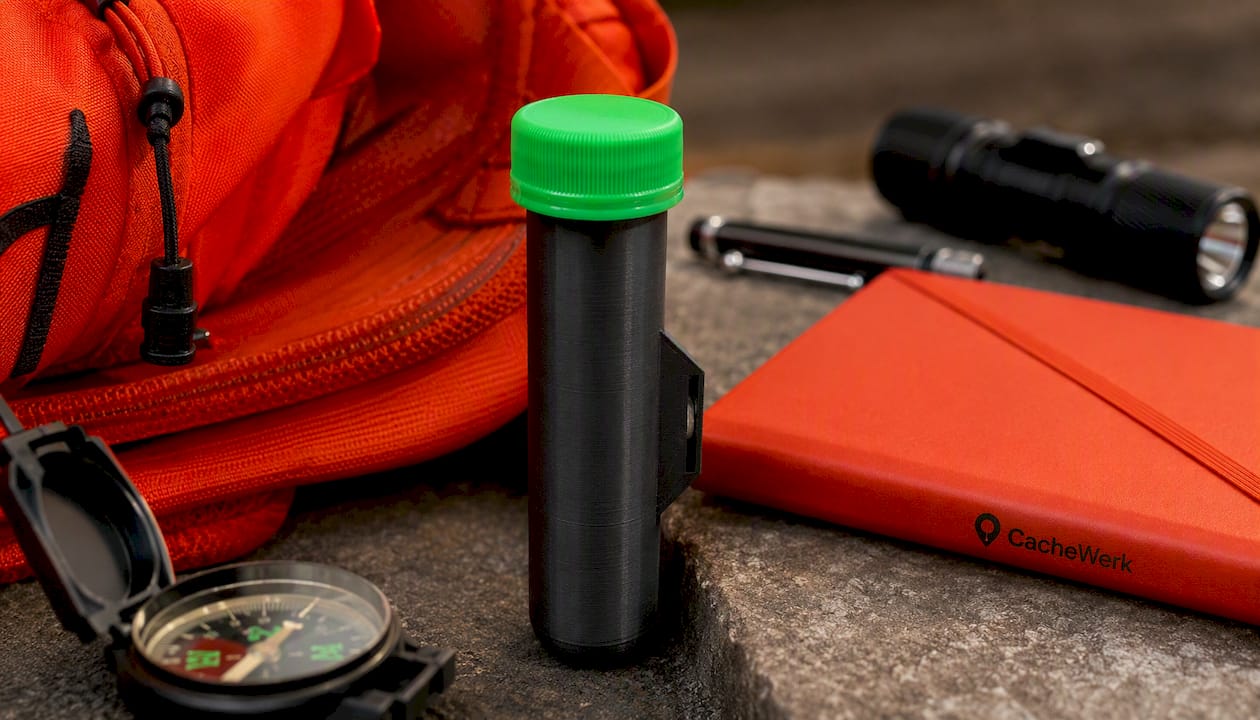
The magnet holder in the PETling is designed so that a correctly tested magnet sits perfectly without shifting or rotating when opened. This saves you from the improvised gluing or wedging that many homemade hiding spots end up with. Instead of a ready-made container from the hardware store, you get a solution optimized for outdoor use, either subtly camouflaged or clearly visible in signal color. Check out the PETlings with magnet holders directly and choose the right color for your next hiding spot. For those who want to browse further, you can find additional material for your own construction projects in the geocaching accessories collection.
Sources
For those who want to dive deeper: GME Magnet explains the reference method, Projekt Elektronik provides the measurement technology behind it, and Supermagnete shows where poles lie in different shapes.
- How To Identify Magnet North And South Poles - GME Magnet
- How To Find The North And South Poles Of A Magnet - OSENC
- Measuring magnetic fields – Projekt Elektronik PDF
FAQ
How do you recognize a magnetic pole without a measuring device?
The easiest way is with a reference magnet of known polarity or a compass. If two sides attract each other, opposite poles are present; if they repel each other, they are like poles.
Does every magnet have a north and south pole?
Yes, every magnet fundamentally has two poles, regardless of shape or size. In multi-pole magnetized magnets, such as ring magnets with several segments, several north and south poles can lie side by side.
Where is plus and minus on a magnet?
Magnets do not have electrical poles like plus and minus, but magnetic poles, named North and South. The location depends on the direction of magnetization; in disc magnets, it is usually on the two circular faces.
How do you find the north pole of a magnet with a compass?
Hold the magnet next to the compass and watch the needle. The needle end marked with an N is attracted by the magnet's south pole, so the magnet's north pole is on the opposite side.
Which magnet holder fits a correctly polarized magnet?
A well-designed holder prevents a properly tested magnet from slipping or coming loose later on. The geocaching PETling with magnetic holder from Cachewerk is built exactly for this purpose, is weather-resistant, and is available in several colors.