Geocaching: Weatherproof attachment of a petling magnet with neodymium

The most reliable method: a neodymium magnet, glued with weather-resistant adhesive and additionally secured mechanically with duct tape or heat shrink tubing. This combination easily withstands rain, frost, and summer heat. For those who prefer a more durable solution, a 3D-printed PETG holder is an option. You can find the individual steps below.
In short:
- Attaching with weather-resistant adhesive to metallic surfaces offers the best connection with relatively little effort compared to loose placement.
- For weather-resistant, permanently stable fastenings, mechanically screwed or 3D-printed PETG holders are preferable, as they remain reliable during temperature changes.
- Duct tape and heat shrink tubing protect the adhesive joint from moisture and mechanical stress, with careful surface preparation significantly increasing durability.
- Neodymium magnets should have a coating like zinc or nickel to prevent rust outdoors; epoxy-based weather-resistant adhesive remains flexible and durable.
- Regular checks for play, rust, or cracks at the adhesive joint help to carry out quick repairs by re-gluing or replacing in time.
Table of Contents
- Attaching a Petling Magnet: A Comparison of Methods
- How to Attach the Magnet to the Petling Step by Step
- Which Magnets and Adhesives Are Suitable for Outdoor Use?
- How to Secure the Adhesive Bond Against Wind and Weather
- Are 3D-Printed Holders for Petlings Worth It?
- How to Tell When a Magnet Needs Re-gluing
- Why Cachewerk Relies on Durable Fastenings
- Ready-Made Solutions for Your Next Magnetic Cache
- Sources
Attaching a Petling Magnet: A Comparison of Methods
Before you grab glue and a magnet, it's worth looking at the alternatives. Not every method suits every hiding spot, and some are better for urban areas, while others are for forests.
- Inserting: The magnet lies loosely in the Petling, without fixation. This is quick, but offers little camouflage and rarely lasts long, as the magnet falls out when opened.
- Gluing: A neodymium magnet plus weather-resistant adhesive is the most common compromise between effort and durability, especially for metal surfaces on posts, signs, or pipes.
- Drilling and Screwing: Mechanically the most secure option, as a screw firmly connects the Petling to the magnet. However, it is invasive and permanently alters the container.
- Hose Cover: A piece of old bicycle inner tube pulled over the Petling holds without adhesive and is weather-resistant, but requires some dexterity for the fit.
- Cable Conduit Holder: Similar to the hose cover, but with a piece of electrical conduit as a sleeve. Non-invasive and easily replaceable.
- Ready-Made Magnetic Holders or 3D Holders: Reusable, custom-fit, and usually mountable without adhesive. The most elaborate but longest-lasting solution.
For a cache on a traffic sign in the city, the adhesive approach is usually sufficient. For a hide on a metal pipe in the forest, the hose cover is often the better choice because it blends discreetly with the material.
How to Attach the Magnet to the Petling Step by Step
You can get the basic equipment at any hardware store or geocaching shop: neodymium magnets in the right size, a weather-resistant adhesive (no hot glue), duct tape, heat shrink tubing, and disposable gloves for applying the adhesive. If you build more often, also get sandpaper for surface preparation.
- Clean the surface. Remove grease, dust, and old adhesive residues from the Petling with isopropanol or dish soap and let it dry completely.
- Roughen the surface. Lightly roughen the adhesive area with fine sandpaper. This creates more grip, especially on the round Petling wall, because a large, flat contact surface improves the mechanical bond.
- Mark the magnet position. Mark the exact spot in advance with a pencil or tape so the adhesive doesn't shift.
- Apply adhesive. A thin, even layer is usually sufficient; too much adhesive will squeeze out the sides and look messy.
- Press and fix the magnet. Hold it in position with tape for the full curing time, often several hours depending on the product.
- Cover with duct tape or heat shrink tubing. This additionally protects the adhesive joint against moisture and mechanical stress.
- Check holding force. Gently pull on the cured magnet and briefly expose it to heat or cold, such as in the sun or refrigerator, to test the adhesive's reactions.
Pro Tip: Never glue directly after roughening. Wait until dust and residues are completely removed, otherwise the adhesive will settle on the sanding dust instead of on the Petling itself.
Which Magnets and Adhesives Are Suitable for Outdoor Use?
Neodymium magnets are almost unrivaled for this purpose because they achieve a significantly higher flux density than ordinary household magnets with a small form factor. For Petlings, sizes around 10x5 mm or 12x3 mm have proven effective, depending on how much weight the cache needs to hold. Look for a nickel-plated or zinc-plated coating; uncoated neodymium magnets rust surprisingly quickly outdoors.
When it comes to adhesive, practice differs from theory. Hot glue seems stable at first, but often fails in outdoor use because it becomes brittle and detaches under temperature changes. Weather-resistant mounting adhesives or two-component epoxy-based adhesives that remain permanently flexible work better.
- Heat shrink tubing additionally protects the adhesive seam from moisture.
- Duct tape acts as a mechanical fallback in case the adhesive ages.
- Silicone is suitable for sealing small gaps at the edge.
For 3D-printed holders, PETG is the better choice over PLA because it is more UV-resistant and does not break as easily in frost.
How to Secure the Adhesive Bond Against Wind and Weather
Duct tape only helps if you apply it correctly. Wrap it completely around the Petling, with an overlap, instead of just sticking a short piece over the adhesive joint. This way, no edge remains open for moisture to penetrate.
- Position heat shrink tubing precisely before heating; it can hardly be moved afterwards.
- Apply silicone or sealant to the edges of the magnet to seal micro-cracks in the adhesive.
- Choose screws or drilling if the cache is subject to heavy use, such as on busy paths with a lot of public traffic. Wear gloves and work with a sharp drill bit to avoid tearing the Petling.
- Apply camouflage paint only after the adhesive has fully cured, otherwise the solvent may reactivate some types of adhesive.
Anyone who spends time outdoors will quickly notice: the combination of adhesive and tape lasts significantly longer than any single measure.
Are 3D-Printed Holders for Petlings Worth It?
3D-printed holders solve a problem that adhesives never quite overcome: temperature changes. While adhesive bonds become brittle in frost and soft in heat, a mechanically inserted or screwed holder remains stable regardless of the weather. This makes them the most durable option, even if the construction effort is higher.
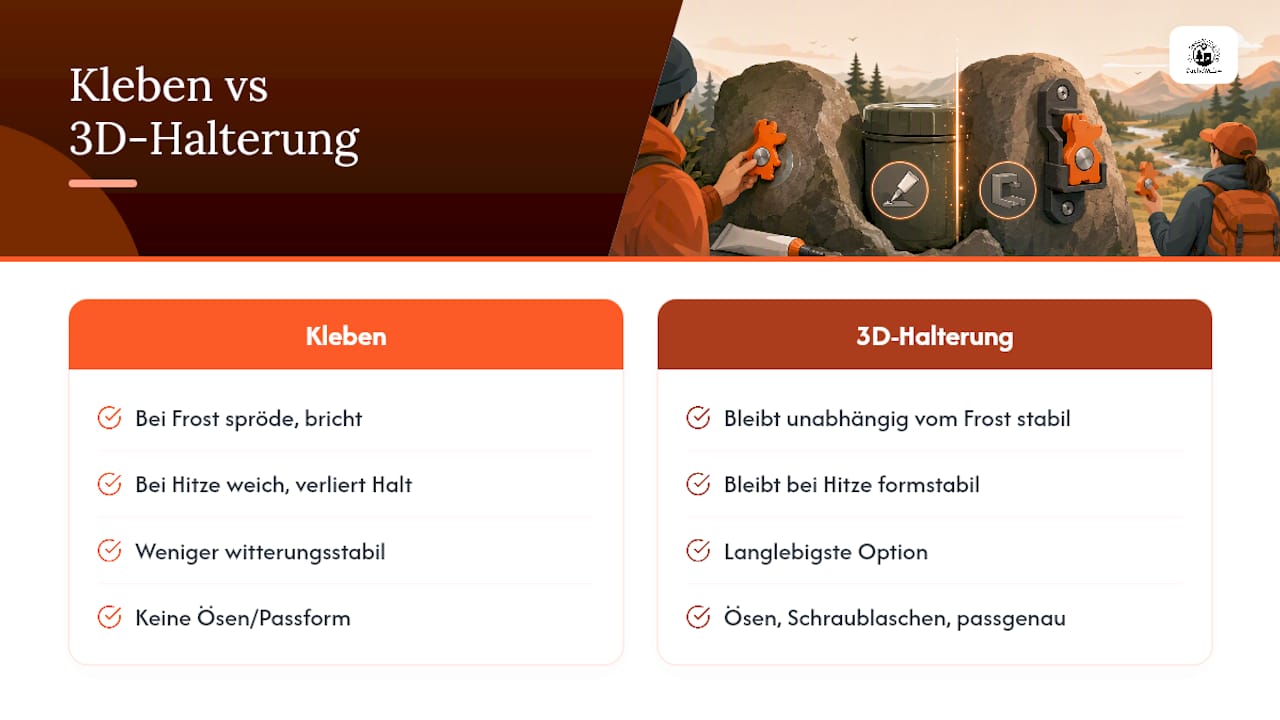
Good designs include eyelets for cable ties, small screw tabs, or a diameter that fits common post thicknesses. Some models sit directly on a 60-millimeter tube post, completely without glue or magnet, while others combine a firm mount with an embedded neodymium magnet for metal surfaces. PETG remains the material of choice here because it withstands moisture and UV radiation better than PLA and doesn't warp as easily.
Cachewerk offers ready-made Petling solutions with integrated magnetic holders that reflect exactly this: precisely manufactured, immediately ready for use, and without your own gluing attempts. For anyone who prefers to use a tested solution rather than experimenting themselves, this is often the more practical way.
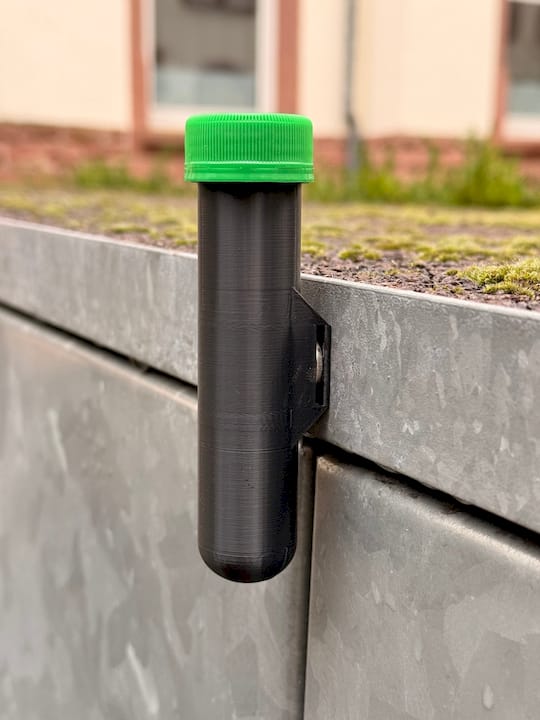
Pro Tip: Print the holder with a slightly thicker wall than the standard profile; thin walls tend to tear at the edges after one to two years of UV exposure.
How to Tell When a Magnet Needs Re-gluing
Even the best adhesive joint doesn't last forever. A quick, regular check is usually enough to avoid problems on site.
- Do a pull test. Gently pull on the magnet without tearing it off. If you feel play, the adhesive is weakening.
- Check for rust. Brown spots on the magnet's edge indicate damaged coating; the magnet should then be completely replaced.
- Examine adhesive joints. Fine cracks or a dull, brittle edge are typical signs of aging in adhesives.
- Immediate action on site. A strip of duct tape provides a temporary fix until re-gluing or replacement is possible.
- Long-term replacement instead of repair. After the second re-gluing, a new magnet or a mechanical holder is usually worthwhile.
Why Cachewerk Relies on Durable Fastenings
At Cachewerk, I see daily which hides truly last outdoors and which need repair after just one winter. That's why we rely on materials like PETG and mechanical securing rather than just adhesive for our own products. A cache that reliably holds up is more fun, both for the owner and for everyone who finds it. Those who want to delve deeper will find further practical tips and support for their own construction in our magnet building workflow.
— Benedikt
Ready-Made Solutions for Your Next Magnetic Cache
If you don't want to glue, sand, and test yourself, Cachewerk offers ready-made alternatives specifically designed for this purpose. The big advantage over your own DIY project: no trial and error, no waiting for curing, ready to use immediately.
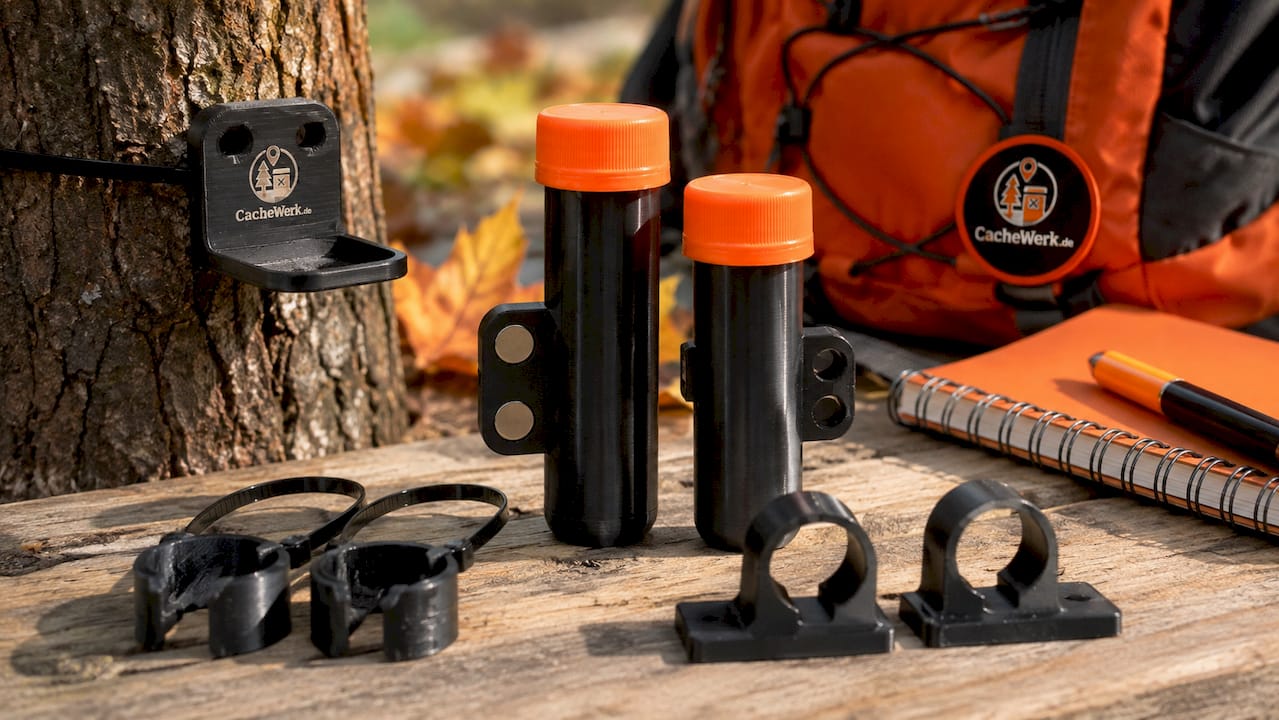
The screw hide with a secret compartment and integrated magnet is suitable for inconspicuous urban hides on metal surfaces, without any gluing attempts. If you're looking for a larger, robust hide, the Geocaching Ammo Box offers a weather-resistant solution with more storage space. For those who want to place their hide on a post or survey point, the Survey Point Hide with PETling and ground socket is available, completely 3D-printed and without wobbly adhesive joints.
Check out the Cachewerk shop, compare the options, and find the solution that suits your next hide.
Sources
If you want to print your own holders, you can find suitable STL files for the Petling holder for pipe posts and in the Cults3D model for Petling holders. Practical reports on construction methods are provided in the blog post about the magnetic Petling.