
Improving Cache Listings: A Guide for Geocachers & Owners
Three measures will help you achieve a faster review and a cache that lasts for years: a complete, rule-compliant listing, a watertight container made of corrosion-free material, and a solid maintenance schedule. This is the core of this guide to cache improvement.
Legally, photos in the listing may only be taken by the owner themselves or included with the express written permission of the copyright holder. The Opencaching guidelines make this clear. Unauthorized foreign images are a common reason for rejection and a real copyright risk.
Table of Contents
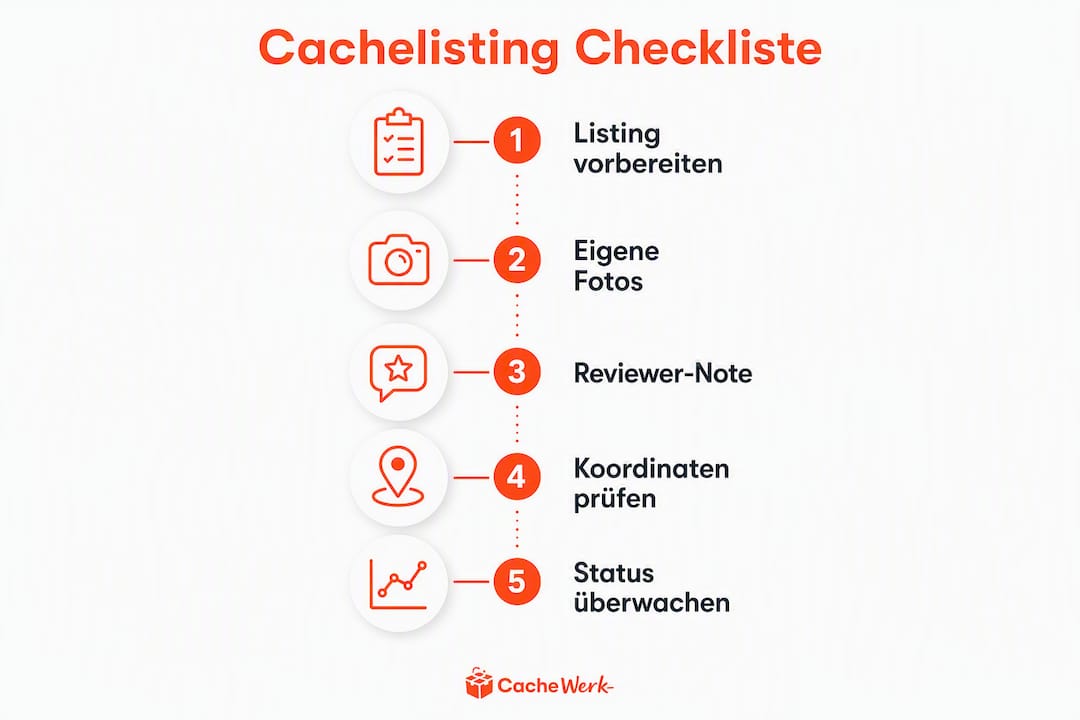
- What does a reviewer check first? The checklist for your listing
- Which materials really last a long time in Germany?
- How do you truly waterproof your cache?
- How do you plan location and maintenance so that your cache survives?
- How do you write a listing that reviewers and finders understand immediately?
- What do you do right before submitting?
- Which components and constructions work in practice?
- Key findings
- What I've learned as an owner
- Your next cache starts with the right set
- Useful sources and further links
What does a reviewer check first? The checklist for your listing
A reviewer usually looks at your listing in less than five minutes. Anything missing or unclear during this time will end up in your inbox as a query, which costs days.
Clear waypoints and parking instructions are particularly important according to the Opencaching Wiki, as they immediately show both travelers and reviewers that you know the location well and have thought about accessibility.
What belongs in the listing:
- Logbook/Logsheet: Physically present, dry, writable. No logbook automatically means rejection.
- Cache Type: Correct and unambiguous. A Traditional with intermediate stations is a Multi.
- Size: State honestly. Declaring a Nano as a Micro frustrates finders.
- Attributes: Set at least three to four relevant attributes (dog, bike, seasonal access).
- Difficulty/Terrain: Realistic. Terrain values stated too easily lead to bad logs.
- Coordinates: Checked on at least two devices, deviation less than 5 meters.
- Waypoints: Add parking lot, trailhead or intermediate stations as additional waypoints.
- Hints: Brief but helpful. Not a full spoiler, but a real hint.
- Spoiler images: Upload, set "do not display" option, then embed specifically via editor.
- Photos: At least one own preview image. Observe copyright.
Template for a reviewer note in special cases:
Pro Tip: Reviewers appreciate it if you explicitly state in the listing how you reach the cache and how often you maintain it. This signals responsibility and accelerates approval.
Do: Parking coordinates as a waypoint, clear language, own photos, reviewer note for mystery mechanics. Don't: Foreign images without permission, vague coordinates, missing size information, mystery without explaining the mechanics.
Which materials really last a long time in Germany?
Central European climate is tough on geocaches: frost in winter, continuous rain in autumn, UV radiation in summer and occasionally curious animals. The choice of material decides whether your cache will still function perfectly after two years or needs to be replaced after only six months.
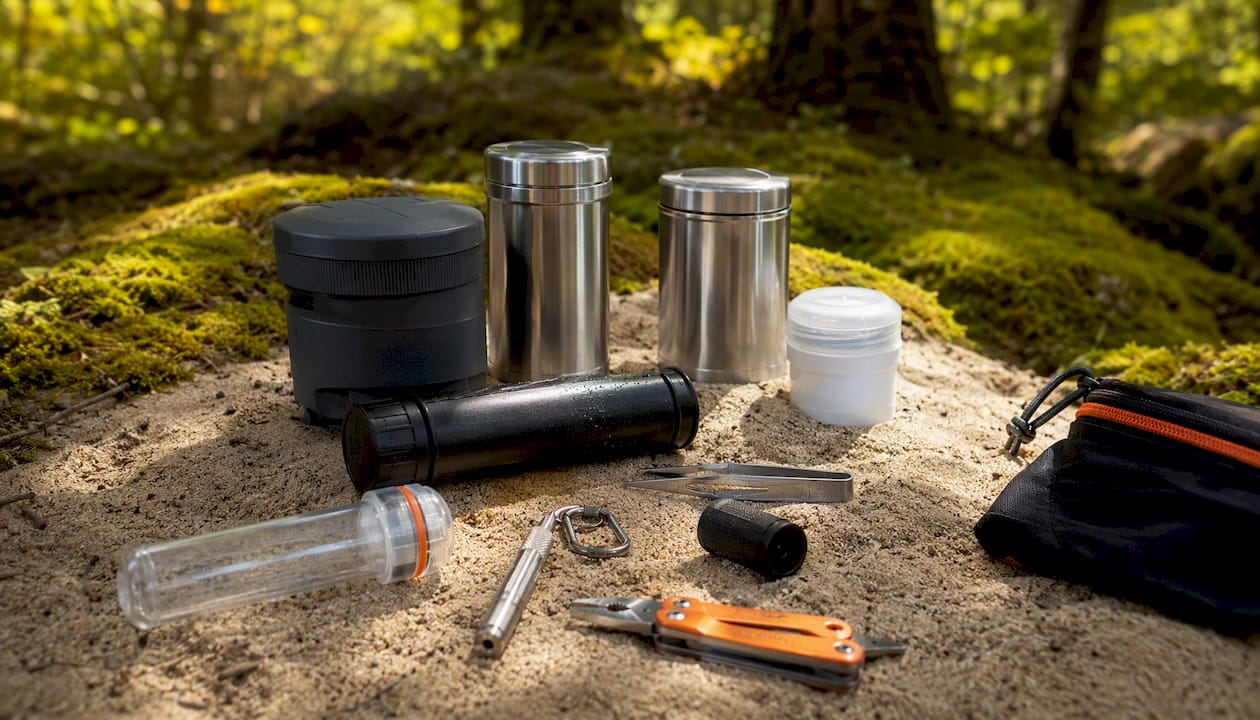
Proper material selection and regular maintenance significantly increase the lifespan and attractiveness of a cache. Bag-free hides are expressly recommended because plastic bags trap moisture instead of wicking it away.
| Material Category | Water Resistance | Corrosion Resistance | Maintenance Effort |
|---|---|---|---|
| Stainless Steel (rust-free) | High (with O-ring) | Very High | Low |
| PETG (3D-printed) | Medium to High | High | Medium |
| Polypropylene (PP) | High (screw cap) | High | Low |
| Aluminum (anodized) | Medium | Medium | Medium |
| Magnetic Container (Nano) | Low to Medium | Medium | High |
Stainless steel is the most durable choice for exposed locations but adds weight. 3D-printed PETG allows for individual shapes and is more UV-resistant than PLA, but requires careful post-processing of the print layers to prevent capillary channels. Magnetic containers are practical for urban micros but susceptible to condensation with temperature fluctuations.
Camouflage and mounting principles further extend durability: no direct ground contact (moisture creeps up), thermally decouple the interior from the outer casing where possible, and choose stainless steel fasteners instead of galvanized steel.
Pro Tip: Urban micros benefit from magnetic mounts with stainless steel screws. For forest caches: Hang the container, don't just place it. A hung PETling dries faster than one lying on the ground.
How do you truly waterproof your cache?
A leak test before deployment is not a luxury, it's a must. Caches that get wet after the first rain quickly receive "Cache needs maintenance" logs and harm your reputation as an owner.
Step-by-step: Sealing and testing
- Prepare the casing: Wipe all surfaces dry and grease-free. Completely remove old sealants.
- Choose sealant: O-rings for screw caps (silicone O-ring, Shore hardness 50–70), silicone sealant for seams and transitions, epoxy resin for permanent connections on mounts.
- Insert logbook: Into a small zip-lock bag or directly into a waterproof liner. Include a pencil, not a ballpoint pen (ink runs with moisture).
- Observe drying time: Silicone needs at least 24 hours, epoxy 12–48 hours depending on the product. Do not close earlier.
- Mount closures: Screw caps with light torque, not with force. Overtightened caps deform the sealing surface.
- Water test at home: Place the fully closed container in a bowl of water for 30 minutes. Then open and check the interior for moisture.
- Field test: Place the cache at the planned location for 24–72 hours (not yet listed). Then open and check the logbook for moisture.
Important for the field test: Document the result in writing, e.g., "Water test passed on March 15, 2026, interior dry after 72 h field test." This note belongs in your maintenance log.
Checklist for the leak test:
- Water test at home: Yes / No
- Dry inside after 30 minutes: Yes / No
- Field test 24–72 h: Yes / No
- Logbook dry after field test: Yes / No
- Pencil available: Yes / No
Environmental note: Do not use solvent-based adhesives and epoxy resins in nature. Cure at home, then deploy. Old sealants and packaging belong in household waste, not in nature.
How do you plan location and maintenance so that your cache survives?
Durability doesn't start with the container; it starts with the choice of location. A perfectly sealed cache in a poorly chosen spot will still quickly become a problem child.
Rule of thumb: A good location is one you can reach in 30 minutes. Anything further away means you'll hesitate when you get a "Cache needs maintenance" log.
Plan your maintenance frequency realistically:
- First three months: Monthly check. New caches often still have sealing problems or are found and touched more frequently.
- From month four: Semi-annual check as a minimum, quarterly for exposed locations.
- After every winter: Mandatory check. Frost and meltwater heavily affect seals and containers.
Location criteria you should check before deployment: Vandalism risk (busy places during the day are often safer than secluded ones), nature conservation restrictions (national parks, FFH areas, bird sanctuaries), and whether you need a permit. In Germany: Caches on private property require the owner's permission; in protected areas, often the permission of the responsible authority. The practical guide to site selection from Cachewerk can be found in the blog.
If you receive a "Cache needs maintenance" log, respond within seven days. Write an owner log with your maintenance plan. Multiple unaddressed maintenance logs will lead to reviewers disabling the cache. Keep your maintenance log up to date and share relevant information with the local community, for example, if seasonal closures make a visit impossible.
How do you write a listing that reviewers and finders understand immediately?
A good listing is not a novel. It's a clear instruction manual for your cache. Intuitive structuring with clear waypoints and concise hints noticeably reduces reviewer queries.
Recommended description structure:
- Short description (2–3 sentences): What awaits the finder? What is special about the location?
- Background/Story (optional, max. 150 words): Why did you choose this location? Local history, natural особенности, personal connection.
- Difficulty and terrain hints: Specific. "Steep path, sturdy footwear recommended" is better than "moderately difficult."
- Waypoints: Parking lot with coordinates, trailhead if necessary, intermediate stations for multi-cache.
- Final hint: Brief. Don't reveal too much, but give a real tip.
Photos: Upload an environment photo before placement (no spoiler), and after placement, a photo of the hiding spot without a direct view of the cache. Mark spoiler images with "do not display" when uploading and then embed them specifically at the correct location in the text using the editor. This prevents them from appearing as annoying placeholders in the gallery.
Copyright: Use only your own photos or images with written permission. External linked images can disappear or change at any time. This makes your listing unstable and is legally risky.
Pro Tip: Set attributes so that reviewers have no questions. "Night Cache" as an attribute plus a short note in the description that the cache can also be solved during the day prevents misunderstandings.
What do you do right before submitting?
The final steps before submission often determine whether your listing is approved in one go or ends up in a query loop.
Template for a reviewer note: "This Traditional is on public land (city forest, no permit required). Coordinates checked with Garmin eTrex and smartphone app, deviation under 3 meters. Logbook inserted, leak test passed. Maintenance carried out by me, travel time approx. 20 minutes."
Final checklist:
- Coordinates checked on two devices
- GPX file imported and waypoints field-tested
- All photos checked for functionality (do they load correctly?)
- Logbook physically inserted, pencil included
- Leak test documented
- Reviewer note included (always for special cases, otherwise recommended)
Prior communication with reviewers shortens the waiting list and allows for compliant solutions before a listing is officially submitted. This applies especially to Mystery Caches with unusual mechanics.
Common reasons for rejection and how to avoid them:
- Missing parking instructions: Always create a waypoint for the parking lot.
- Mystery mechanic unclear: Explain in the reviewer note how the solution works. For Mystery Caches, no emails may be sent or programs executed; passive media files like WAV or MP3 are allowed. Reference coordinates more than 3.2 km from the final require an explanation.
- Inaccurate coordinates: Measure multiple times, calculate average.
- Foreign photos without permission: Use only your own images.
- Cache buried: Not allowed. Always place it accessibly.
Which components and constructions work in practice?
Theory is good. But which combination of container, seal, and mount really lasts? Here are two practical setups that have proven their worth.
Setup 1: Urban Micro
- PETling (75 mm or 100 mm) with silicone O-ring on the lid
- Stainless steel magnetic mount, on lamppost or metal beam
- Nano logsheet, rolled and inserted
- Pencil stub attached with rubber band
Setup 2: Weatherproof Forest Multi
- Polypropylene screw box (1 liter) with silicone seal
- Hung on a branch with UV-resistant nylon cord, no ground contact
- Weatherproof logbook (coated paper or Tyvek insert)
- Pencil and spare logbook in a separate zip-lock bag
Both setups can be implemented directly with a starter bundle. Cachewerk offers ready-made sets that combine PETling, a weatherproof logbook, and a mount.
Pro Tip: Always place a spare logbook in the cache. If finders fill the first one, they can switch it themselves. This significantly reduces maintenance logs and keeps your cache active.
Anyone looking for robust geocache containers and DIY solutions will find specific instructions and product recommendations for both scenarios in the Cachewerk blog.
Key findings
A review-ready listing combines complete mandatory information, own photos, and a clear reviewer note with a waterproof, low-maintenance container at the right location.
| Topic | Details |
|---|---|
| Increase review speed | Provide a reviewer note for special cases and check coordinates on two devices. |
| Ensure waterproofness | Use silicone O-ring or sealant, document home water test and 72-h field test. |
| Plan location and maintenance | Choose a location within a maximum 30-minute drive, check monthly for the first three months. |
| Photos and copyright | Only include your own photos or images with written permission, mark spoilers correctly. |
| Cachewerk as a solution | Starter bundles with PETling, logbook, and holder accelerate the setup of ready-to-use caches. |
What I learned as an owner
My first cache had everything wrong that could be wrong. Coordinates that were almost 10 meters off. A logbook in a simple plastic bag. And a description that talked more about my enthusiasm for the place than about the way there.
The first maintenance log came after three weeks. "Logbook soaked." Of course. The bag had opened, water had entered. I drove there, replaced everything, and this time used a real PETling with an O-ring. Since then, not a single moisture log.
What really surprised me: How much a good maintenance plan makes a difference. Not because caches break down so often, but because as an owner you know when you were last there. This knowledge makes you faster and more credible when finders ask questions or report problems.
The second learning moment was the reviewer's note. I had submitted a mystery cache with an unusual mechanism, without explanation. The reviewer rejected it and asked for clarification. Three days lost. Since then, for every special case, I write a short, factual note. Five sentences. No effort, but the difference between one day and a week of waiting time.
Further case studies on specific cache setups and maintenance protocols can be found in the Cachewerk blog.
Your next cache starts with the right set
Anyone who wants to improve a listing needs not only good texts but also the right material. Cachewerk has put together two starter bundles that allow you to set up a review-ready cache directly.
The Geocaching Starter Bundle 1 contains a PETling, a weatherproof logbook, and a holder. All coordinated, ready for immediate use. The Geocaching Starter Bundle 2 comes with a hanging device instead of a holder, ideal for forest caches without a metal base. Those who regularly maintain caches and want to transport equipment safely will find the Crossbody Bag for Geocachers a practical addition for fieldwork.
Check out the sets directly in the Cachewerk shop and set up your next cache with the right material.
Useful sources and further links
- Checklist for new cache (Opencaching Wiki): Official checklist with material recommendations, location criteria, and maintenance tips for new cache owners in Germany.
- Creating a cache description / listing (Opencaching Wiki): Step-by-step guide to setting up a listing, including spoiler image management, copyright, and editor functions.
- Cache description / listing (Opencaching Wiki): Detailed explanation of all listing fields, waypoints, and language options.
- Checklist for cache listing and fast review (gc-reviewer.de): Reviewer-side checklist with common reasons for rejection and tips for prior communication.
- Inserting images in cache listings (gc-reviewer.de): FAQ with concrete steps for uploading, setting spoiler flags, and embedding images.
- Cachewerk Blog: Location selection: Practical guide to location selection with accessibility and maintenance recommendations.
- Cachewerk Blog: Robust containers: Instructions and product recommendations for durable geocache containers and DIY solutions.