
DIY Geocache Workflow: Planning Creative Hides
A structured DIY geocache workflow is the method by which you plan, build, and permanently maintain geocache hiding spots. Once you've established this process, you'll save a significant amount of time with each new hide. The official Geocaching app, from version 10.7.0 onwards, allows direct tagging, editing, and submission of traditional caches directly from your smartphone. Cachewerk offers suitable materials and ready-made hiding solutions that seamlessly integrate into any crafting plan. Creative, durable hides excite the community and ensure good logs.
What tools do you need for a geocache workflow?
Good planning begins with the right tools. For the crafting part, a drill, wood preservative paint, strong magnets, and weatherproof adhesive tape are often sufficient. In addition, there are digital tools that significantly simplify the geocaching workflow.
Basic Crafting Equipment
- Drill and jigsaw for wood and plastic work
- Wood preservative paint for pre-treating wooden surfaces before placement
- Neodymium magnets for magnetic attachments to metal surfaces
- Heat shrink tubing for securing motor shafts in mechanical hides
- Weatherproof sealing tape for all openings and joints
Pro Tip: Buy heat shrink tubing in various diameters. Mechanical connections between the motor shaft and attachments will last significantly longer with it than with glue alone.
Digital tools at a glance
| Tool | Function | Area of Application |
|---|---|---|
| Geocaching App 10.7.0+ | Tagging, Editing, Submitting Tradis | Mobile workflow on-site |
| OpenSAK | Automatic cache sorting along the route | Tour planning up to 10 points |
| SeaTable | Central coordination and hint management | Planning complex cache routes |
| Cachekeeper | Digital record-keeping for maintenance and logbooks | Management of 5+ active caches |
OpenSAK is an open-source tool with a trip planner function that automatically sorts caches along your route. This saves a lot of driving time during maintenance tours with multiple hides. SeaTable offers a free template specifically for geocaching planning, with which you can centrally store coordinates, hints, and tasks.
How to build a creative hide step-by-step?
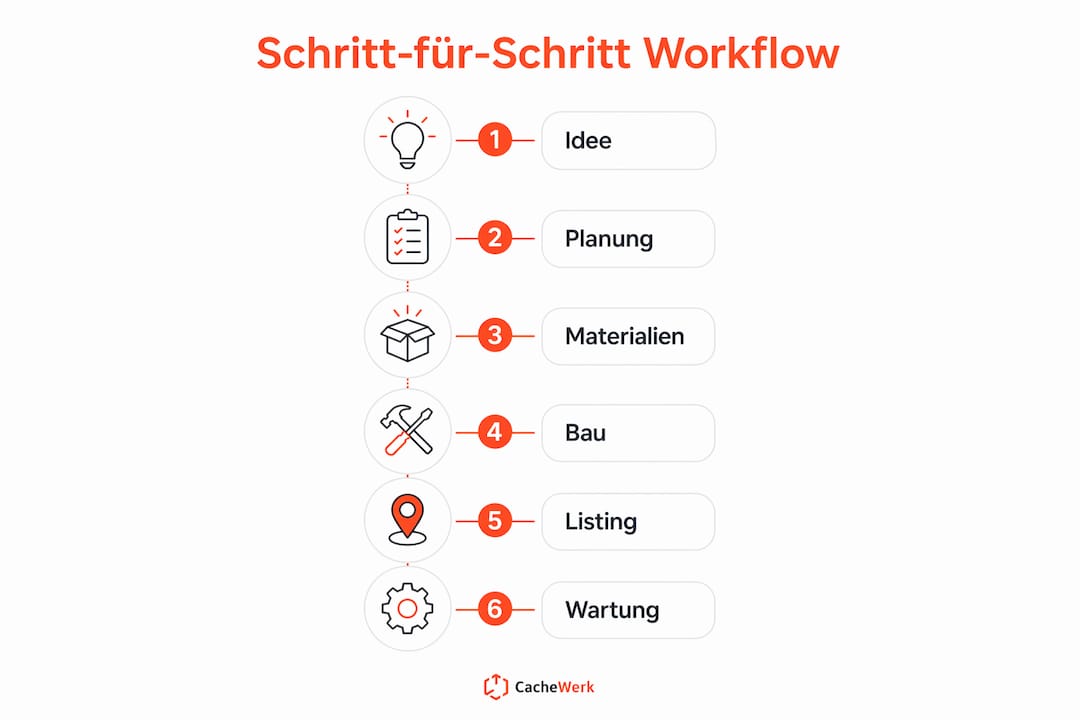
Building a hide follows a clear process. Once this process has been documented, it can be reused for every new project. This saves time and prevents important steps from being forgotten.
The workflow from idea to listing
-
Define idea and concept. Decide whether you are building a simple container hide or a mechanical puzzle. Roughly sketch the shape, size, and camouflage.
-
Scout location and determine coordinates. Go on-site, check visibility and accessibility. Note the GPS coordinates directly at the location using the Geocaching App 10.7.0+.
-
Procure and prepare materials. For wooden hides like the Geocaching Cactus, wood preservative paint is mandatory before assembly. Plastic parts from the hardware store can often be assembled into a functional container in under 15 minutes.
-
Build and test the hide. Fully assemble the hide before placing it. Test the opening mechanism, waterproofness, and camouflage at home.
-
Insert logbook and contents. Use weatherproof logbooks. Roll the logbook loosely so it can be easily removed.
-
Place the hide and check protection. Securely attach the hide. Check if water can enter and seal if necessary.
-
Create and submit listing. Write a clear description with hints on difficulty and terrain. Upload photos and submit the listing via the app or website.
-
Set maintenance schedule. Immediately enter the first maintenance date into your calendar. For wooden hides, plan a visual inspection after the first rainy period.
Pro Tip: Photograph every step of the construction. These photos will help you later with troubleshooting and creating the listing.
Those who build creative geocaches consider maintenance during construction. A hide that you can only open with special tools will make every logbook round a test of patience.
How do you automate maintenance and organization in the workflow?
Structured digital record-keeping is the biggest productivity leap for any cache owner with more than five active hides. Those who don't centrally manage their caches quickly lose track of due maintenance and outdated listings. This leads to annoyance in the community and bad logs.
Digital management with Cachekeeper and Co.
Cachekeeper is an approach to systematically record all your own hides, their coordinates, maintenance history, and logbook statuses. Experienced crafters even set up relational databases based on Django or Python for this purpose to manage mysteries, logbooks, and maintenance flawlessly. This sounds complex but pays off significantly with about ten active caches.
For most crafters, a well-maintained table in SeaTable or a similar tool is sufficient. It's important to record the following points for each cache:
- Location coordinates and last on-site check
- Logbook status (full, damp, damaged)
- Next maintenance date with a specific date
- Material condition of the container and camouflage
- Open finder logs with hints of problems
AI tools for repetitive tasks
AI-based tools like ai-logger can automate log entries and save time when writing. The GitHub project ai-logger generates log entries based on your notes without losing your personal style. Artificial intelligence is increasingly being used in geocaching for such routine tasks.
| Task | Manual | With digital tool |
|---|---|---|
| Maintenance planning | Calendar or notes | Cachekeeper, SeaTable |
| Logbook reminder | Randomly when passing by | Automatic reminder |
| Writing logs | 5–15 minutes per log | ai-logger: Minutes saved |
| Tour planning | Map and estimation | OpenSAK: Route up to 10 points |
What mistakes should you avoid in the geocache workflow?
Errors in the crafting workflow cost time and frustrate finders. The most common problems don't arise during construction, but during planning and material selection.
Typical sources of error and their solutions
-
Too thin container walls. Thin household plastic cannot withstand frost and heat. Use containers with at least 2 mm wall thickness or opt for proven solutions.
-
Lack of weather protection for wood. Wooden hides without pre-treatment swell, mold, and fall apart. Wood preservative paint before assembly is not an optional step.
-
Mechanical connections without heat shrink tubing. Gluing motor shafts directly to attachments risks play and failure. Heat shrink tubing between the shaft and component reliably transmits power and lasts significantly longer.
-
No maintenance plan in the listing. If you don't have a plan, you won't do maintenance. Lack of maintenance organization leads to neglected hides and complaints from the community.
-
Coordinates only estimated. GPS coordinates that you have only roughly read out will lead finders astray. Measure the coordinates multiple times and average the result.
Pro Tip: Create a simple ten-point checklist that you check off before each placement. This includes: waterproofness, logbook inserted, coordinates checked, camouflage tested, maintenance date entered.
Those who build DIY containers from hardware store materials often have a functional hide ready in under 15 minutes. That's impressively fast. But speed in construction must not come at the expense of quality control.
Key Takeaways
A well-thought-out DIY geocache workflow combines craftsmanship with digital organization, thereby preventing the most common mistakes during construction, placement, and maintenance.
| Topic | Details |
|---|---|
| Tools and Software | Geocaching App 10.7.0+, OpenSAK and SeaTable fully cover planning and management. |
| Step-by-step construction | From concept to listing, every hide follows a fixed process with quality control. |
| Maintenance organization | Cachekeeper or SeaTable prevent forgotten maintenance for more than five active caches. |
| Common errors | Lack of weather protection and no maintenance planning are the most common causes of cache problems. |
| Material selection | Heat shrink tubing and wood preservative paint significantly increase the lifespan of mechanical and wooden hides. |
What I've learned after years as a geocaching crafter
For a long time, I built every cache spontaneously. An idea in the morning, a hide in the afternoon. It was fun, but after the tenth active cache, I lost track. I forgot maintenance, logbooks were full, finders complained.
The turning point was a simple table. Not a sophisticated system, just a list with location, last visit, and next maintenance date. That did more than any new crafting tool.
What I do differently today: I plan maintenance during construction. If I build a hide that I can only open with difficulty, that's a mistake. Maintainability is not a luxury, but a duty to the community.
Creativity and structure are not mutually exclusive. The best hides I've built were also the easiest to maintain. A good concept combines both. If you document and photograph your ideas, you can also show them to other crafters. This strengthens the community and provides motivation for the next project.
My honest advice: Start with a clear workflow, even if it's simple. You can always expand it. But without structure, frustration grows faster than the collection.
— Benedikt
Cachewerk products for your crafting workflow
If you want to support your workflow with proven materials, Cachewerk offers a wide selection of ready-made hides and accessories.
The Geocaching Starter Bundle includes a PETling, logbook, and holder and is the fastest way to get started with new hides. If you are looking for an eye-catching yet weatherproof hide, the Mini Birdhouse offers a ready-made solution with a film canister or screw-top container. All products at Cachewerk are designed for durability and can be directly integrated into your crafting workflow. Browse the Cachewerk assortment and find the right hide for your next project.
FAQ
What is a DIY geocache workflow?
A DIY geocache workflow is a structured process for planning, building, and maintaining geocache hides. It includes steps from idea generation and material procurement to listing and regular maintenance.
Which app is best suited for the mobile workflow?
The official Geocaching app, from version 10.7.0 onwards, allows direct tagging, editing, and submission of traditional caches on-site. It is therefore the central tool for the mobile part of the workflow.
How do I manage many active caches simultaneously?
From five to ten active hides, digital management with tools like Cachekeeper or SeaTable becomes worthwhile. Both allow for central recording of coordinates, maintenance dates, and logbook statuses.
Which material lasts longest for DIY hides?
Wooden hides pre-treated with wood preservative paint and plastic containers with at least 2 mm wall thickness last the longest. For mechanical hides, heat shrink tubing on motor shafts significantly extends their lifespan.
How do I automate the writing of log entries?
The open-source project ai-logger on GitHub automatically generates log entries based on your notes. It saves time for repetitive logs while retaining your personal writing style.
