
Scouting a Cache Location: A Step-by-Step Guide for Owners
Before placing your first cache, you should have completed five things. Check accessibility, safety, and environmental risks at the planned location. Obtain permission from the landowner or the responsible authority. Verify that the minimum distance of 161 meters to all physical caches and waypoints is maintained. Measure and document the exact coordinates on-site. Then choose a waterproof, well-camouflaged container and set up a maintenance plan. The community also recommends having collected at least about 20 finds as a seeker before hiding one yourself. This significantly sharpens your eye for realistic locations.
- Check accessibility, safety, and environmental risks
- Obtain permission from the owner or authority
- Check minimum distance of 161 m to physical waypoints and other caches
- Measure and document exact coordinates on-site
- Choose and label a suitable, waterproof container
- Establish a maintenance plan before the listing goes live
Key Takeaways
A compliant, long-lasting cache is created through six mandatory steps: checking the location, obtaining permission, verifying the 161-meter distance, measuring coordinates, selecting a suitable container, and establishing a maintenance plan.
| Topic | Details |
|---|---|
| Maintain minimum distance | Physical caches and waypoints must be at least 161 meters apart. |
| Document permission | Obtain and keep written consent from the owner or authority before listing. |
| Measure coordinates multiple times | At least three measurements at different times, average the values, export GPX file. |
| Maintenance plan from the start | Plan quarterly visual inspections; respond to "Needs Maintenance" logs within two weeks. |
| Use Cachewerk products | Starter bundles, Ammo Box, Survey Point, and Rusty Bolt cover all typical location types. |
Table of Contents
- How does systematic on-site scouting work step by step?
- Whom do you need to contact for permission?
- How do you check the 161-meter minimum distance and resolve conflicts?
- How do you measure coordinates accurately and create waypoints?
- Which container suits which location?
- How do you plan the maintenance of your cache?
- What safety and environmental rules apply when placing?
- What I learned after many scouting missions
- Suitable Cachewerk products for your next cache
- Sources
How does systematic on-site scouting work step by step?
A good cache location scouting workflow follows a fixed sequence so you don't forget anything on-site. Go through the following points in order:
- Check accessibility: Is the location safely accessible on foot? Are there access restrictions, fences, or seasonal closures?
- Assess muggle risk: How many passers-by are there? Does the location allow for discreet searching, for example, from a bench, without attracting attention from bystanders?
- Evaluate longevity and maintainability: Is the location near you? Can you reach it within 30 minutes if needed?
- Clarify environmental compatibility: Are there protected plants, animals, or biotopes in the immediate vicinity?
- Explore camouflage options: Which natural or structural elements are suitable for camouflage without causing damage?
- Make a decision: Keep, adapt, or discard the location. Discard criteria include, for example, access restrictions, too high a muggle density, or the inability to obtain permission.
Pay attention to seasonal changes. Falling leaves in autumn can suddenly make a well-camouflaged cache visible. Floods or snow can drastically change discoverability and accessibility. Experienced owners ideally check locations in two different seasons, as the Opencaching checklist recommends.
Take photos on-site from all four cardinal directions, as well as a detailed photo of the exact placement point. A quick sketch with measurements and landmarks will save you a lot of time during maintenance later.
Pro Tip: Also note where you parked and how long the walk takes. This information helps with your maintenance plan and makes the "parking nearby" listing attribute credible.
According to the official blog, a first-class location should offer real added value to seekers: a view, historical significance, or a playful challenge. A hidden container alone is not enough.
Whom do you need to contact for permission?
Obtaining permission is mandatory in most cases, whether it's private property, municipal land, a park, or a nature reserve. The owner bears full responsibility, as the official permission guide clearly states.
- Private property: Contact the owner directly, in person or in writing.
- Municipal areas: Contact the responsible city office or green spaces department.
- Parks and forests: Inquire with the park administration, forestry office, or nature conservation authority.
- Nature reserves: Lower nature conservation authority of the district; explicit written permission is particularly important here.
For each conversation, prepare photos, a site sketch, the planned container type, and your maintenance intervals. Feel free to mention the geocaching community and refer to the local reviewer or regional wiki. This appears professional and significantly increases the probability of success. Regional listing requirements can also be found on Gc-reviewer.
Sample email (to copy and adapt):
Subject: Request for placement of a geocache on your property
Dear Sir or Madam,
I am an active geocacher and would like to place a small, weatherproof container (approx. [size] cm) on your property. The container will be discreetly camouflaged, bear an official geocaching label, and will be regularly maintained by me (at least every three months). If desired, I will remove it at any time. I look forward to your feedback and am available for questions at [phone number/email].
Sincerely, [Name]
How do you check the 161-meter minimum distance and resolve conflicts?
Groundspeak's Geocaching Guidelines stipulate: physical caches and physical waypoints must be at least 161 meters (0.1 miles / 528 feet) apart. This rule also applies to hidden finals in multi-caches.
| Situation | Procedure |
|---|---|
| Distance maintained | Proceed with coordinate measurement and listing |
| Distance too short | Check for alternative locations in the vicinity |
| Hidden waypoint of another cache in the way | Contact reviewer and clarify the situation |
| No alternative location possible | Reconsider cache type or pause project |
Here's how to reliably check the distance:
- Open the map on geocaching.com and activate the display of all caches in the vicinity.
- Use the listing map when submitting: it automatically shows conflicts.
- Note that hidden waypoints of other caches are not always visible on the public map. When in doubt, ask the local reviewer.
If the distance is tight, a small shift of the location by 20–30 meters often helps. Alternatively, you can adjust the cache type, for example, from a Traditional to a Multi, whose physical final is then further away.
How do you measure coordinates accurately and create waypoints?
Accurate coordinates are the heart of every cache. Typical GPS fluctuations are 5–10 meters, depending on the device, cloud cover, and tree canopy. Here's how to minimize errors:
- Calibrate your GPS device before measuring and wait until it receives at least four satellites.
- Measure the coordinates at least three times at different times of day and average the values.
- Hold the device steady and at chest height, not directly on the ground.
- Dedicated GPS devices (e.g., Garmin eTrex series) generally provide more stable readings than smartphones, especially under dense foliage.
For multi-caches and mystery caches, you create additional waypoints: starting point, intermediate stages, and the physical final. Only the starting point and public stations are visible to seekers. The final remains hidden. Export all coordinates as a GPX file and save a screenshot as a backup.
Pro Tip: Include a note in the listing about the expected GPS accuracy at the location, for example, "Under dense foliage, the reading may deviate by up to 8 meters." This saves seekers frustration and reduces negative logs.
You can find more on searching techniques and navigation in the Cachewerk Geocache Search Workflow.
Which container suits which location?
The choice of container depends directly on the environment. A nano-hide in a city park appears inconspicuous; a large ammo box in the forest can survive for years without problems. Every container must be waterproof, bear a GC label, and contain a laminated or weatherproof logbook.
Camouflage methods should not cause damage to property or nature. Tape on tree bark, hammered nails, or broken branches are forbidden. Magnets, ground sleeves, and suspensions are the safest fastening options.
| Environment | Recommended container type | Camouflage / Attachment |
|---|---|---|
| City park, street | Nano-hide, Micro | Magnet, screw imitation |
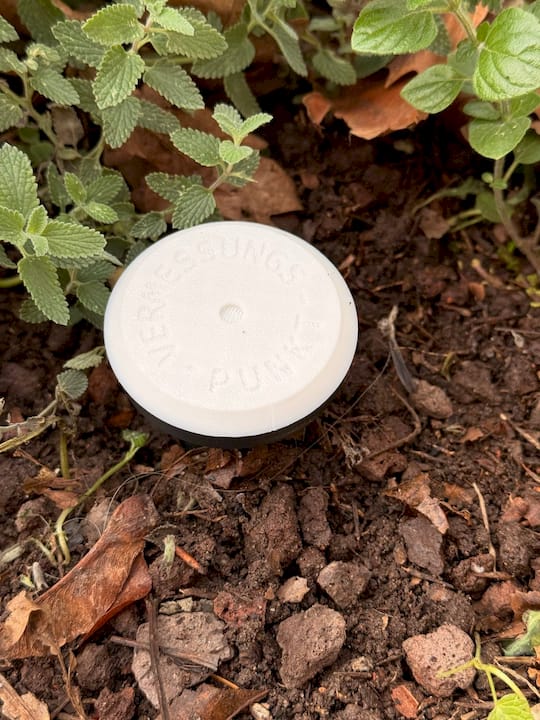
| Open space, meadow | Survey point with ground sleeve | Ground sleeve, inconspicuously recessed |
| Forest, nature | PETling, Ammo Box | Suspension, under leaves, wood look |
| Urban wall, railing | Rusty Bolt, magnetic box | Magnet, screw look |
Specific Cachewerk product solutions for these cases can be found further down in the article.
How do you plan the maintenance of your cache?
A cache without a maintenance plan is a cache on call. Plan fixed intervals from the start.
- Quarterly visual inspection: Logbook, watertightness, container condition, inventory.
- After every "Needs Maintenance" log: Respond within two weeks.
- After storm or flood: Immediate check if the location might be affected.
- Annual basic check: Re-measure coordinates, renew camouflage, replace logbook.
On-site maintenance checklist:
- Logbook dry and writable?
- Container sealed and undamaged?
- Camouflage still effective?
- Attachment (magnet, sleeve, suspension) secure?
- Coordinates still correct?
Archive a cache if it is permanently destroyed, the owner withdraws consent, or repeated problems cannot be resolved. An archived cache is not a defeat. It protects the community from frustrating searches.
What safety and environmental rules apply when placing?
You generally avoid sensitive zones or clarify them in writing beforehand. These include caves, protected biotopes, monuments, and bird sanctuaries. The Geocaching Magazine Workshop emphasizes: protecting sensitive areas and obtaining permissions are not formalities, but basic prerequisites.
Do's and Don'ts at a glance:
- Do: Only access the location on paved paths, restrict the search radius in the listing, give hints instead of risking damage.
- Don't: Place caches in caves, at monuments, or in protected biotopes without explicit permission.
- Do: Observe personal safety during scouting: suitable footwear, check weather forecast, do not go into rough terrain alone.
- Don't: Choose attachments that could endanger visitors (sharp edges, unstable mounts).
Document every owner's consent in writing and keep it. In liability matters, you as the owner are responsible. Written permission is your most important safeguard document.
For detailed legal questions regarding liability law, it is advisable to consult a specialized lawyer. This article provides general guidance, not legal advice.
What I learned after many scouting missions
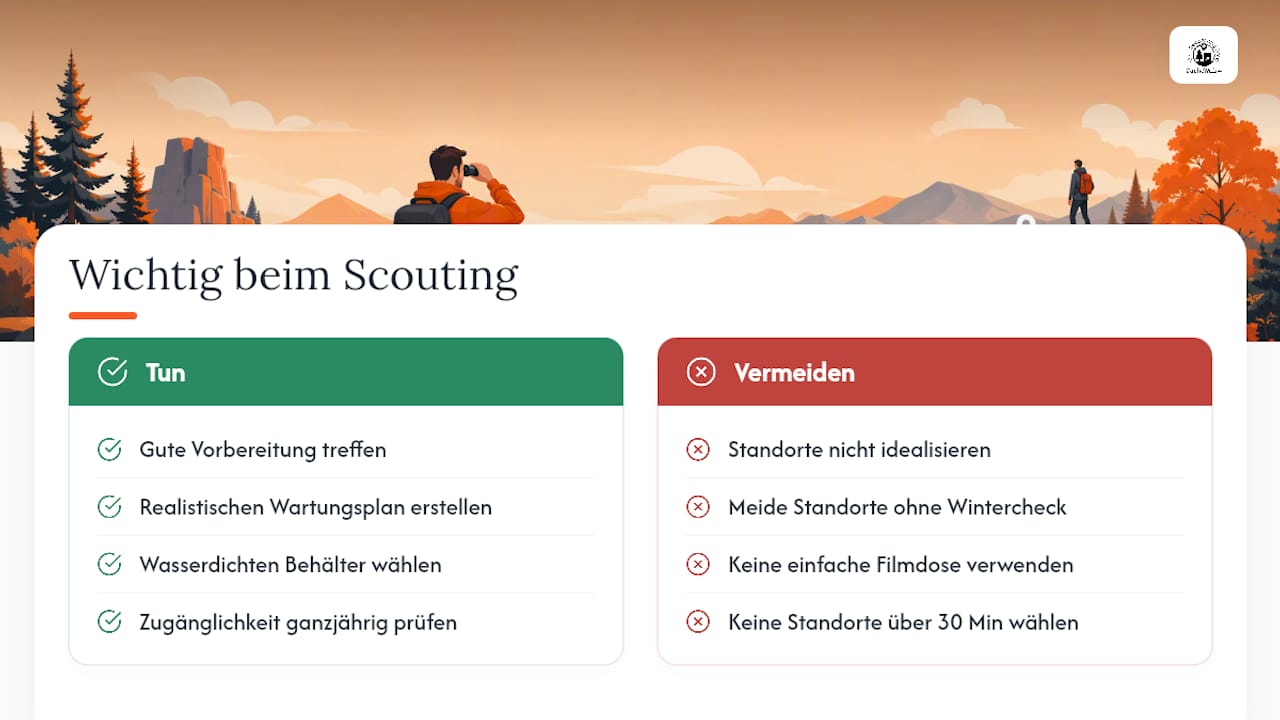
The most common mistake I see new cache owners make: they fall in love with a location and ignore problems. A place that seems perfect in summer can become inaccessible in winter due to snow or floods. And a cache that you can't reach within 30 minutes will eventually become a problem.
A concrete example: A cache in a small city park was archived after a few months because the container filled with water after every rain. The solution would have been simple: a waterproof PETling with a laminated logbook instead of a simple film canister. With the right container choice from the start, the cache would have lasted for several years without problems.
Good preparation, a realistic maintenance plan, and the right container make the difference between a cache that is archived after three months and one that brings joy for years.
Suitable Cachewerk products for your next cache
If you want to place a compliant, long-lasting cache, you need the right tools from the start. Cachewerk offers exactly that: well-thought-out products for every location type, without compromising on quality or camouflage.
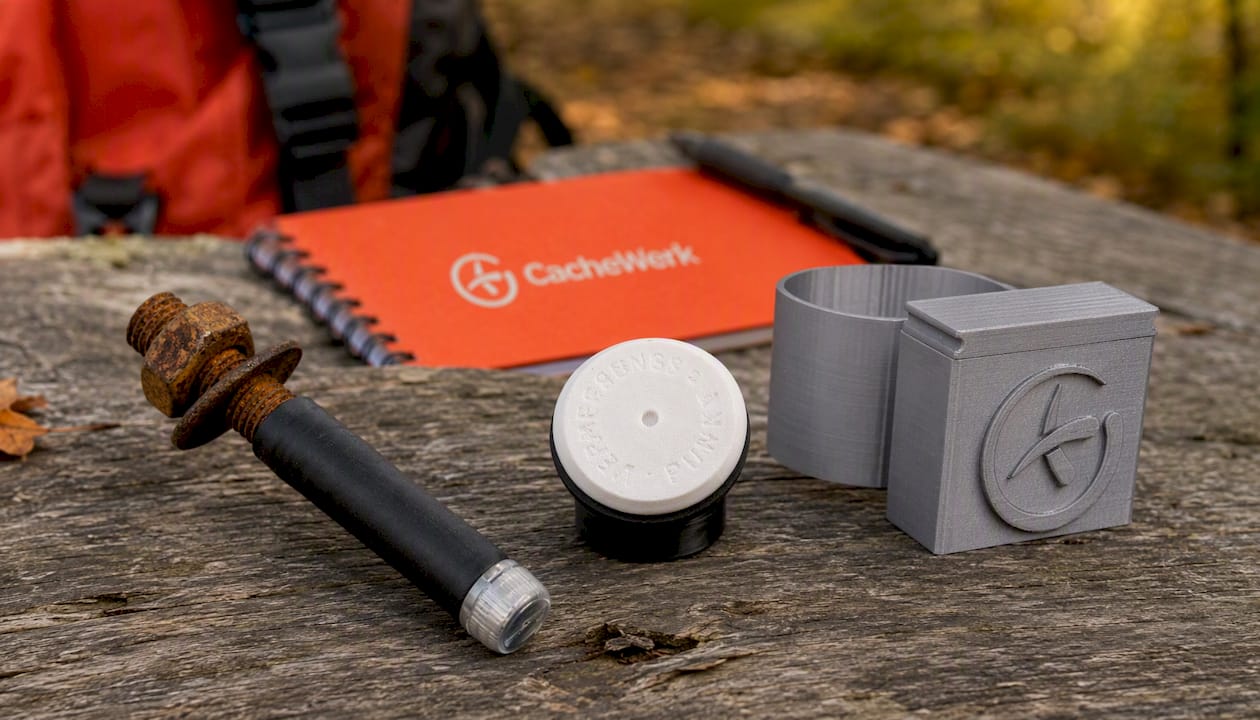
For beginners, Starter Bundle 1 (PETling + logbook + holder) and Starter Bundle 2 with suspension are the easiest way to get started: everything included, ready to use immediately. For outdoor finals in nature, the Ammo-Box Trick Edition is the most robust choice. In open spaces, the survey point with ground sleeve and PETling ensures secure, permanent fixation. Urban micro-caches are successful with the Rusty Bolt Nano-Cache, which even attentive passers-by won't notice. And for maintenance rounds with lots of accessories, the Crossbody Bag with Opencaching logo is the practical companion. Check out the complete range in the Cachewerk Shop and find the right set for your location.