
DIY Tips for Advanced Geocachers: Pro Guide
You've been hiding caches for years and know that a regular film canister cache doesn't impress anyone anymore. If you're one of the advanced geocachers who want to take their DIY projects to the next level, you need more than basic knowledge. The best DIY tips for advanced geocachers combine technical mechanics, clever camouflage, and genuine storytelling. This guide will show you how to build caches that will keep the community talking for a long time.
Table of Contents
- Key Takeaways
- 1. DIY Tips for Advanced Geocachers: Planning and Quality Criteria
- 2. Properly Building Neodymium Magnets and Magnetic PETlings
- 3. Wooden Logbook Holder with Magnetic Closure
- 4. Camouflage and Color Design for Durable Cache Containers
- 5. Comparison of Typical DIY Cache Types and Applications
- 6. Robust Materials for Improved Cache Equipment
- 7. Practical Tips for Planning, Construction, and Community Engagement
- My Experiences with Advanced DIY Mechanics
- High-Quality Equipment for Your DIY Projects at Cachewerk
- FAQ
Key Takeaways
| Point | Details |
|---|---|
| Quality over Quantity | A well-planned cache with a story and mechanics makes a greater impression than ten ordinary hides. |
| Material Choice is Crucial | Neodymium magnets, UV-resistant paints, and robust plastics significantly extend lifespan. |
| Camouflage Needs Strategy | Multi-layered camouflage paints on roughened surfaces last much longer than simple painting. |
| Mechanics Need Guidance | Magnetic containers with mechanical guidance prevent malfunctions and frustrated seekers. |
| Maintenance is Mandatory | Regular checks and clear listing hints ensure long-term functioning caches. |
1. DIY Tips for Advanced Geocachers: Planning and Quality Criteria
Advanced cache builders don't start with the container. They start with a question: What experience should the finder have? Quality criteria such as creativity, storytelling, and good description are at the top of the list. Technical sophistication alone is not enough.
The official Geocaching Hiding Guidelines provide the framework: safety, environmental protection, and sufficient distance from other caches. Within this framework lies your creative scope. Use it.
What makes a great cache:
- Waterproof container with a flawless logbook and dry contents
- Thematic description that sparks the finder's curiosity
- Thoughtful placement that matches the mechanics and the environment
- Honest difficulty and terrain ratings without exaggeration or understatement
- No damaged container, no wet logs, no loose parts
The community doesn't judge quality by size. A good cache is one that people still talk about afterward. That's the standard you should apply.
2. Properly Building Neodymium Magnets and Magnetic PETlings
Magnetic PETlings are among the most popular DIY constructions for advanced geocachers. But many fail due to material selection. Household magnets are simply too weak. Neodymium magnets with 10 mm diameter and 5 mm thickness, each with about 2.4 kg holding force, are the standard that works.
Here's how to build a robust magnetic PETling:
- Select magnets: Two neodymium magnets per container, each 10 mm diameter and 5 mm thickness.
- Prepare surface: Lightly roughen adhesive surfaces on the PETling and magnets.
- Choose adhesive: Temperature-resistant adhesive such as Pattex Repair Extreme. Household magnets are too weak; only high-quality neodymium magnets with suitable adhesive will hold permanently.
- Allow to cure: Let dry for at least two hours without pressure. No clamps needed.
- Check pole alignment: Both magnets must attract each other, not repel. Test before gluing.
- Add mechanical guide: A wooden or plastic dowel prevents the container from slipping when opened. Mechanical guidance significantly improves handling and reduces wear.
Pro Tip: Never glue magnets directly onto smooth surfaces. Roughened surfaces increase adhesive strength many times over and prevent the magnet from breaking off after a few months.
3. Wooden Logbook Holder with Magnetic Closure
The wooden logbook holder is an elegant alternative to the classic container. It looks natural, fits perfectly into forest environments, and can be made with simple tools. Drilling blind holes, gluing magnets, and letting them dry overnight is enough for the basic construction.
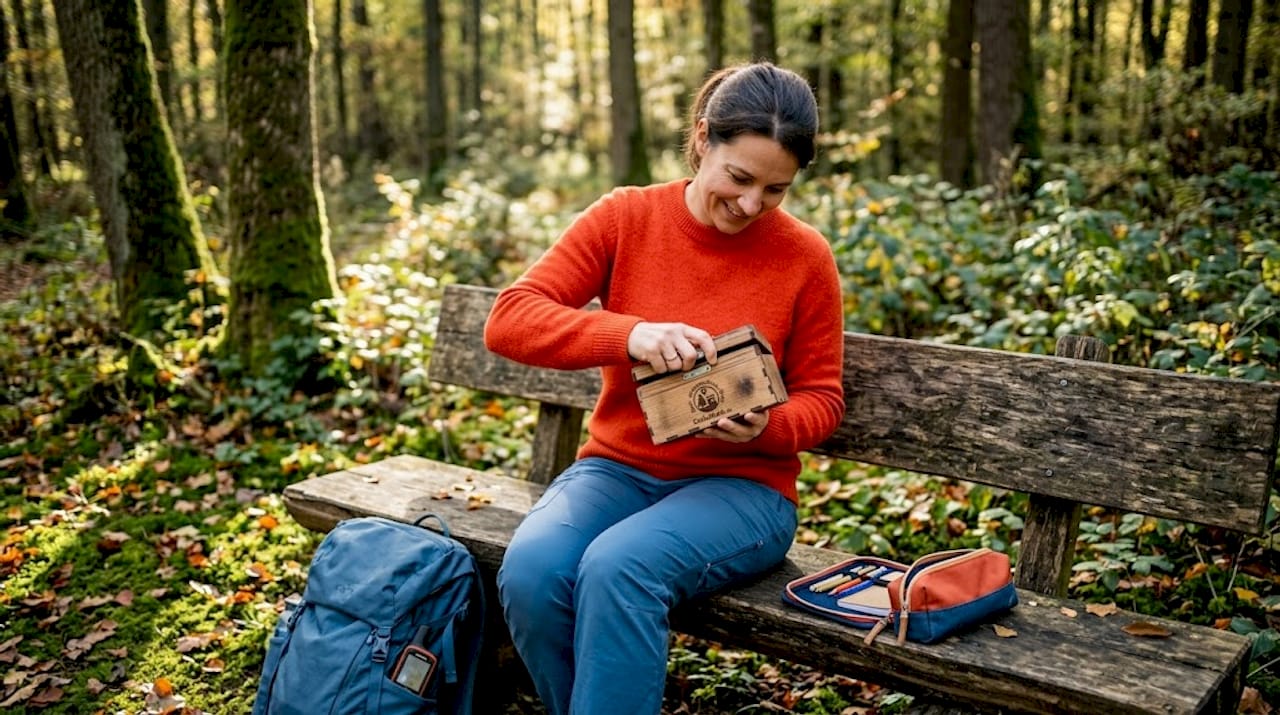
What's special about wooden containers: they are visually convincing right away. No striking plastic surface, no shine. Combined with real bark or moss, such a holder is almost invisible.
An important point that many geocachers forget: explicitly refer to a suitable pen in the listing. Wooden surfaces and special logbook formats do not work with every pen. If you don't communicate this, you will frustrate finders.
Pro Tip: Treat wooden parts with a water-repellent oil or varnish before using them outdoors. Untreated wood swells after two periods of rain, and the magnet will no longer sit properly.
4. Camouflage and Color Design for Durable Cache Containers
Camouflage is not just a coat of paint. It's a technique. Anyone who simply paints a plastic container green and hopes it will become invisible in the bushes will be frustrated after a winter.
Roughening plastic containers before painting is the first step that determines success or failure. Smooth surfaces hardly absorb paint. Light sanding with 120-grit sandpaper doubles adhesion.
| Camouflage Method | Advantage | Disadvantage | Best Environment |
|---|---|---|---|
| Single-color camouflage paint | Fast, inexpensive | Less realistic, ages quickly | Urban areas |
| Multi-color camouflage | Very naturalistic, durable | Time-consuming | Forest, meadow |
| Camouflage net with natural material | Highest camouflage effect | High maintenance effort | Forest, undergrowth |
| Textured paint | Good texture, robust | Must match environment | Rock, bark |
| 3D printing with coloring | Precise shapes possible | More expensive to produce | Urban installations |
Multi-colored camouflage patterns with at least three shades look much more realistic in the field than single-colored versions. Practical experience over three years shows that cheap plastics quickly become brittle due to UV radiation and temperature fluctuations. Invest in UV-resistant paints and robust base materials. This pays off after the first summer.
For urban caches, it's worth looking at urban camouflage methods that are specifically designed for city environments.
Pro Tip: Apply camouflage paints in several thin layers and let each layer dry completely. A thick layer will peel off; three thin layers will last for years.
5. Comparison of Typical DIY Cache Types and Applications
Not every cache type fits every location. As an advanced geocacher, you know the differences, but a structured comparison helps with the decision.
| Cache Type | Effort | Durability | Difficulty Level | Maintenance |
|---|---|---|---|---|
| Standard PETling (magnetic) | Medium | High | Medium to high | Low |
| Wooden logbook holder | Medium | Medium | Medium | Medium |
| Gadget cache with mechanics | High | Medium | High | High |
| Hardware store pipe container | Low | High | Low to medium | Low |
| 3D-printed PETG container | High | Very high | Variable | Low |
From practice: A self-built container from hardware store pipes with a union nut only takes about 15 minutes to build and is waterproof. In terms of cost, it is not always cheaper than purchased solutions, but control over material and size is a real advantage.
Gadget caches with puzzle mechanics or code input provide the most intensive community experience. Quality criteria for puzzle and gadget caches always include a clear, thematic description and functional, maintainable mechanics.
What you should consider for every cache type:
- Puzzle mechanics need clear operating instructions in the listing
- Code caches should have a reset procedure that you can communicate remotely
- Large gadget caches require more frequent maintenance visits
- Simple containers for high-traffic areas keep field stress low
For outdoor use, you'll find more ideas for creative constructions in the Outdoor Cache Hiding Guide.
6. Robust Materials for Improved Cache Equipment
Material is not a secondary matter. A cache that fails after one winter costs you not only reputation but also time for maintenance visits. Material selection determines lifespan, camouflage potential, and usability.
PETG as a 3D printing material is one of the best choices for self-printed cache containers. It is more UV-stable than PLA, easily survives frost and summer heat, and can be precisely shaped. This makes it the first choice for technically demanding gadget caches. Many advanced geocachers looking for robust containers and DIY solutions rely on PETG prints for this very reason.
For the outer shell: no cheap plastic from the discount store. Polypropylene containers with rubber seals keep moisture out permanently. Cheap lock-and-lock imitations lose their watertightness after a few freeze-thaw cycles.
For metal constructions, galvanized or coated materials are recommended. Bare steel rusts within a season and leaves unsightly marks at the hiding spot.
7. Practical Tips for Planning, Construction, and Community Engagement
A cache that is technically perfect but poorly maintained quickly loses quality. Maintenance, honest difficulty ratings, and response to finder comments are not optional extras. They are mandatory.
What really helps in practice:
- Plan maintenance visits: At least twice a year, before winter and after spring.
- Logbook hints in the listing: Explicitly state whether a pencil, a waterproof pen, or a ballpoint pen is needed. Especially with wooden logbooks, this makes all the difference.
- Take feedback seriously: Finder logs are free quality checks. If three people write that the container was damp, something is wrong.
- Consider seasonal aging: Adhesives, paints, and seals age at different rates. Check everything once after the first summer.
- Test the combination of mechanics and camouflage: Before publishing the cache, test several times yourself whether the mechanics and camouflage work together.
Pro Tip: Have a friend search for the cache before you publish it. Fresh eyes will find problems that you no longer see after hours of tinkering.
Always plan coordination with the reviewer for the listing. Clear descriptions and realistic information avoid queries and delays.
My Experiences with Advanced DIY Mechanics
Over the past few years, I've tried many different DIY constructions. And I can tell you: the most elaborate ones weren't always the best.
My first gadget cache with a self-built mechanism caused more maintenance trips than all my standard caches combined. The mechanism was clever but not maintainable. That was an important lesson. Since then, I plan every cache with the question: What happens if something gets stuck in six months?
What I've truly learned: the experience value isn't created by complexity. It's created by coherence. A simple magnetic wooden container that fits perfectly into an old stone wall and tells a short story beats any over-engineered gadget cache that's hard to open. Quality is reflected in whether people still talk about it afterward.
I now work almost exclusively with PETG for 3D-printed parts and neodymium magnets for closures. The combination is reliable, precise, and durable. And I test every cache at least three times myself before it goes online.
My most important tip for anyone who wants to improve their DIY caches: Start small, do it right, and then increase complexity. A cache that has worked perfectly for three years is more valuable than one that needs to be replaced after one season.
— Benedikt
High-Quality Equipment for Your DIY Projects at Cachewerk
If you want to support your DIY projects with the right materials, it's worth taking a look at Cachewerk's assortment. From robust containers to camouflage materials and 3D-printed PETG specialty items, you'll find everything you need for sophisticated cache constructions.
Geocaching equipment and accessories at Cachewerk are specifically designed for the needs of experienced geocachers. Quality materials, well-thought-out designs, and products that withstand real outdoor conditions. If you're also looking for an inconspicuous, thematic hiding spot, the customizable fake water meter cover offers a particularly creative solution for urban installations. Complement your DIY projects with products designed for the same goal as you: caches that excite.
FAQ
What makes an advanced DIY cache?
An advanced cache combines technical mechanics, clever camouflage, and a true experience for the finder. Quality is evident in storytelling, maintainability, and clean execution, not just difficulty.
Which magnets are suitable for magnetic cache containers?
Neodymium magnets with 10 mm diameter and 5 mm thickness, each with approximately 2.4 kg holding force, are the recommended choice. Household magnets are too weak for permanent outdoor use.
How long does DIY camouflage paint last on plastic?
With proper preparation, i.e., a roughened surface and multiple coats, camouflage paint lasts for several years. Cheap plastic without preparation ages much faster due to UV and temperature fluctuations.
Why do I need mechanical guidance for magnetic closures?
Mechanical guidance through dowels or a snug fit prevents the container from slipping or falling when opened. This significantly reduces wear and tear and improves handling for the finder.
Which material is best suited for 3D-printed cache containers?
PETG is the first choice: more UV-stable than PLA, resistant to frost and summer heat, and precisely moldable. It is particularly suitable for technically demanding constructions that are intended to function outdoors for a long time.