2–3 Meters: Night cache reflectors environmentally friendly installed

For most night caches, self-adhesive reflective dots on thumbtacks at a height difficult for muggles to reach are the most reliable choice. This combination lasts a long time, remains inconspicuous during the day, and can be installed with minimal tools. What each color stands for must be indicated in the listing. Below, we show you suitable materials and two CacheWerk hiding places that combine well with reflectors.
In short:
- Reflective dots on thumbtacks at a height of 2 to 3 meters are particularly durable, inconspicuous, and difficult for muggles to see.
- Mount reflectors on smooth surfaces slightly offset to increase camouflage and extend their lifespan.
- Color markings such as white, red, yellow, or green must be precisely specified in the listing to avoid confusing seekers.
- High-quality materials like Oralite or 3M reflect more strongly and fade slower, which is useful for caches that will be active for a longer time.
- Check reflectors twice a year and after storms to replace defective or faded dots promptly.
Table of Contents
- Choosing Night Cache Reflectors: Which Type Suits Your Cache?
- How to Mount Reflectors in a Tree-Friendly and Durable Way?
- Which Colors and Distances Safely Guide Seekers to the Goal?
- Which Material Withstands Wind and Weather the Longest?
- How Often Should You Check Night Cache Reflectors?
- What to Consider Regarding Nature Conservation and Safety?
- How Do Professional Geocachers Use Reflectors in Practice?
- Why Most Guides on Reflector Choice Fall Short
- Suitable Hiding Places for Your Night Cache
- Sources
Choosing Night Cache Reflectors: Which Type Suits Your Cache?
Not every reflector is suitable for every night cache. Before choosing night cache reflectors, it's worth taking a look at the four common types and their respective weaknesses.
- Pre-made reflective dots (Ø 10 or 20 mm): Inconspicuous by day, quickly mounted. Reflective dots with 10 millimeter diameter fit perfectly on thumbtacks, many shops offer 10/20 mm sets in a double pack.
- Reflective film for cutting: Flexible in shape and size, practical if you want to mark individual symbols or arrows.
- Large prismatic reflectors: Extremely bright in lamplight, but clearly visible during the day and less camouflaged. They are more suitable for open areas than for densely populated areas.
- UV markings: Only visible with a UV lamp, good as an additional hint or fake distraction. Commercial 390-nanometer LEDs are perfectly sufficient for common UV colors; expensive 365-nm models are not needed for this.
For a relaxing night cache walk, small reflective dots in the forest are perfectly adequate. For a multi-cache with long distances between stations, larger prisms or a mix of dots and additional UV markings are worthwhile, so seekers don't lose their orientation. Weather also plays a role: film tolerates continuous rain less well than firmly pressed reflective dots.
How to Mount Reflectors in a Tree-Friendly and Durable Way?
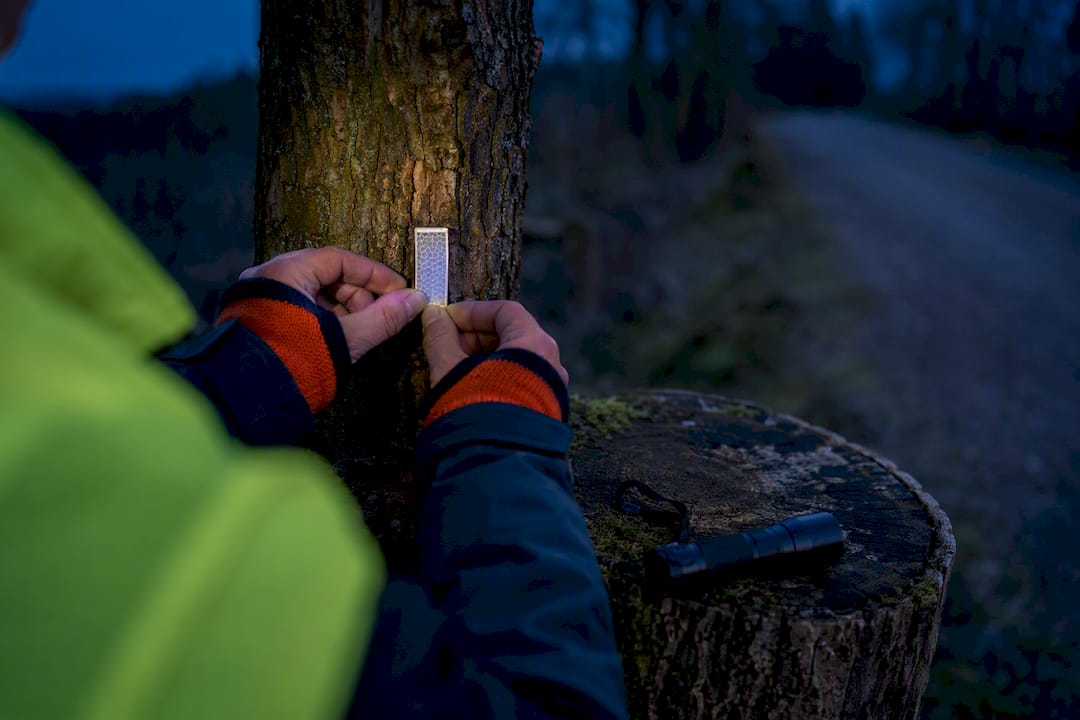
The mounting height determines both durability and visibility. A range of 2 to 3 meters has proven effective: reflectors at the recommended mounting height are harder for muggles to reach and thus remain undamaged significantly longer.
You need little for mounting: an extendable pole with a magnetic head or a small ladder, thumbtacks, a cleaning cloth, fine sandpaper, and some cleaning spirit.
- Prepare the surface: Clean bark or post of dust and loose particles, lightly sand smooth surfaces.
- Provisionally fix the reflector with a thumbtack and test with a flashlight in the dark whether it is visible from the expected approach direction.
- Only after a successful night test, push in the thumbtack definitively, if necessary with a second one for additional hold.
Thumbtacks in bark are considered a proven solution; when used correctly, they usually cause no permanent damage, unlike nails or screws, which penetrate deeper into the wood and can promote rot. Adhesive solutions hold well in the short term but often come loose after frost or heavy rain.
Pro tip: Mount the reflector slightly offset to the side, on the back of the trunk facing away from the path. Seekers then have to briefly walk around the tree, which makes the night cache more interactive without requiring additional material.
Which Colors and Distances Safely Guide Seekers to the Goal?
A well-thought-out color scheme makes the difference between a fair and a frustrating night cache. Common ones include:
- White: Marks the regular path between stations.
- Red: Denotes intermediate stations or hint points.
- Yellow or Green: Often signifies the final or an important decision.
- Double reflectors: Signal a fork or change of direction.
As a rule of thumb: from the current reflector, the next one should be visible with a headlamp or flashlight, without vegetation growth blocking the view in the following year. Therefore, it's better to plan with a bit of buffer instead of timing the reflectors exactly to the current visibility. At forks, different shapes or double reflectors help ensure no one walks into a dead end.
Important: Such color codes must be included in the listing, otherwise seekers will wonder on site what distinguishes red from white. Additionally, a note on suitable equipment helps, as is common in many night cache listings.
Which Material Withstands Wind and Weather the Longest?
Brand materials such as Oralite or 3M films reflect more strongly and fade significantly slower than simple hardware store film. For caches that are intended to last for years, the higher price usually pays off.
- Clean, degrease, and, for metal, lightly sand the adhesive surface before application. This preparation significantly improves durability.
- UV pens fade faster than applied UV paint. A thin layer of clear coat over them significantly extends visibility.
- In damp, shady forests, green growth accumulates faster than in open, sunny locations. Choose a more robust material accordingly.
Good to know: Thumbtacks in combination with high-quality reflective film are considered one of the most durable combinations by experienced owners, precisely because both components tolerate moisture well and can be replaced individually if necessary.
How Often Should You Check Night Cache Reflectors?
Reflectors age inconspicuously. A defective dot often only becomes apparent when a seeker complains in the log that they lost the trail.
- Check twice a year, ideally in spring after winter and in autumn before the dark season.
- Additionally check after major storms, as falling branches often rip off reflectors.
- Immediately replace damaged or faded dots, not just during the next planned round.
The maintenance kit should include spare reflectors, a few thumbtacks, some contact adhesive for emergencies, and thin gloves if you are working on thorny or splintery wood.
What to Consider Regarding Nature Conservation and Safety?
Reflectors should never be screwed or nailed into trees, as this permanently damages the bark and is in any case impermissible in protected areas. Thumbtacks are a much gentler alternative because they barely penetrate the bark.
If the cache is in a sensitive area, such as near a biotope or nature reserve, it is advisable to check with the local green spaces office beforehand. This will save you trouble if someone reports the marking. Also, think of yourself: if you are attaching or maintaining reflectors at dusk or during hunting season on forest paths or roadsides, a high-visibility vest is not a bad idea.
How Do Professional Geocachers Use Reflectors in Practice?
At CacheWerk, Benedikt regularly deals with hiding solutions for urban and rural night caches, including in blog articles on illuminated cache hiding places and on marking caches. Three scenarios consistently come up:
- Urban night cache in a residential area: A fake water sign on a post looks like street furniture during the day; at night, a small reflector at its base marks the spot for those in the know.
- Forest path with camouflage need at the final: A rusty-looking bolt with a nano container is barely noticeable even with a flashlight; a discreet reflector dot next to it is enough for confirmation.
- Combined multi-cache: Reflector dots along the route, a camouflaged hiding place at the destination. This keeps the trail clear without the final being prematurely revealed.
Further ideas for creative integration are provided in the article on DIY hiding tips.
Why Most Guides on Reflector Choice Fall Short
Many lists online treat reflectors as a purely material problem: which brand, which diameter, which color. This falls short. The real challenge is the combination of mounting height, nature conservation, and maintenance plan, not the choice of film itself.

The common assumption that more reflectors are automatically better is not true. Too many dots over a short distance dilute the trail and confuse rather than help. A conscious reduction to clearly distinguishable color codes and sufficient distance is more sensible.
What I always ask owners: Have you ever walked your cache yourself at night, as a stranger would, without prior knowledge? This test decides whether the reflectors really work or just look good on paper. Those who skip this step rely on assumptions instead of real visibility in the dark.
— Benedikt
Suitable Hiding Places for Your Night Cache
Reflectors are only half the battle; the right hiding place makes a night cache complete. For urban environments, the customizable fake water sign is particularly suitable: it appears as ordinary street furniture on a post during the day and can be individually labeled, remaining inconspicuous even at night with a small reflector at its base.
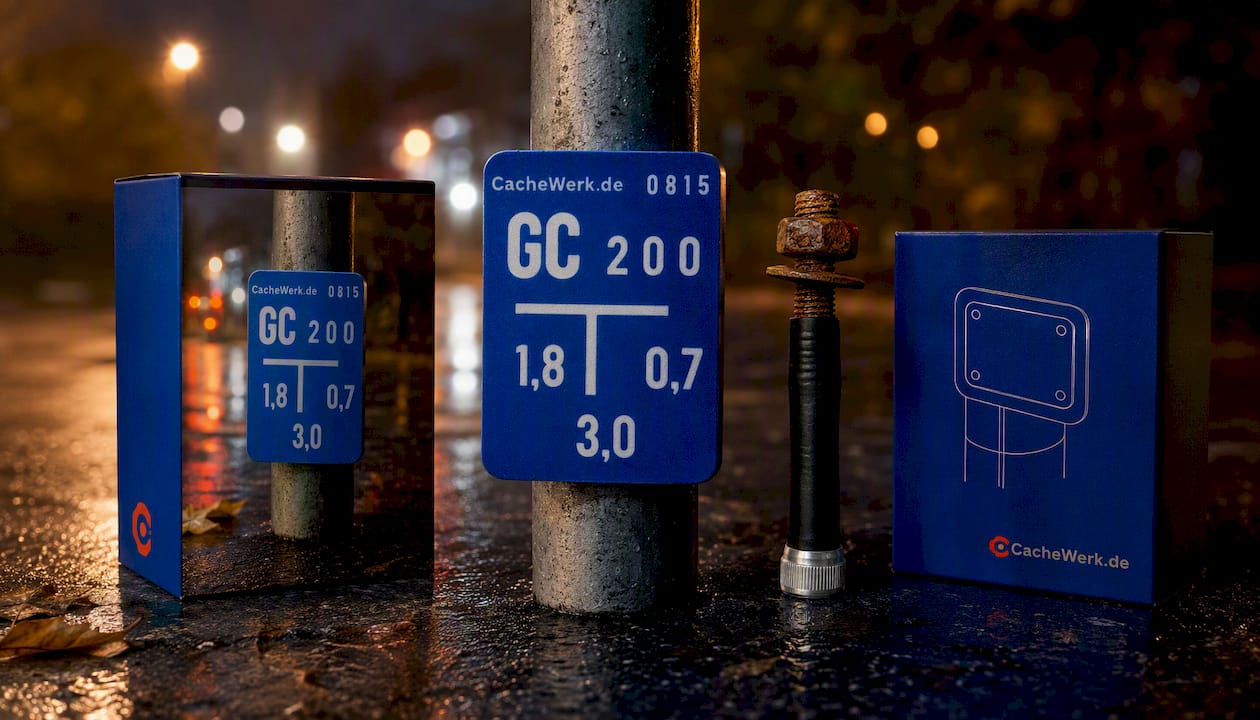
If you're looking for a final that isn't noticeable even upon close inspection, the Rusty Bolt Nano container provides a solid solution. The rusty-looking bolt is robustly built and also works in combination with a discreet reflector dot next to it without revealing the camouflage. For owners planning multiple stations with a similar look, it's also worth checking out the fake traffic sign variant, which combines well with the same post holders. Visit the shop and find the combination that suits your next night cache.
Sources
Opencaching's Night Cache Wiki explains color coding and listing attributes in detail. The CacheWiki on Nightcaching provides background on attachment types and UV technology. Practical mounting tips first-hand are offered by the Paravan Podcast, and equipment lists are summarized by Cachoholic.
- Night Cache – Opencaching‑Wiki
- Nightcaching – CacheWiki
- Tips for Setting Up a Night Cache – Paravan Podcast
- Night Cache – Cachoholic