Weatherproof PETG Geocaches: Wet sanding up to 600 grit and epoxy

Anyone who wants to post-process PETG cannot avoid a certain process: wet sanding with increasing grit, spot repair of imperfections, a filling primer, and finally lacquer or epoxy resin for gloss. Acetone vapor, which works for ABS, does not reliably smooth PETG and should therefore not be used. And when sanding, the rule is: work slowly and with water, otherwise the material will quickly smudge.
In short:
- Wet sanding with water is essential to smooth PETG evenly and without deformation, as dry sanding leads to smudging.
- For post-processing, support residues should be carefully removed, the surface degreased, and the workpiece firmly fixed to achieve optimal results.
- For fill areas and small cracks, 2K filler or superglue with filler powder are suitable, always applied in multiple layers.
- A durable, weather-resistant surface can be achieved through priming, multiple sanding passes, and a final epoxy resin coating, which also protects against moisture.
- For maximum stability of outdoor-suitable PETG parts, complete post-processing is recommended, while functional parts can usually forgo a quick fine sanding.
Table of Contents
- What tools, abrasives, and chemicals you need
- Preparation: Removing supports, deburring, degreasing, and fixing
- Sanding and Polishing: Wet sanding, grit progression, and polishing
- Filling and Repairing: Filling, superglue tricks, repairing holes
- Priming, Lacquering, and Epoxy Finish for Weather Resistance and Gloss
- Troubleshooting: Stringing, smudging, warping, clear PETG
- CacheWerk Practice: Post-processing for weatherproof geocache hides
- When is an intensive finish worth it for PETG: effort vs. benefit
- Finished PETG hides without your own post-processing
- Sources
What tools, abrasives, and chemicals you need
Before you start, it's worth taking a look at the equipment. PETG doesn't forgive much haste, but with the right tools, the work progresses quickly.
- Wet sandpaper in several fine grits
- Side cutters, scalpel, and a small deburring tool for support residues
- Heat gun, but only for short, targeted applications
- 2K filler for deeper holes, superglue with fine filler powder for small cracks
- Epoxy resin and primer, as well as a suitable clear coat for the finish
- Respirator mask, safety glasses, and nitrile gloves
- A small vice or clamping device for fixation
The Prusa Knowledge Base confirms that PETG can fundamentally be sanded both dry and wet. However, for a uniform result without smudging, wet sanding is almost indispensable.
Preparation: Removing supports, deburring, degreasing, and fixing
Clean preparation determines how much rework will be needed later. If you're sloppy here, you'll sand twice as much.
- Carefully snip off supports with side cutters, remove remnants with a scalpel.
- Break edges and transitions with a fine file or deburring tool to prevent sharp burrs.
- Wipe the part with isopropanol to remove print dust and oils from your hands.
- Before sanding, firmly clamp the workpiece so it doesn't slip.
- Briefly check print quality: visible layer lines, over-extrusion at corners, or elephant's foot at the bottom determine how much sanding work is actually required.
Prints with finer layer heights generally require less sanding time than those with coarser layers, but they take longer on the printer. This trade-off is worth considering before the first print.
Sanding and Polishing: Wet sanding, grit progression, and polishing
Wet sanding is not a nice extra tip for PETG, but a prerequisite for a usable result. Dry sanding causes the material to "gum up," where warm plastic clumps on the paper instead of being abraded. The water cools the surface and immediately washes away the debris; wet sanding significantly reduces this heat development.
The process follows a fixed grit sequence from coarse to fine, using increasingly finer paper for smoothing and refining the surface until the final polish before priming or polishing.

When using each grit, work in circular motions with light pressure, regularly changing direction. Take small breaks every 20 to 30 seconds to prevent friction heat from building up. For larger surfaces, a belt sander or a rotary tool at low speed can save time, but aggressive speeds almost always lead to the same smudging problems as dry sanding. For the final shine, polishing paste on a felt wheel or simply a soft cloth with some polish, applied by hand, is suitable.
Pro Tip: Always test a new grit on an inconspicuous area first. This way, you'll immediately see if the paper is too coarse before ruining the visible surface.
Filling and Repairing: Filling, superglue tricks, repairing holes
Small imperfections are almost always part of 3D prints. The choice of method depends on the size of the defect.
- For deeper holes and voids, 2K filler is suitable, applied thinly and built up in several layers instead of one thick layer.
- Between each layer, lightly sand with 320-grit paper so that the next layer adheres better.
- For fine cracks, superglue combined with some filler powder or baking soda helps, which hardens immediately and can then be sanded well.
- After hardening, always go through the complete grit sequence from coarse to fine, otherwise a visible edge will remain.
- Before application, test on a hidden area to ensure the filler is compatible with PETG.
- Do not apply too much material. Overfilling means more sanding work and a higher risk of shrinkage cracks during curing.
Priming, Lacquering, and Epoxy Finish for Weather Resistance and Gloss
After the final fine sanding, the durability and gloss of the result are determined. The recommended workflow of sanding, filling, priming, and a final lacquer or epoxy coating has proven effective in practice.
- Degrease the surface with isopropanol so that the primer adheres correctly.
- Spray primer thinly and evenly, let dry.
- Sand between coats with 400 to 600 grit paper to even out irregularities in the primer.
- Apply lacquer in several thin coats, letting each coat dry briefly instead of immediately spraying on the next.
- For high gloss, mix epoxy resin according to manufacturer's instructions and apply in a thin layer, ensuring adequate ventilation.
Epoxy offers an advantage that pure lacquer does not: it further seals the surface against moisture. This is particularly relevant for parts exposed to the outdoors, as PETG softens at moderate temperatures according to material comparisons and reacts more sensitively to localized heat than many hobbyists assume. One drawback remains: epoxy noticeably increases the weight of the part and absolutely requires a well-ventilated working environment.
Troubleshooting: Stringing, smudging, warping, clear PETG
Stringing can usually be avoided by adjusting retract settings and slightly lower print temperatures; acute threads are removed by localized heating with immediate repolishing. If the surface smudges during sanding, only a cooling break and less pressure will help. We advise against solvents like dichloromethane or acetone vapor for PETG: acetone vapor does not reliably smooth PETG, and the result remains uncontrollable. For clear parts, every sanding pass counts, so process as little surface as possible and increase polishing gradually.

CacheWerk Practice: Post-processing for weatherproof geocache hides
At CacheWerk, we regularly work with PETG because it simply lasts longer outdoors than many alternatives. I'm Benedikt, and I've been involved in geocaching and printing my own hides for years. For a weatherproof PETG geocache container, wet sanding up to 600 grit plus a thin epoxy layer is often enough to keep the part weather-resistant for years.
When is an intensive finish worth it for PETG: effort vs. benefit
For purely functional components, a quick fine sand is usually sufficient; more effort is rarely worthwhile. For display pieces and outdoor parts, however, the full procedure with filling, priming, and epoxy pays off, especially when exposed to weather and UV light for years. Plan realistically: an hour of pure sanding per medium-sized part is not uncommon, but those who print more often quickly develop a repeatable process.
— Benedikt
Finished PETG hides without your own post-processing
Not everyone wants to sand, fill, and paint every part themselves. This is exactly where Cachewerk's product range comes in: ready-to-use, weatherproof PETG hides that have already gone through the complete process from sandpaper to epoxy.
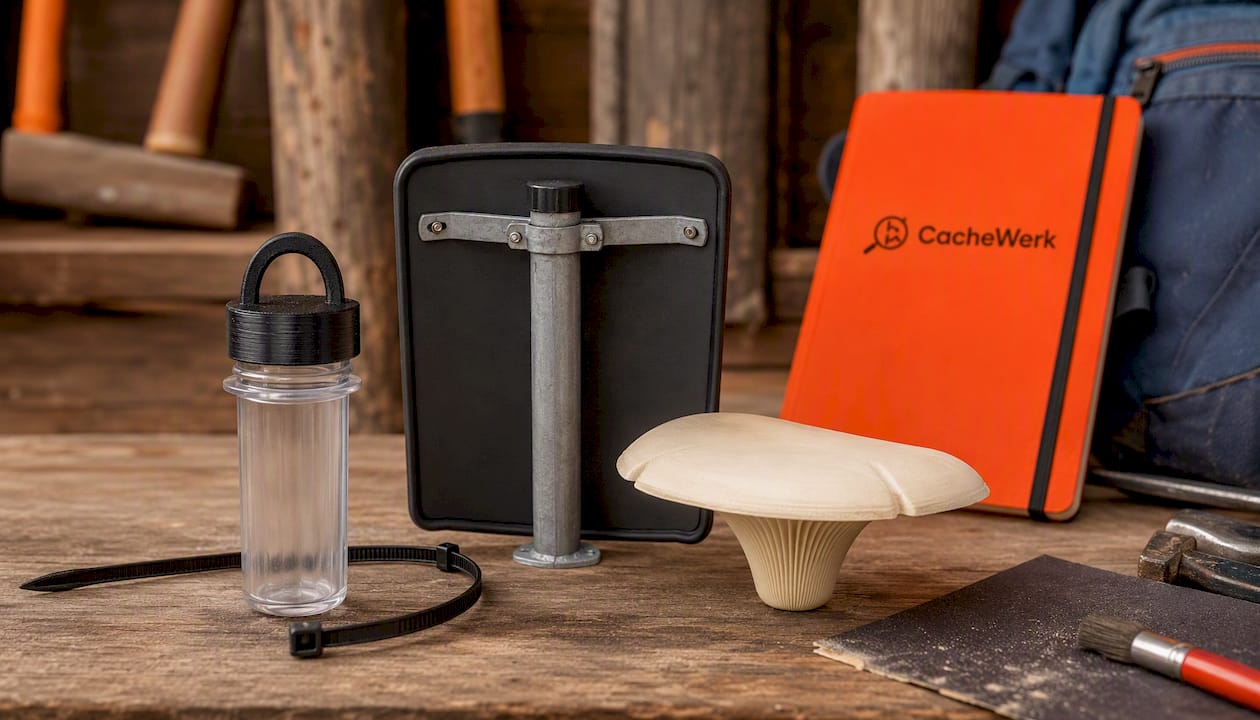
The Geocaching Screw Cap with Eyelet is suitable for a hangable, robust hide and comes in a pack of two. If you are looking for an inconspicuous hide in an urban environment, the Geocaching Post Cap offers a disguised, weather-resistant solution for posts with a 60 mm diameter. For the forest, the Tree Mushroom Geocache Hide is an option, a realistic-looking camouflage hide for nature. If you prefer to print yourself, the Guide to PETG Geocache Hides contains all the necessary print settings. Browse the shop and find the perfect hide for your next adventure.
Sources
The Prusa Knowledge Base provides manufacturer specifications for PETG sanding methods. Partner-3D explains material properties and grit recommendations in detail. The Post-Processing Guide from Makers101 describes the complete workflow from sanding to epoxy. Xometry compares PETG with ABS regarding heat resistance, and the Wikipedia page on polyethylene terephthalate provides the technical background on the base material.
- PETG — Prusa Knowledge Base
- PETG 3D Printing and Properties — Partner‑3D
- Guide To FDM 3D Print Post Processing — Makers101