Quickly Tack-Free: Camouflage Spray for Geocaches with Tips from CacheWerk

Yes, camouflage spray is excellent for geocaches when the container and the surface match. Metal, plastic, and wood take the paint well if you clean and lightly sand them beforehand. If you maintain a safe distance and ensure good ventilation while spraying, the cache will usually be touch-dry within 20 minutes and fully cured after about 16 hours. Details on materials, techniques, and maintenance can be found in the following sections.
In a nutshell:
- A green, inconspicuous camouflage typically lasts 2 to 3 months in the open before showing visible wear.
- For smooth plastic containers, using an adhesion promoter instead of just sandpaper is often crucial for paint durability.
- Thin, multi-layered spray applications with at least 45 minutes of curing time per layer significantly improve camouflage effectiveness.
- Surface preparation by cleaning, degreasing, and sanding is more important for success than choosing the perfect shade.
- For urban caches, special containers like the Rusty Bolt Cache with a realistic rust effect are suitable, while starter bundles make it easier to get started.
Table of Contents
- Which materials and paint types are suitable for camouflage spray?
- How do you prepare containers and equipment?
- How do you apply camouflage spray correctly, step by step?
- How long does the camouflage last and when do you need to touch it up?
- What are the most common mistakes when camouflaging?
- What does a camouflaged urban cache look like in practice?
- What many geocachers underestimate about camouflage
- Which CacheWerk products suit your camouflage project?
- Sources
Which materials and paint types are suitable for camouflage spray?
Not every container absorbs paint equally well. Camouflage sprays are versatile spray paints that generally adhere to metal, plastic, wood, and rubber and visually adapt objects to their surroundings. Nevertheless, there are significant differences in preparation.
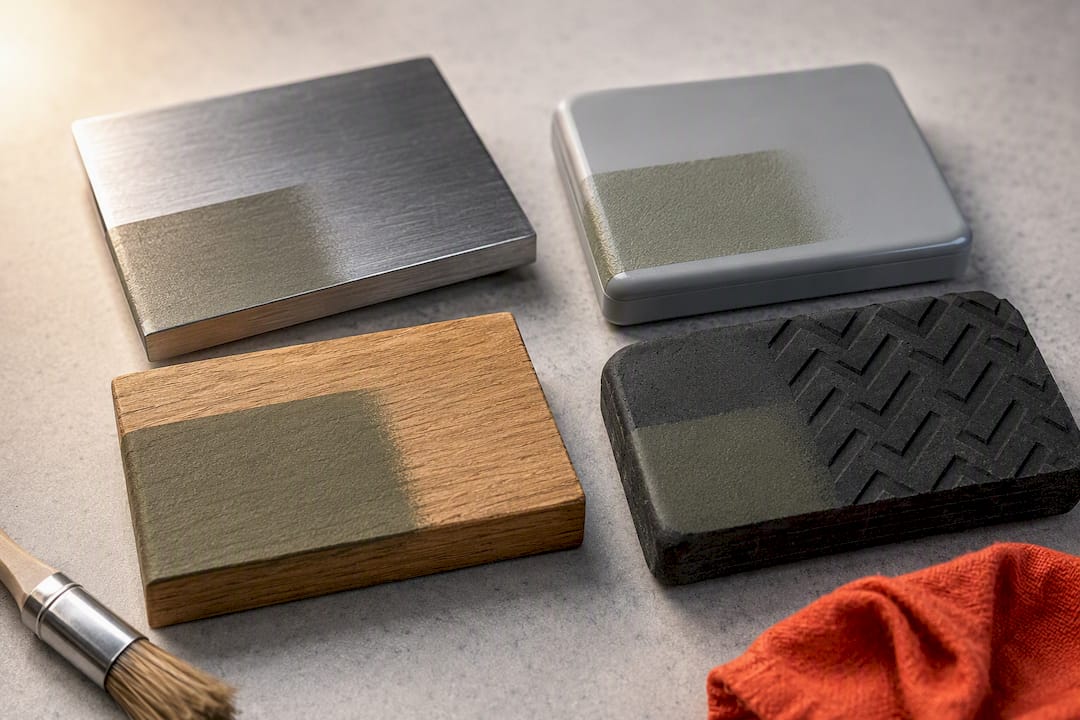
For smooth plastic containers like PETlings, simply sanding is often not enough. A light adhesion promoter or primer yields better results than rough sandpaper alone, especially with the round shapes often found in starter bundles with PETling, logbook, and holder.
For the paint types themselves, it's worth looking at the base:
- Alkyd-based sprays adhere very well to metal and wood, are touch-dry in 10 to 20 minutes, and tolerate larger temperature fluctuations in outdoor use.
- Acrylic-based sprays usually dry faster but are more susceptible to scratches and are more suitable for indoor or protected caches.
- Special sprays suitable for plastic contain adhesion promoters specifically developed for PET, PETG, or ABS.
For beginners, the second starter bundle with suspension is suitable if you want to attach your cache to branches or fences. For urban micro-caches where rust and metal patina are the actual camouflage, the Rusty Bolt Cache with a nano container is particularly suitable because its basic shape already provides a realistic base.
How do you prepare containers and equipment?
Paint only adheres as well as the surface it meets. Otherwise, grease, dust, and release agents from manufacturing will cause the layer to flake off after a few weeks.
Here's how to proceed:
- Clean the container thoroughly with water and a little dish soap, rinse off residues.
- Degrease smooth plastic or metal surfaces additionally with isopropanol.
- Lightly sand glossy surfaces with fine sandpaper so that the paint can adhere.
- If necessary, apply a thin primer to plastic before using the actual camouflage spray.
- Test the paint first on an inconspicuous spot, such as the bottom.
For your own safety, you need more than just a good mood: a respirator, gloves, and safety glasses are essential, as is a well-ventilated workspace, because manufacturer safety instructions explicitly recommend not inhaling solvent vapors.
Pro tip: Never spray directly on other people's property or protected monuments. Instead, use freestanding fake caches that you paint separately and then place them at the location.
How do you apply camouflage spray correctly, step by step?
The actual application determines whether your cache ultimately looks like a real environmental object or a colorful splash of paint in the bushes. Patience is particularly important: multiple thin layers beat any thick single layer.
Preparation and test application
Shake the can for at least one minute before you start. First, apply a short test spray to a piece of cardboard or an inconspicuous spot on your container and check the color tone and opacity in daylight.
The actual spraying technique
- Hold the can about 20 to 30 centimeters away from the object.
- Spray in short, staccato bursts instead of a continuous stream.
- Move the can evenly so that the paths overlap slightly.
- Wait sufficient time between layers before applying the next.
- Apply two to three thin layers instead of one thick one.
For drying times, it's worth checking the manufacturer's instructions. Alkyd-based sprays are touch-dry after 10 to 20 minutes, can be overcoated after about 45 minutes, and are fully cured after about 16 hours. These 16 hours are considered a conservative but reliable guideline if you want to hide the cache the next day.
Simple tricks help create realistic camouflage patterns:
- Dab additional paint tones with a sponge to imitate lichens or rust spots.
- Place real leaves or tape as a stencil before spraying the second coat of paint.
- Scribe fine lines into the fresh paint layer with a blunt tool (sgraffito technique) to recreate wood grain or cracks.
Always choose the color tone to match the specific on-site environment, not according to a catalog image. A matte sealant at the end also prevents sunlight from reflecting off the cache and revealing it.
How long does the camouflage last and when do you need to touch it up?
No paint lasts forever outdoors. UV radiation, abrasion from wind and sand, and handling by finders wear down the layer over time, especially in exposed areas like tree trunks or fence posts.
- Document the condition of your cache with photos during each of your own visits.
- Note any irregularities in the logbook or your own cache records.
- Check every few months whether edges or corners have already lost paint.
Pro tip: For small chips, you don't have to repaint the entire container. Lightly sand the affected area, apply paint pointwise, and then seal it with a matte finish so that the transition is not noticeable.
Further tips on weatherproof cache placement will help you extend the overall lifespan of the camouflage.
What are the most common mistakes when camouflaging?
Most problems arise not from the wrong paint, but from the wrong technique.
- Too thick layers lead to cracks and peeling: sand down and then repaint in several thin coats.
- Wrong color tone makes the cache more visible instead of invisible: always compare the tone directly on site, never just on screen.
- Stuck seals impair watertightness: treat lids and sealing rings separately or cover them when spraying.
- Urban caches forgive fewer mistakes than natural caches because passers-by see them up close. Those who work too roughly here risk muggle finds or theft more quickly. More on this in the guide to protection against vandalism.
What does a camouflaged urban cache look like in practice?
For a typical urban cache, an object that already appears inconspicuous is suitable, such as a fake fire hydrant sign or a rusty bolt with a nano container. Both forms imitate everyday objects that no one looks at twice.
Before spraying, the container was degreased, lightly sanded, and primed with a thin base coat before several thin layers of camouflage spray in rust and gray tones were applied. There were approximately 45 minutes between each layer, and full curing occurred overnight.
- Original object: metallic nano container with screw thread
- Paint application: two base coats plus a selective rust tint
- Sealing: matte clear coat against light reflection
After several months of outdoor use, slight wear was visible on the edges, but the rest of the surface remained inconspicuous and colorfast. Repainting was only necessary after the first season.
Such practical tutorials on cache camouflage show that the effort is worthwhile if you consider materials and environment together from the start.
What many geocachers underestimate about camouflage
The common misconception that a single thick coat of paint is sufficient is the most frequent error in camouflaging. In fact, it's not the amount of paint that determines the camouflage effect, but the texture. A cache with two thin, unevenly dabbed coats will ultimately look more credible than one with a perfectly opaque single coat, because real surfaces in nature are never uniform.
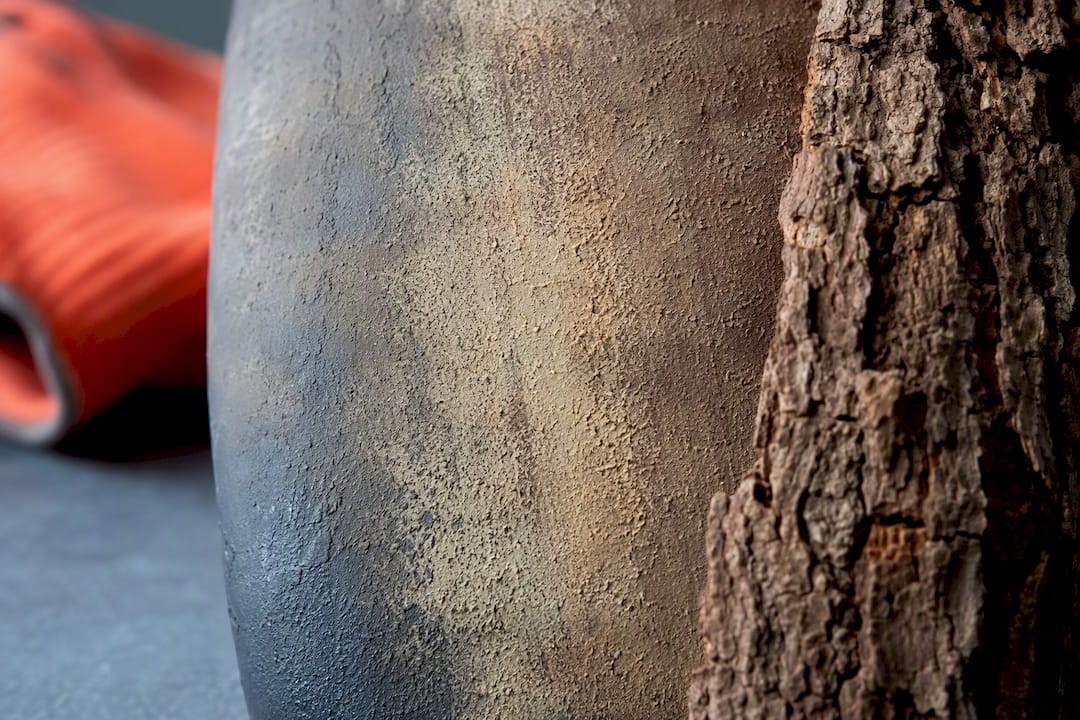
The second point that many instructions overlook: Material selection often determines success or failure even before the first spray. If you spray a smooth PETling without pre-treatment, you won't get a durable layer even with the best camouflage spray. However, if you rely on a rough, suitable surface from the start, you save yourself later touch-ups.
Therefore, the priority should not be color selection, but surface preparation. This is less exciting than choosing the perfect camouflage tone, but it actually determines durability in the field.
— Benedikt
Which CacheWerk products suit your camouflage project?
You don't have to start from scratch. CacheWerk has already prepared the basics for camouflage projects, while other providers usually only sell individual containers without suitable accessories.
For beginners, the starter bundles with PETling, logbook, and holder or with suspension are suitable; both are designed as raw forms that you can spray directly. If you are planning an urban micro-cache, opt for the Rusty Bolt Cache with a nano container, which already credibly anticipates rust and patina through its basic shape. For more stable caches in nature, the Ammo Box Cache in the Trick Edition is suitable, offering robust metal surfaces for your camouflage technique.
Additional seals, spare parts, and an overview of all geocaching equipment and accessories can be found directly in the shop. For questions about shipping or product selection, the CacheWerk customer service is available to assist you. Check out the relevant category and choose your starting product for the next cache.