
Invisible Cache: How to Permanently Protect Your Hideout
An invisible geocache reliably lasts when you consistently combine five things: an inconspicuous location, a waterproof container, camouflage adapted to the location, stable attachment, and a realistic maintenance schedule. If one of these is missing, the entire system collapses, no matter how clever the camouflage is otherwise. This exact combination determines how long a hide remains undetected and intact, instead of being soaked, displaced, or removed by muggles after a few months.
Before you place it, quickly check these five points:
- Location: Not a high-traffic area, no nature reserve, good accessibility for maintenance.
- Container: Waterproof, UV and frost resistant, size appropriate for camouflage.
- Sealing: Logbook in a zip-lock bag, silica gel inside, lid truly sealed.
- Replaceability: Even inexperienced finders must be able to return the cache exactly as it was.
- First maintenance check: Schedule an appointment in two to four weeks to check the first logs.
The following sections will detail each of these points, from site selection to specific construction instructions for a weatherproof hide.
Key Takeaways
An invisible cache survives long-term only if location, container, camouflage, attachment, and maintenance are treated as a coherent system, not as individual measures.
| Topic | Details |
|---|---|
| Check location first | Assess muggle frequency, nature conservation, and accessibility before planning camouflage. |
| Double moisture barrier | Logbook in a freezer bag plus silica gel protects even with minor seal flaws. |
| Choose materials suitable for the environment | PETG for urban camouflage, metal for forests and mechanical stress. |
| Maintenance every four to eight weeks | Adjust interval to visitor frequency, react immediately if DNF increases. |
| Ready-made solutions save crafting time | Cachewerk offers weatherproof, location-adapted hides like the ammo box model ready for deployment. |
Table of Contents
- How to protect an invisible cache in practice?
- What should you check five minutes before placing?
- How do you choose a location that considers muggles and nature?
- Containers & Materials: Which container for which location?
- Camouflage & Attachment: Invisible, stable, and reproducible
- How do you protect the logbook from moisture?
- How often do you need to maintain an invisible cache?
- What are the legal and ecological limits?
- How do you build a weatherproof, inconspicuous hide?
- What do you learn after years of placing caches?
- Which CacheWerk products directly solve these problems?
- Where can you find further instructions and assistance?
- Sources
How to protect an invisible cache in practice?
The crux of the matter: A cache is never "simply hidden" but always a chain of decisions that influence each other. A perfectly camouflaged container made of thin plastic is useless if it's full of water after the first rain. And the most stable ammo box is useless if it's located somewhere every passerby finds first.
This is precisely where the practical guide to protecting caches, which owners in the community consistently underestimate, comes into play. It's not about a single trick, but about an interplay of location, material, and maintenance. Those who consider these three levels separately almost automatically introduce weaknesses.
What should you check five minutes before placing?
Before the container goes into the ground, a tree, or a wall, a quick but honest check is worthwhile. Five minutes of effort often saves you several maintenance trips later.
- Assess muggle risk: Stand at the exact spot for one minute and observe how many passersby come into view. Too many glances mean: move location.
- Container watertightness test: Submerge the container under running water or in a bowl for two minutes. Are drops visible inside? Replace the container before it fails in the field.
- On-site camouflage test: Take a photo from three to four meters away. If the cache looks out of place, the camouflage needs improvement.
- Test reproducibility: Have a second person correctly close the hide without prior knowledge. If it doesn't work immediately, the construction is too complicated.
- Prepare reviewer note: Write a short note for publication, e.g., about private property or nearby nature reserves.
If any of these points turn out poorly, immediate improvement is worthwhile. A change of location by ten meters or a different container costs five minutes; a maintenance trip later costs half an afternoon. Each of these checks directly impacts the cache's lifespan, more on that in the maintenance section below.
How do you choose a location that considers muggles and nature?
A good location is inconspicuous, accessible, and doesn't disturb anything worth protecting. A bad location often fulfills only one of these three criteria and fails at the other two.
Pay attention to these characteristics when choosing:
- Muggle frequency: Hiking trails with dog owners or school routes are risky, even off-route.
- Access for maintenance: A place you can only reach with climbing equipment will rarely be checked.
- Visual cover: Shrubs, wall crevices, or root areas offer natural concealment without artificial embellishment.
- Nature conservation sensitivity: Breeding grounds, wetlands, and designated protected zones are strictly off-limits.
- Authority risk: Railway embankments, substations, or barracks areas almost always lead to problems with operators.
A short "Do not place" list helps with quick exclusion: bridges with traffic, bird breeding sites in spring, private front gardens without agreement, military restricted zones. Publishing rules from CacheWiki's hide checklist also require not using conspicuous terrain features like freestanding solitary trees, as they magically attract attention.
Pro-tip: Visit the planned location once in summer and once in winter before committing. A hide that seems perfectly concealed in a leafy forest can suddenly stand exposed in a bare winter forest and be visible from fifty meters away.
Containers & Materials: Which container for which location?
The choice of container determines more about its lifespan than any camouflage. Metal, PETG, and polypropylene behave very differently in moisture, frost, and UV light, and you should know these differences before you buy.
| Material | Waterproof | UV-resistant | Frost resistance | Theft risk |
|---|---|---|---|---|
| Metal (ammo box, sealed container) | Very good with intact seal | Very good | Very good | Medium, appears valuable |
| PETG (3D printed) | Good with clean bonding | Good | Good | Low, appears inconspicuous |
| Polypropylene (standard storage container) | Medium, lid wears out | Medium, becomes brittle | Medium | Low |
For urban locations, PETG is often best because it can be cast into shapes and colors that resemble everyday objects. In the forest, metal scores with its robustness against rodents and mechanical stress. In wetlands, double protection is needed, more on this in the next section. Winter locations, according to the official guide to winter-proofing, require additional protection through double containers or elevated positioning, as snow and ice promote water entry.
A simple on-site test works like this: hold the container briefly under water, close the lid, wait two minutes, open it, check inside for moisture, visually inspect the seal, and replace it if in doubt. Over time, plastic becomes brittle due to UV radiation, and frost cracks micro-fissures in poorly bonded seams. The most common user error remains improper re-sealing, often because the last finder did not fully click the lid into place.
Camouflage & Attachment: Invisible, stable, and reproducible
Good camouflage adapts its shape and color to the surroundings without adding a single foreign object that doesn't belong there. A gray plastic stone in a gravel pit is less conspicuous than an elaborately painted birdhouse in the middle of nowhere. The rule almost always applies: the simpler the camouflage blends into the environment, the longer it remains unnoticed.
Several methods are available for attachment:
- Magnetic attachment: Quickly mounted, no drilling required, but weaker for outdoor metal structures with vibration.
- Screw mounts: Very stable, ideal for posts or wooden beams, but requires permission for third-party property.
- Cable ties with weather protection: Inexpensive and flexible, should be regularly checked for material fatigue.
- Hollow space hides: Utilizes existing structures like wall gaps or tree hollows, but requires precise reproducibility when closing.
To ensure finders can replace the hide non-destructively, clear, inconspicuous markings inside the container help, such as a small arrow indicating the correct orientation:
- Photograph the position before opening; the owner keeps the image as a reference.
- Choose a closing mechanism that works without tools.
- Briefly explain in the listing how the closure works, without revealing the camouflage.
An overly complicated system almost always leads to damage because inexperienced finders, under time pressure, act roughly. Building simpler means staying undetected longer.
How do you protect the logbook from moisture?
Water intrusion is one of the most common reasons for maintenance calls, and usually the problem doesn't start with the container itself, but with the seal. According to the Cache Maintenance overview from Opencaching, water intrusion almost automatically leads to logbook damage and mold if containers are not truly watertight.
Three immediate measures significantly reduce the risk:
- Place silica gel packets inside the container; they bind residual moisture even when the lid is briefly open.
- Store the logbook in reclosable freezer bags, not in thin cling film bags.
- Double container technique: A smaller, watertight container inside a larger hide protects the logbook even if the outer shell takes on water.
A simple five-step on-site test is as follows: close the lid, hold the container in light rain or under a stream of water for ten minutes, open it, check the logbook for moisture, visually inspect the seal, and replace it if in doubt. Over time, plastic embrittles due to UV radiation, and frost creates micro-cracks in poorly sealed seams. The most common user error remains improper re-sealing, often because the last finder did not fully click the lid into place.
How often do you need to maintain an invisible cache?
Maintenance intervals depend on the location type and visitor frequency. A cache near a parking lot with a high find rate requires more frequent checks than a remote forest cache with few logs per year.
As general guidelines:
Maintenance intervals should be based on location type and visitor frequency. Caches near cities and high-traffic areas need to be checked more often than remote and less visited caches, which usually can be checked less frequently.
Immediate maintenance is mandatory as soon as several "Needs Maintenance" logs or a rising DNF (Did Not Find) rate occur. The CacheWiki cache maintenance page makes it clear: Neglected maintenance can lead to forced archiving, and external maintenance by other finders never replaces the owner's own control.
During an on-site inspection, a fixed checklist is useful: check for watertightness, inspect camouflage for intactness, verify logbook condition, test anchoring for wobbling. In case of vandalism or theft, a clear procedure applies: temporarily deactivate the cache online, prepare and place a replacement container, then provide brief information to the community or reviewer if the location changes.
What are the legal and ecological limits?
Safety always takes precedence over camouflage optimization; this is not just a phrase, but the fundamental rule for every responsible owner. A hide that tempts seekers into risky climbing or disturbs animals in their habitat should not be placed, no matter how clever the camouflage might be.
These locations are fundamentally on the "Do not place" list:
- Military installations and restricted areas of any kind.
- Bridges with traffic or restricted access.
- Private front gardens and properties without explicit permission.
- Designated nature reserves and known breeding grounds.
Before publishing, it's worth checking local regulations and, if necessary, making a brief inquiry with authorities or landowners. Reviewers, according to the official blog about hiding your first geocache, carefully check such permission questions before a listing is released. If a conflict arises with a forester, hunting tenant, or resident, an open conversation usually helps more than justification; if necessary, it's better to move the hide twenty meters away than to risk a prolonged dispute.
How do you build a weatherproof, inconspicuous hide?
A concrete example makes the theory tangible. For an urban camouflage hide on a post or wall, you will need the following materials:
- Waterproof PETG housing or metal box with rubber seal.
- Waterproof logbook plus soft pencil.
- Silica gel packets, two to three pieces depending on container size.
- Reclosable freezer bag for the logbook as a second barrier.
- Magnetic mount or screw attachment, suitable for the surface.
- Cable ties with UV protection as an addition for provisional fixation.
Proceed as follows:
- Select the location according to the criteria from the location section and perform the watertightness test.
- Equip the container with the logbook, silica gel, and freezer bag, then close the lid completely.
- Adapt the camouflage, matching the color and texture to the immediate surroundings.
- Mount the attachment and test its stability with a gentle pull.
- Perform a reproducibility test with a second person before the listing goes online.
- Record coordinates exactly in WGS84 format using a GPS device or Geocaching app, as recommended by the practical guide from Geocaching-Info.
Time and cost depend heavily on the effort involved. A simple hide with a ready-made container, logbook, and silica gel can be assembled in one to two hours, whereas more material-intensive camouflage solutions with custom cutting or gluing might take half a day. If you don't want to craft the basic assembly yourself, you'll find ready-made solutions in the Promo section below. More construction ideas and material lists are provided in the step-by-step DIY guide on the CacheWerk blog.
What do you learn after years of placing caches?
The biggest misconception among new owners: they think complicated camouflage protects better than simple camouflage. The opposite is usually true. A simple, robust hide that finders can replace without frustration lasts longer than a work of art in hide engineering that breaks after the second find.
A practical example: a hide perfectly camouflaged in a bush in summer can suddenly become exposed in winter once the leaves fall. What seemed invisible in July lies openly exposed in January. The solution was simple: choose a location slightly deeper within the vegetation and keep the camouflage color more neutral so it works across all seasons, instead of just one.
Regular maintenance beats even the most sophisticated individual measure. A cache that is checked every six to eight weeks survives vandalism and weather effects much better than one that is left undisturbed after placement. This very principle is incorporated into the practical guides on the CacheWerk blog, which document material tests and assembly procedures directly from our own cache placement experiences.
Which CacheWerk products directly solve these problems?
Not every owner wants to assemble silica gel packets individually or cut a seal themselves. Precisely for this case, Cachewerk offers ready-made hides that already incorporate the protective measures described in the guide, instead of requiring tedious retrofitting.
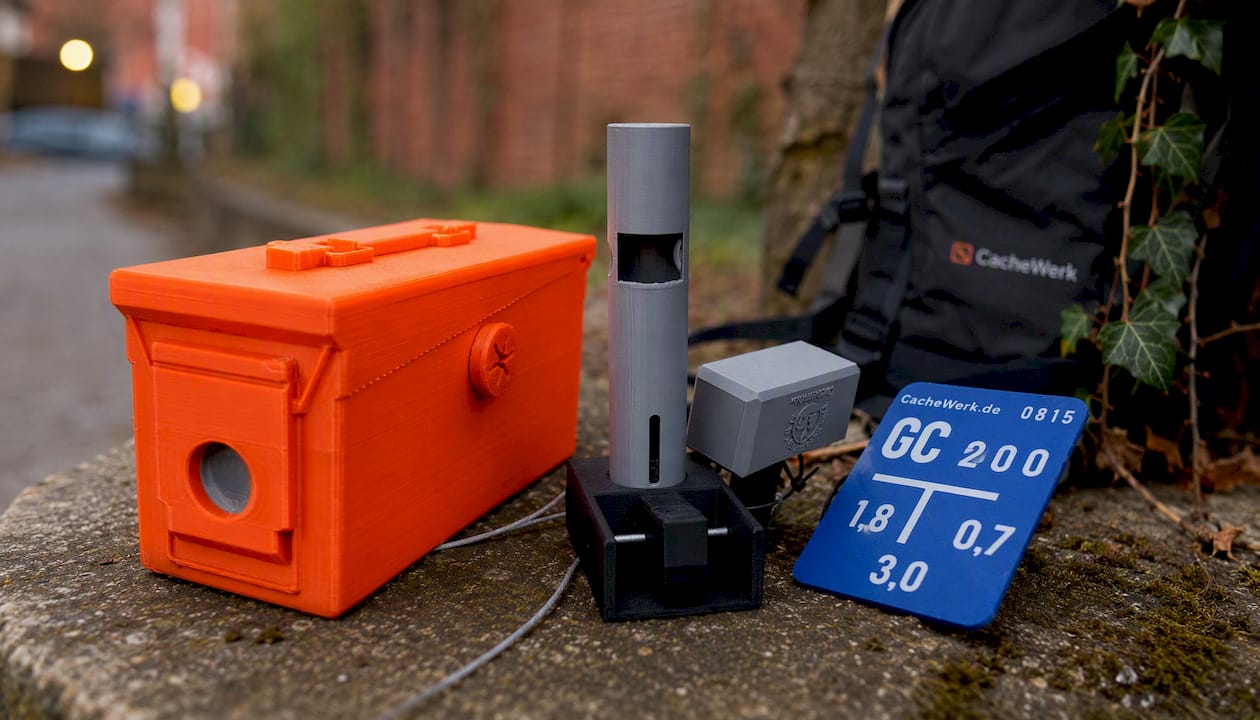
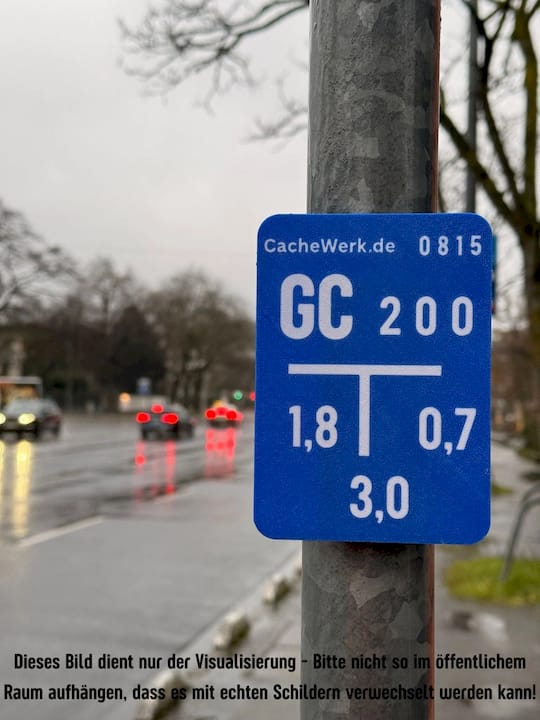
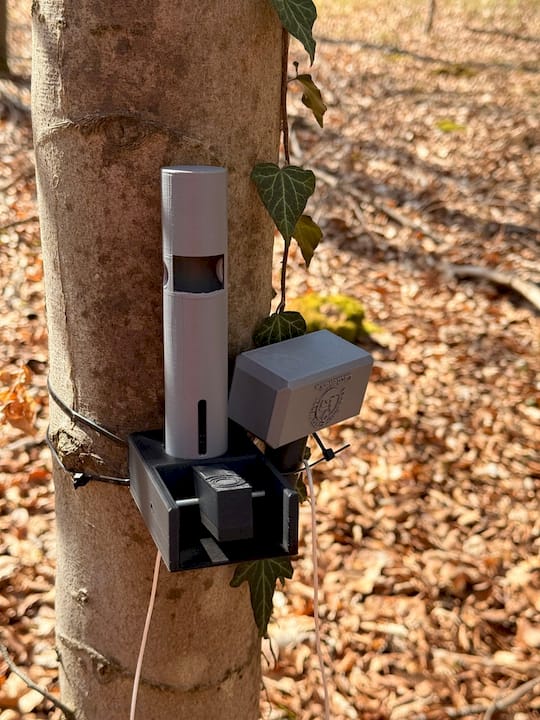
The Geocaching Ammo‑Box Hide – Trick Edition provides a robust, waterproof base for locations with high weather exposure, without any need for your own sealing work. The Mini High Striker Trick Hide with a hidden logbook in the hammer handle is suitable for urban locations where an everyday object appears more inconspicuous than any classic container. And the “Fake Water Sign” Camouflage Hide with a post holder is specifically built for the urban situations described in the camouflage section above, invisible on the post, but repeatable to open and close at any time.
All three products rely on weather-resistant materials such as PETG and metallic components, which precisely circumvent the frost and UV problems described in the container section. If you prefer to build it yourself, you'll find additional camouflage ideas in the article on urban hiding. Check out the shop, compare the three hides directly, and choose the model that fits your planned location.
Where can you find further instructions and assistance?
For watertightness tests and material questions, the cache maintenance overview from Opencaching provides practical fundamentals. Location and publishing rules are described in detail in the Hide Checklist from CacheWiki, while the practical guide from Geocaching‑Info describes the complete path from site selection to listing.
For maintenance questions and owner responsibilities, the Cache Maintenance page of CacheWiki is helpful, especially regarding winter risks, the Winter Resilience guide from the official blog. Those planning their first hide will find additional safety tips in the article Safe Caching Tips as well as information on terrain and accessibility questions in the guide Geocaching Limits for Caches.
Sources
- Cache Maintenance – Opencaching‑Wiki
- Hide Checklist – CacheWiki
- Hiding – Geocaching‑Info
- If You're Cold, It's Cold Too: A Guide to the Winter Resilience of Your Geocache – Official Blog